First start
Before using the product for the first time and before using it in everyday life, read the following instructions. This chapter provides information on the correct installation, connection and use of the product.
|
Hint: Items not included in the delivery are sold separately. |
|
HINT |
|
|
|
Damage of the display Do not place heavy objects on the computer, this could damage the display. |

|
Hint: Before connecting the product to a power outlet, make sure that the power cord is not pinched or damaged. Also make sure that the power output is within the voltage range of the product. |
First-Time operation
To put the Scoria A10X into operation, proceed as follows:
- Install the SIM card
- Install the memory card
- Charge the device
- Start the device
Install the SIM card
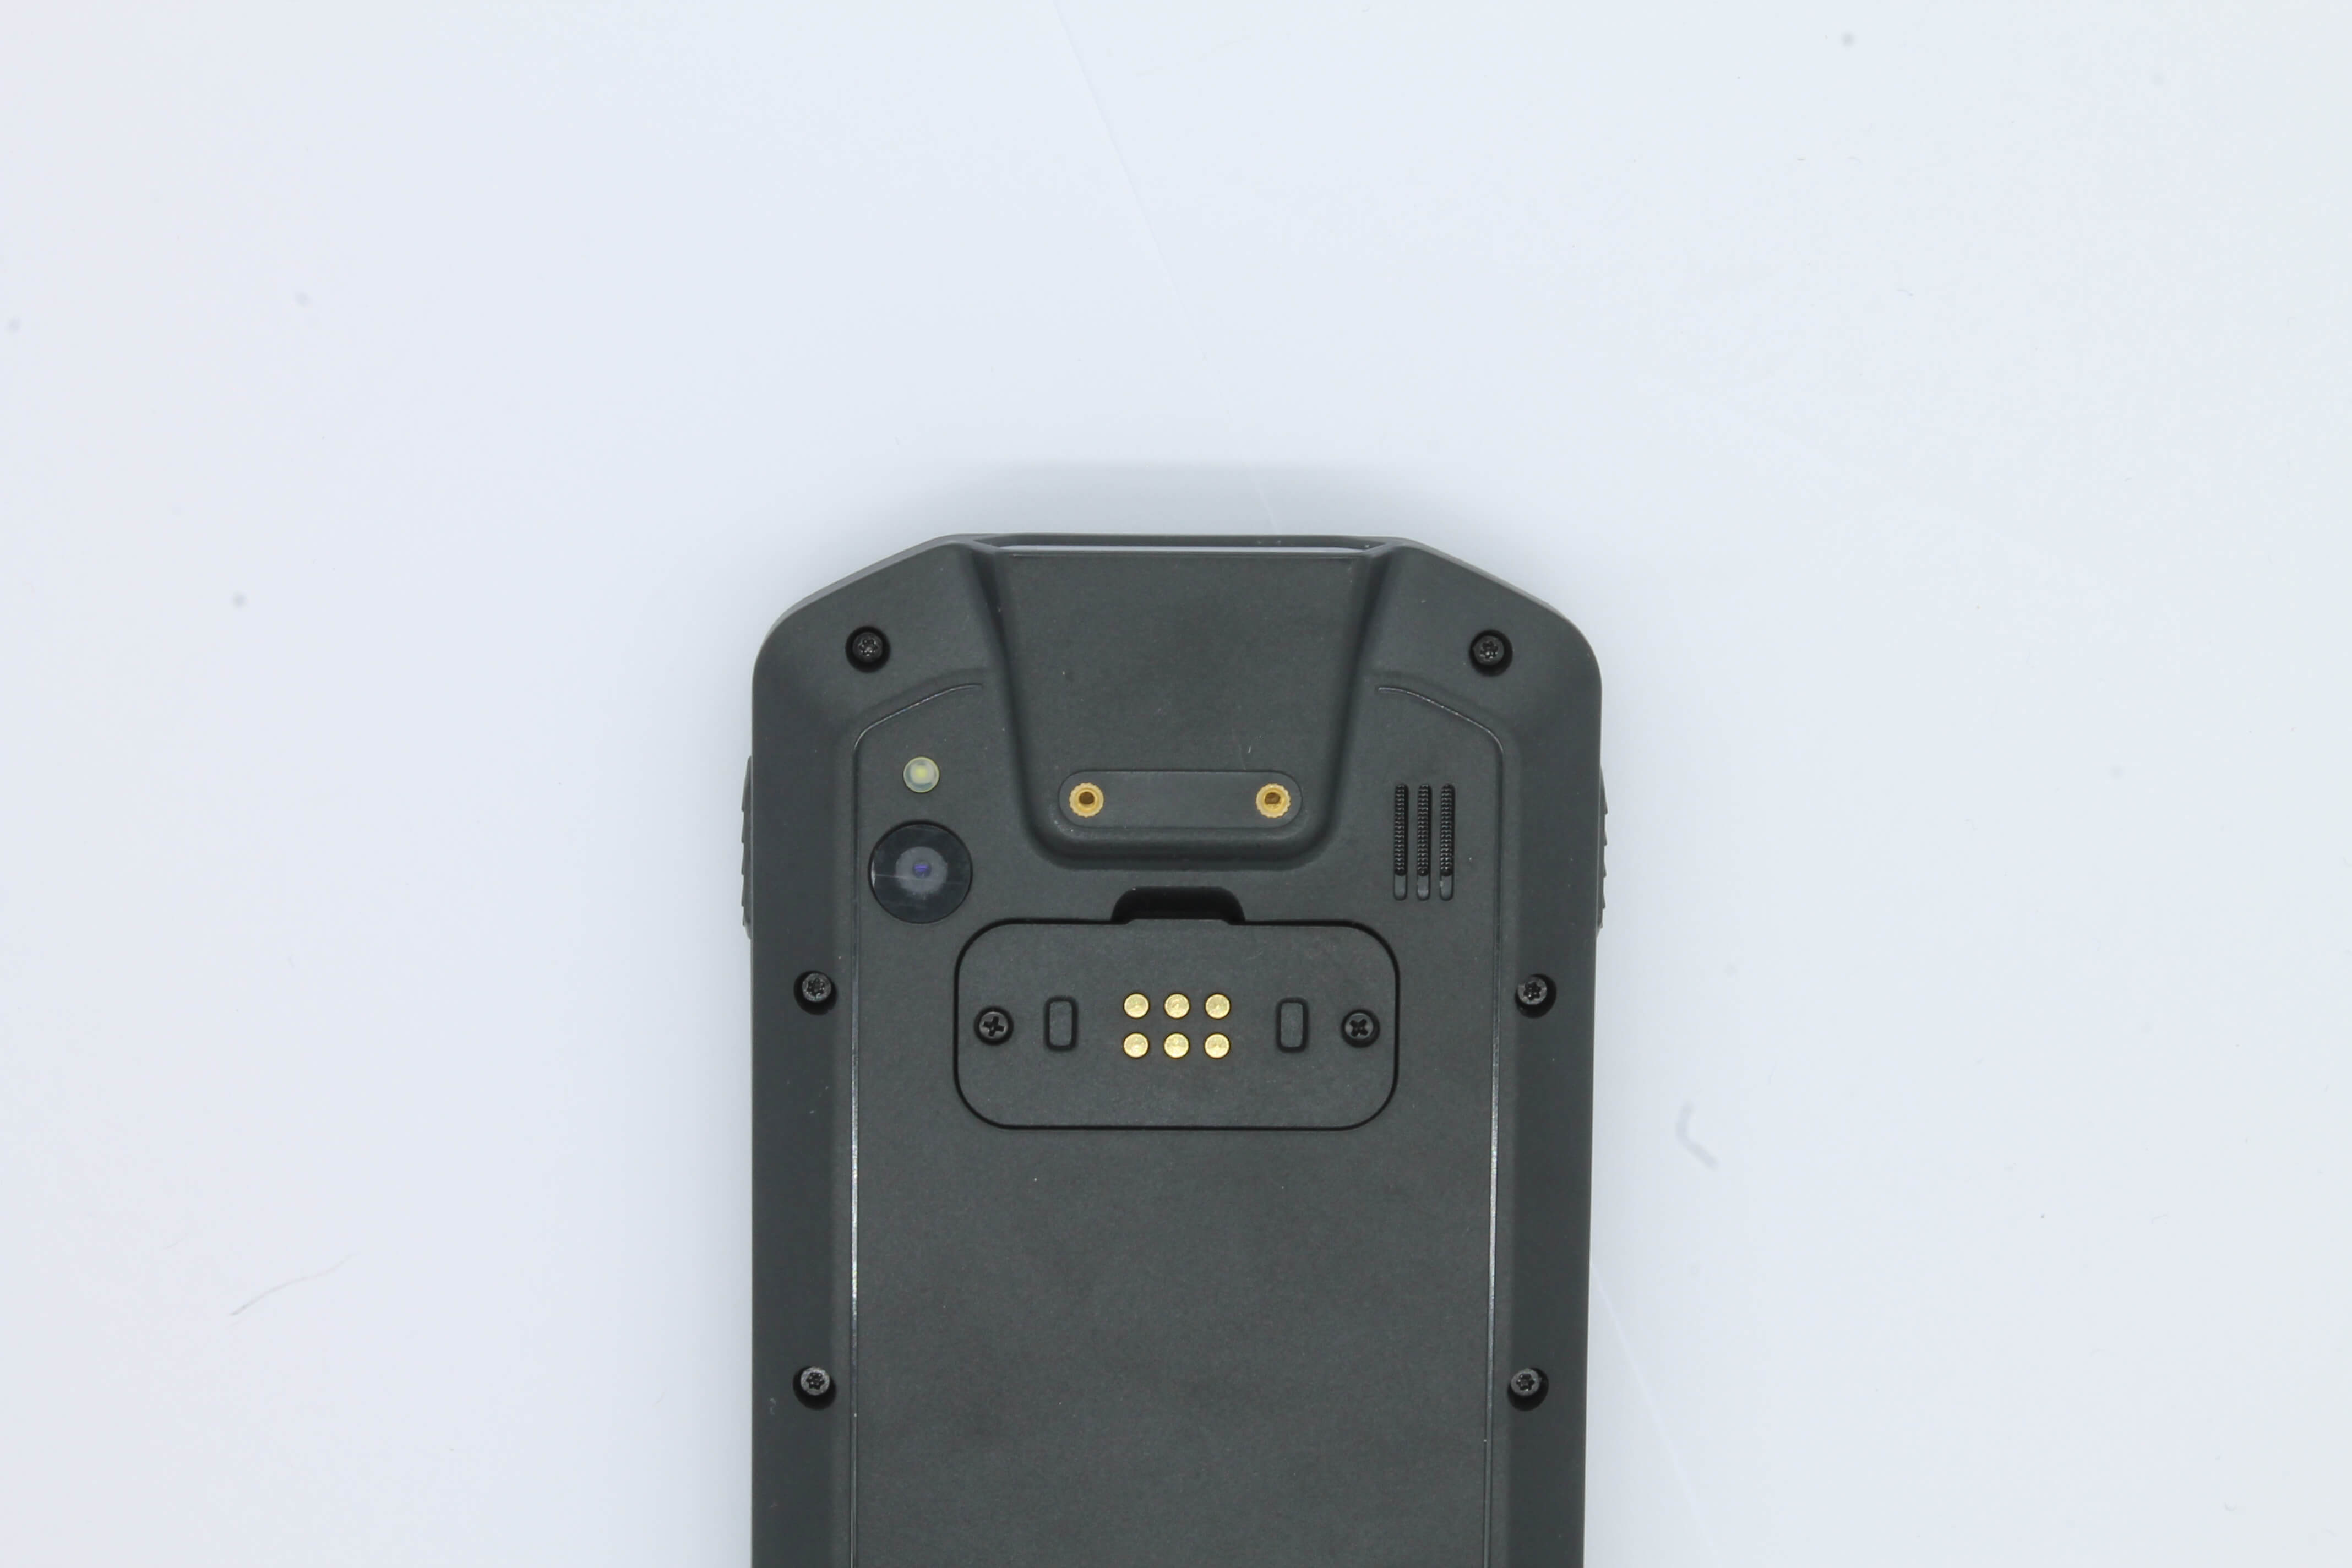
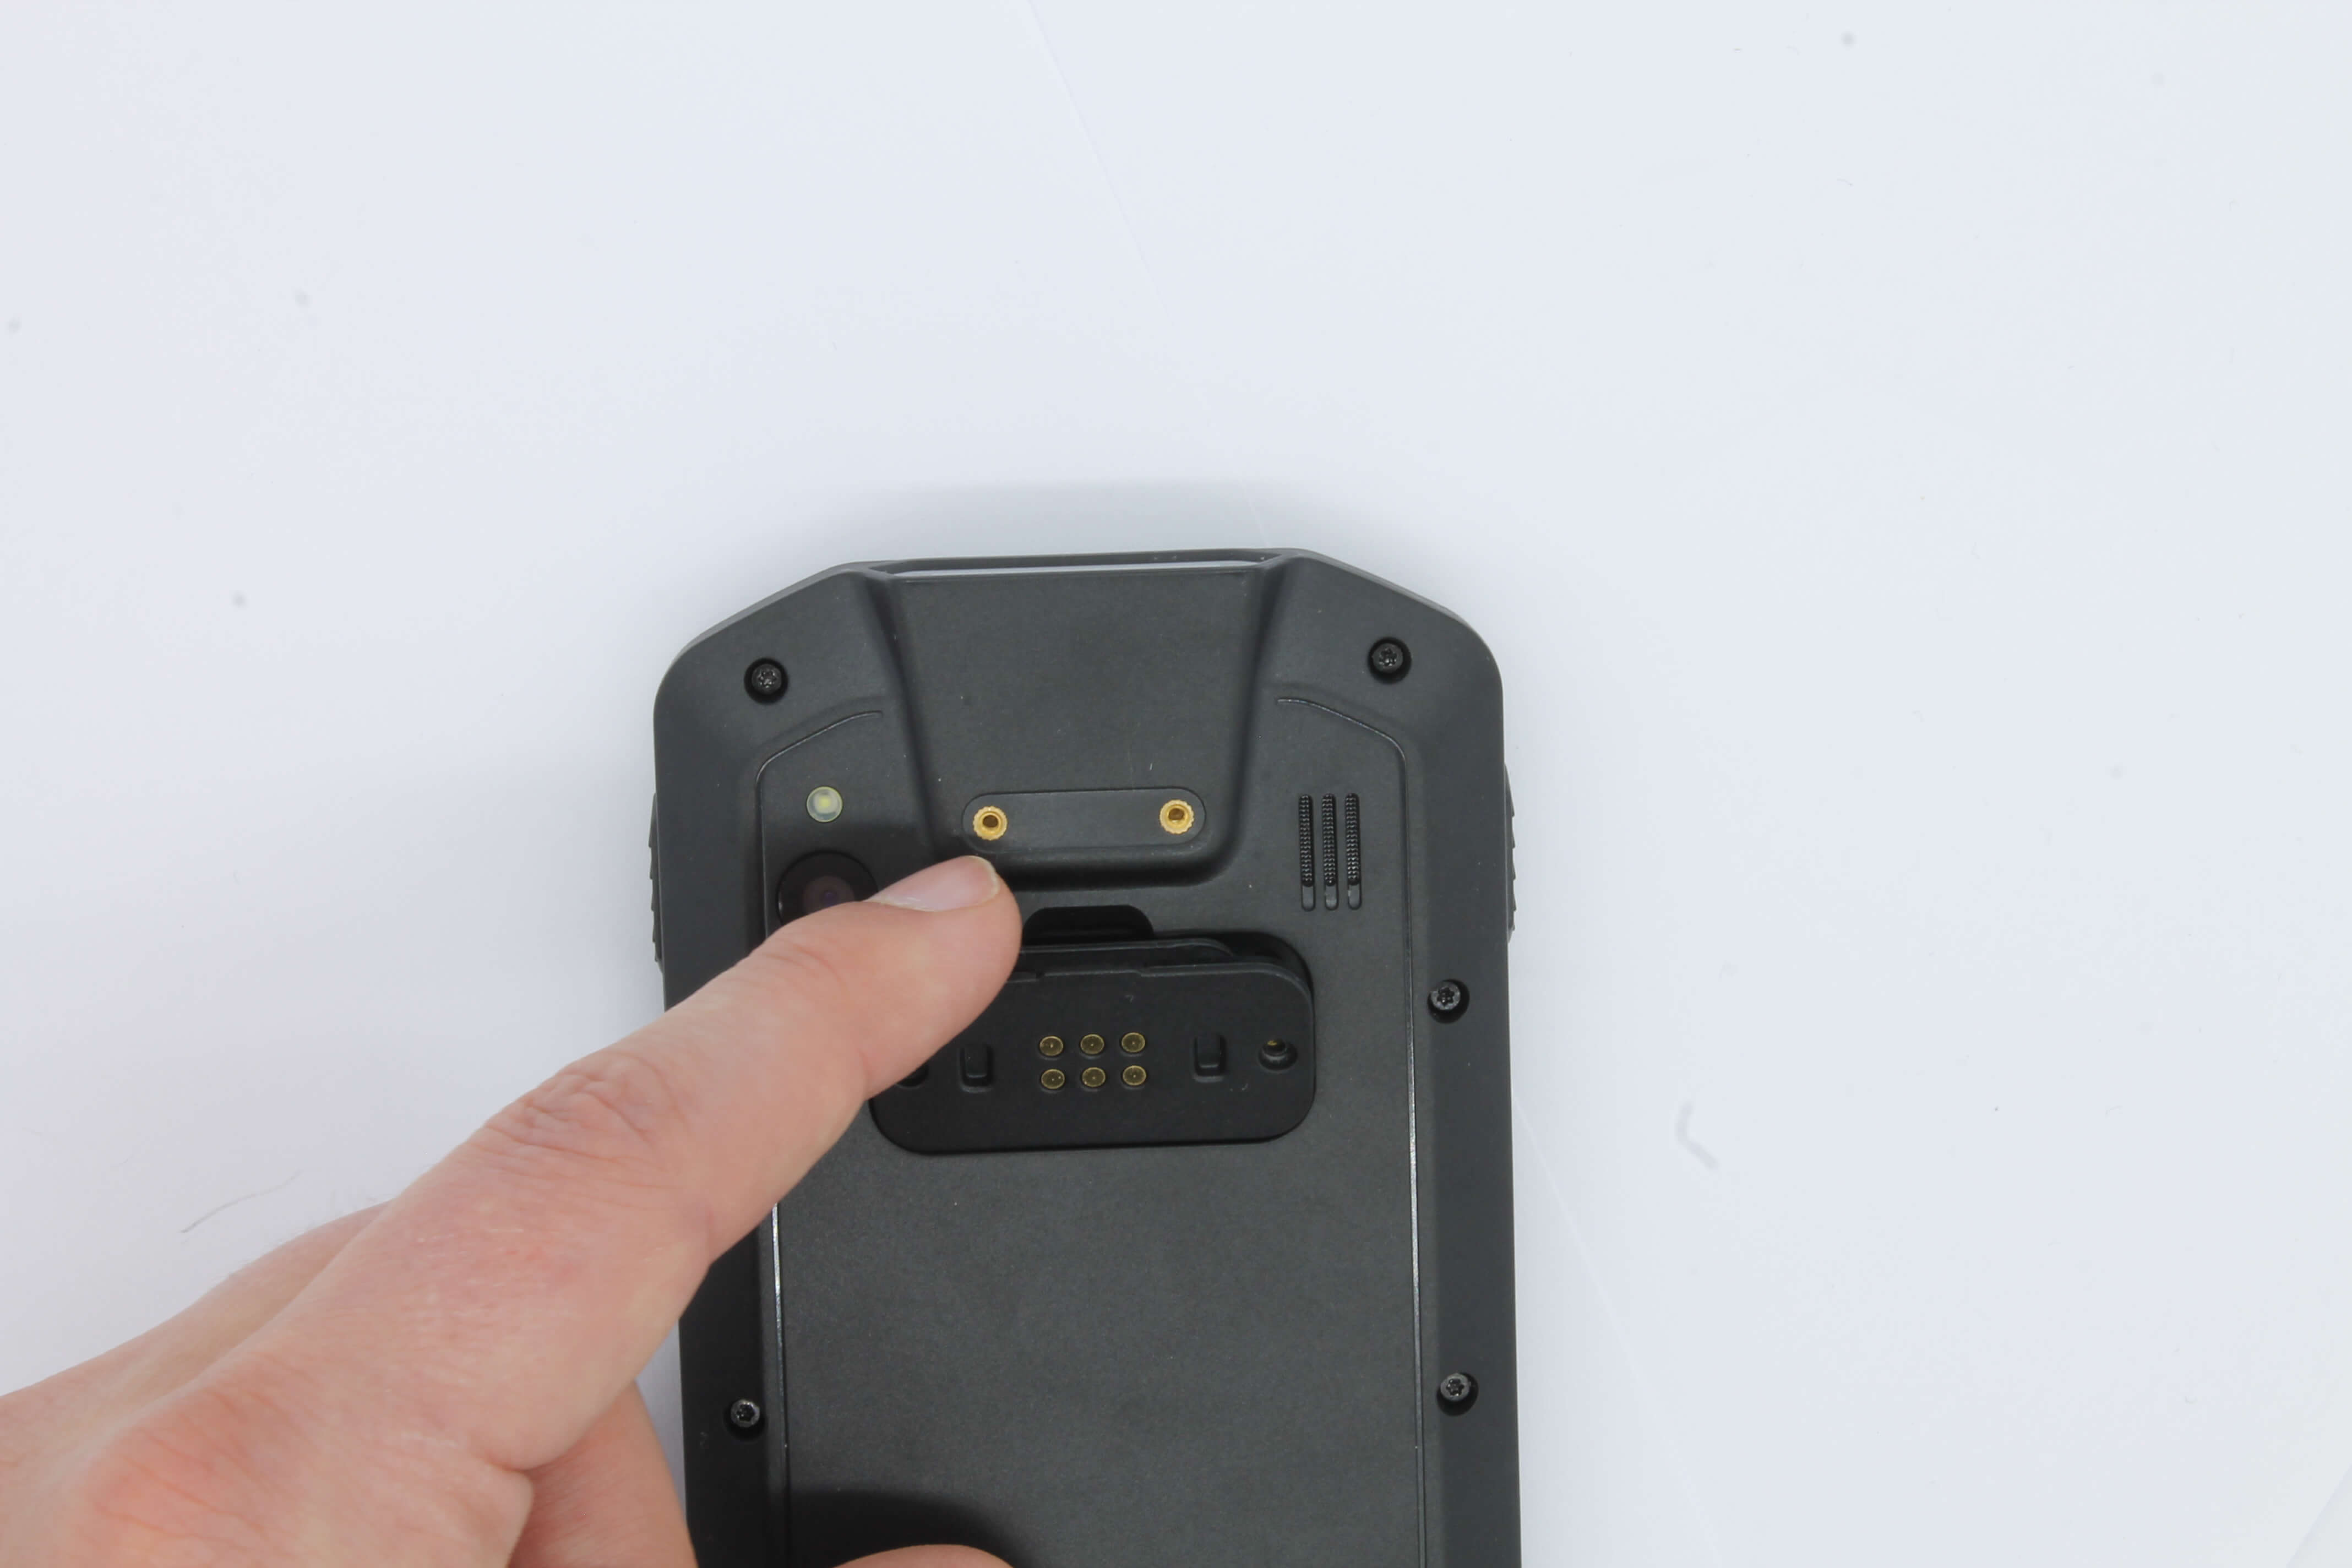
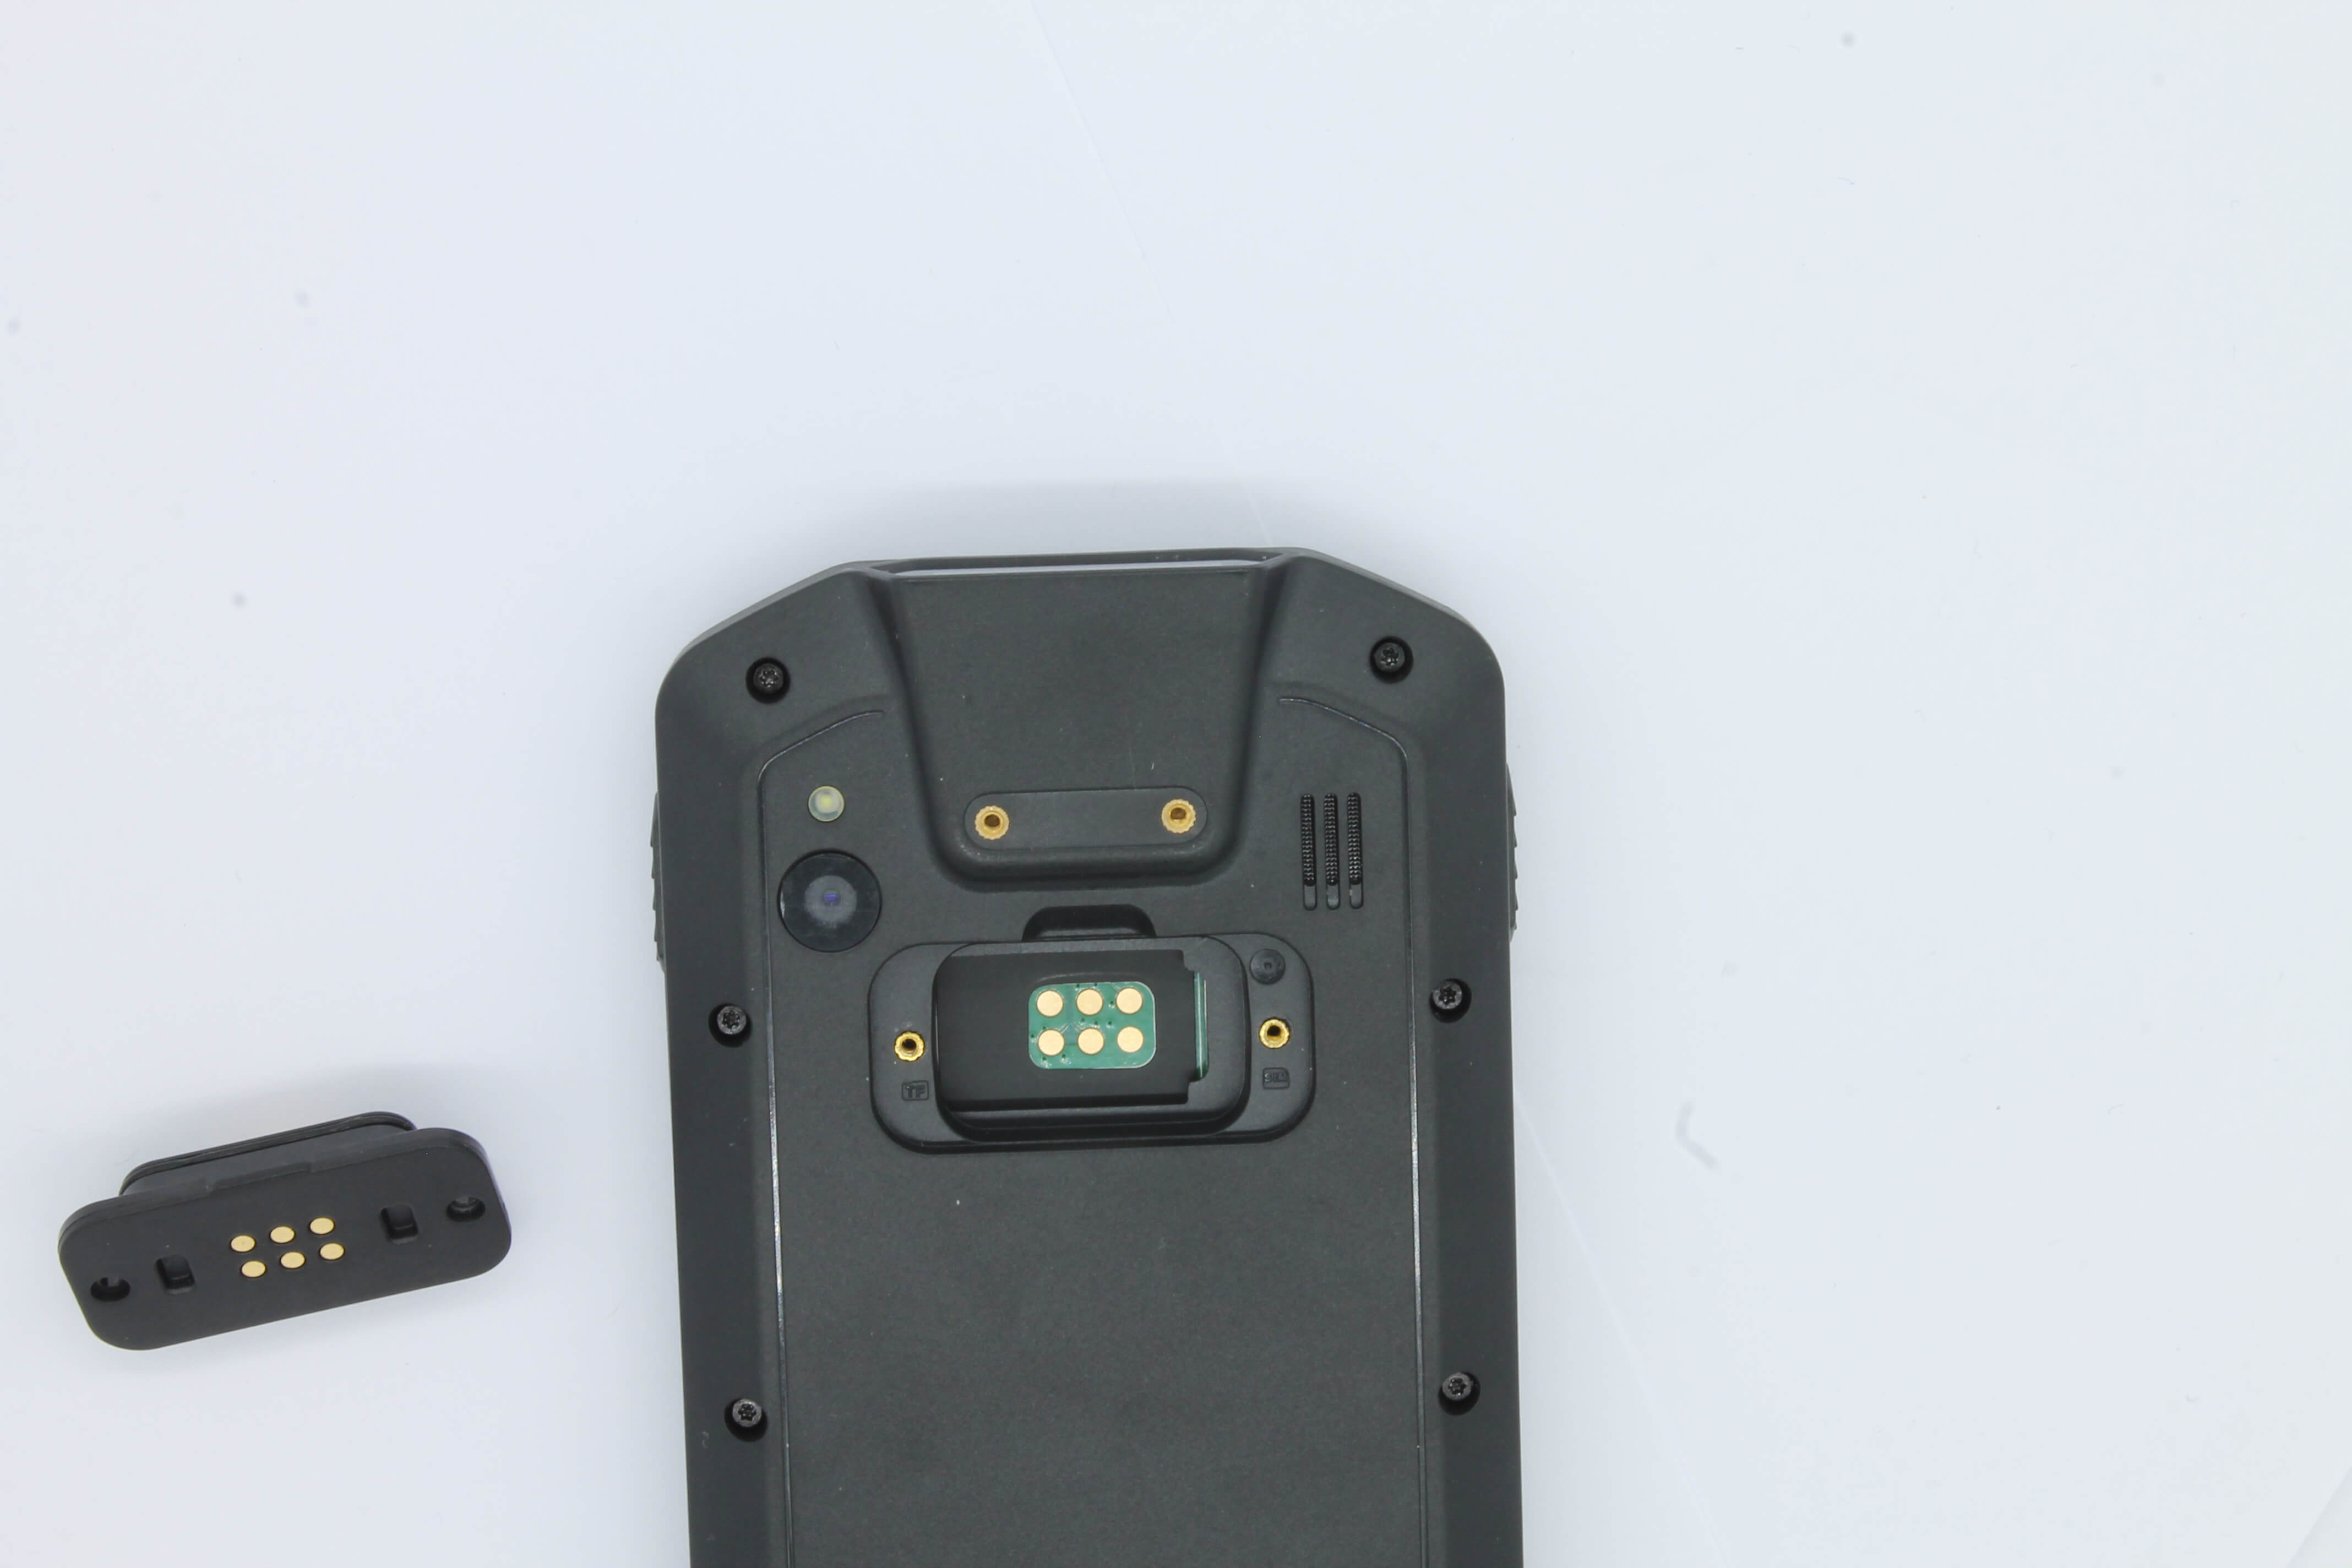
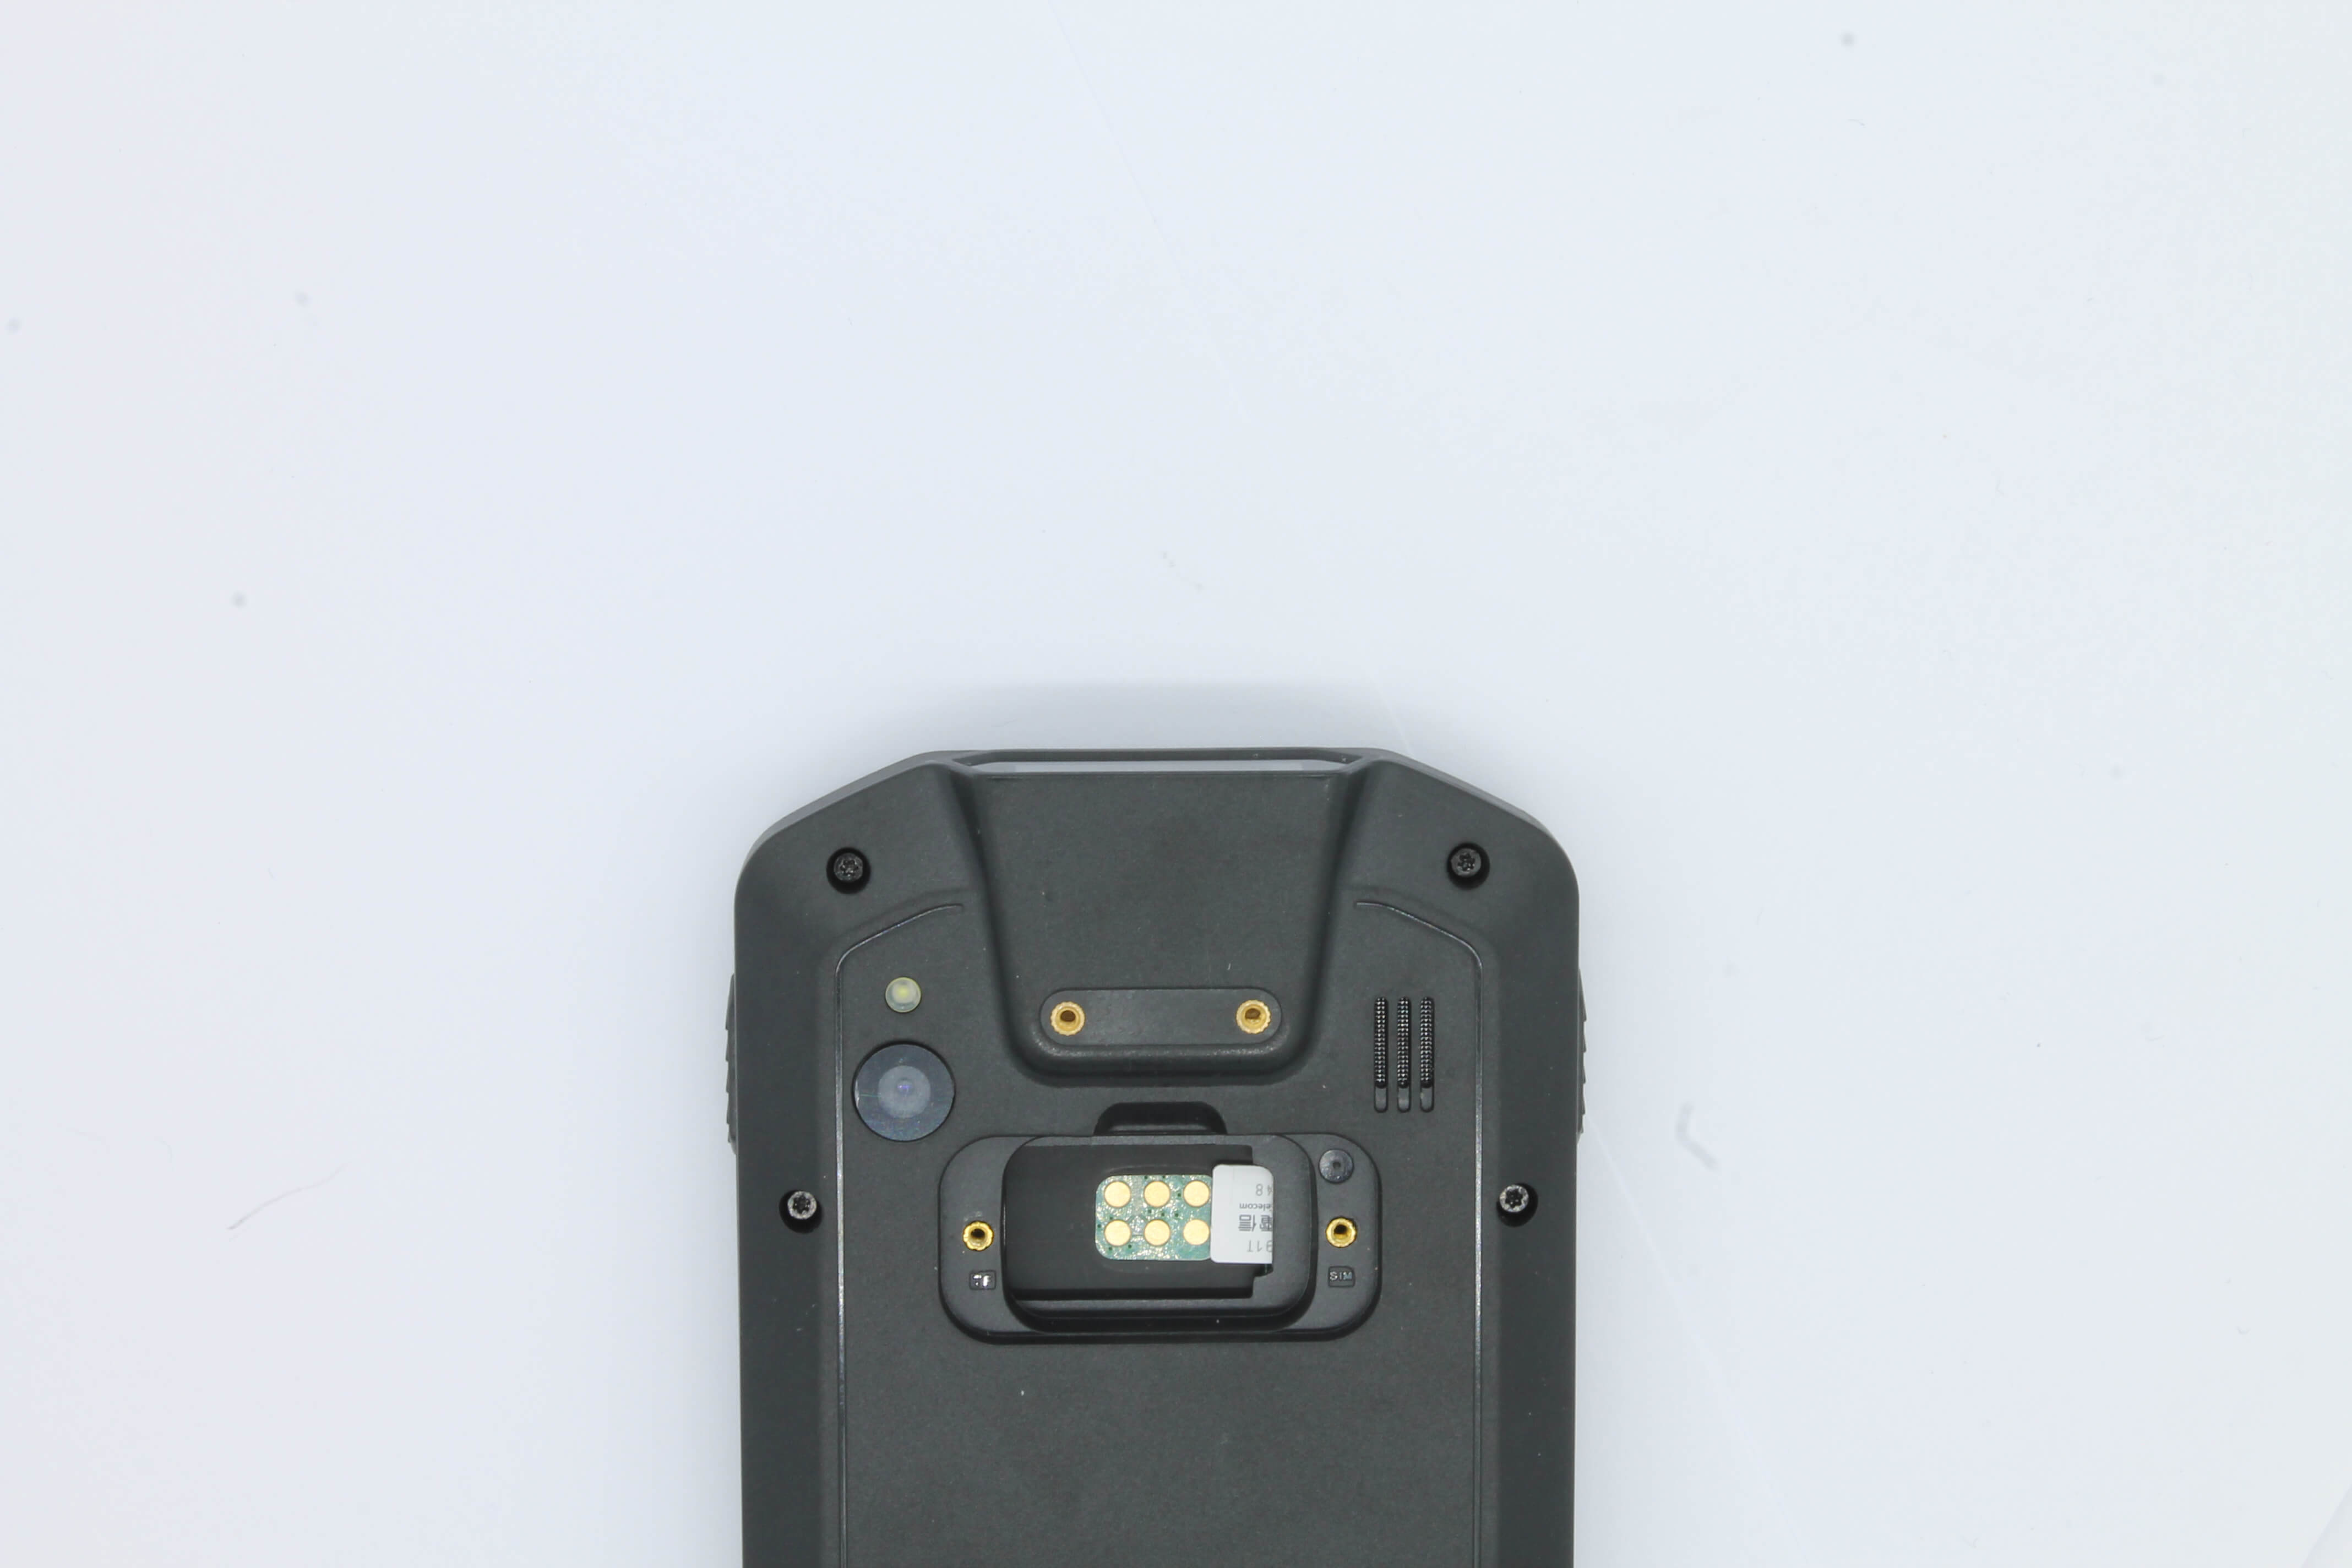
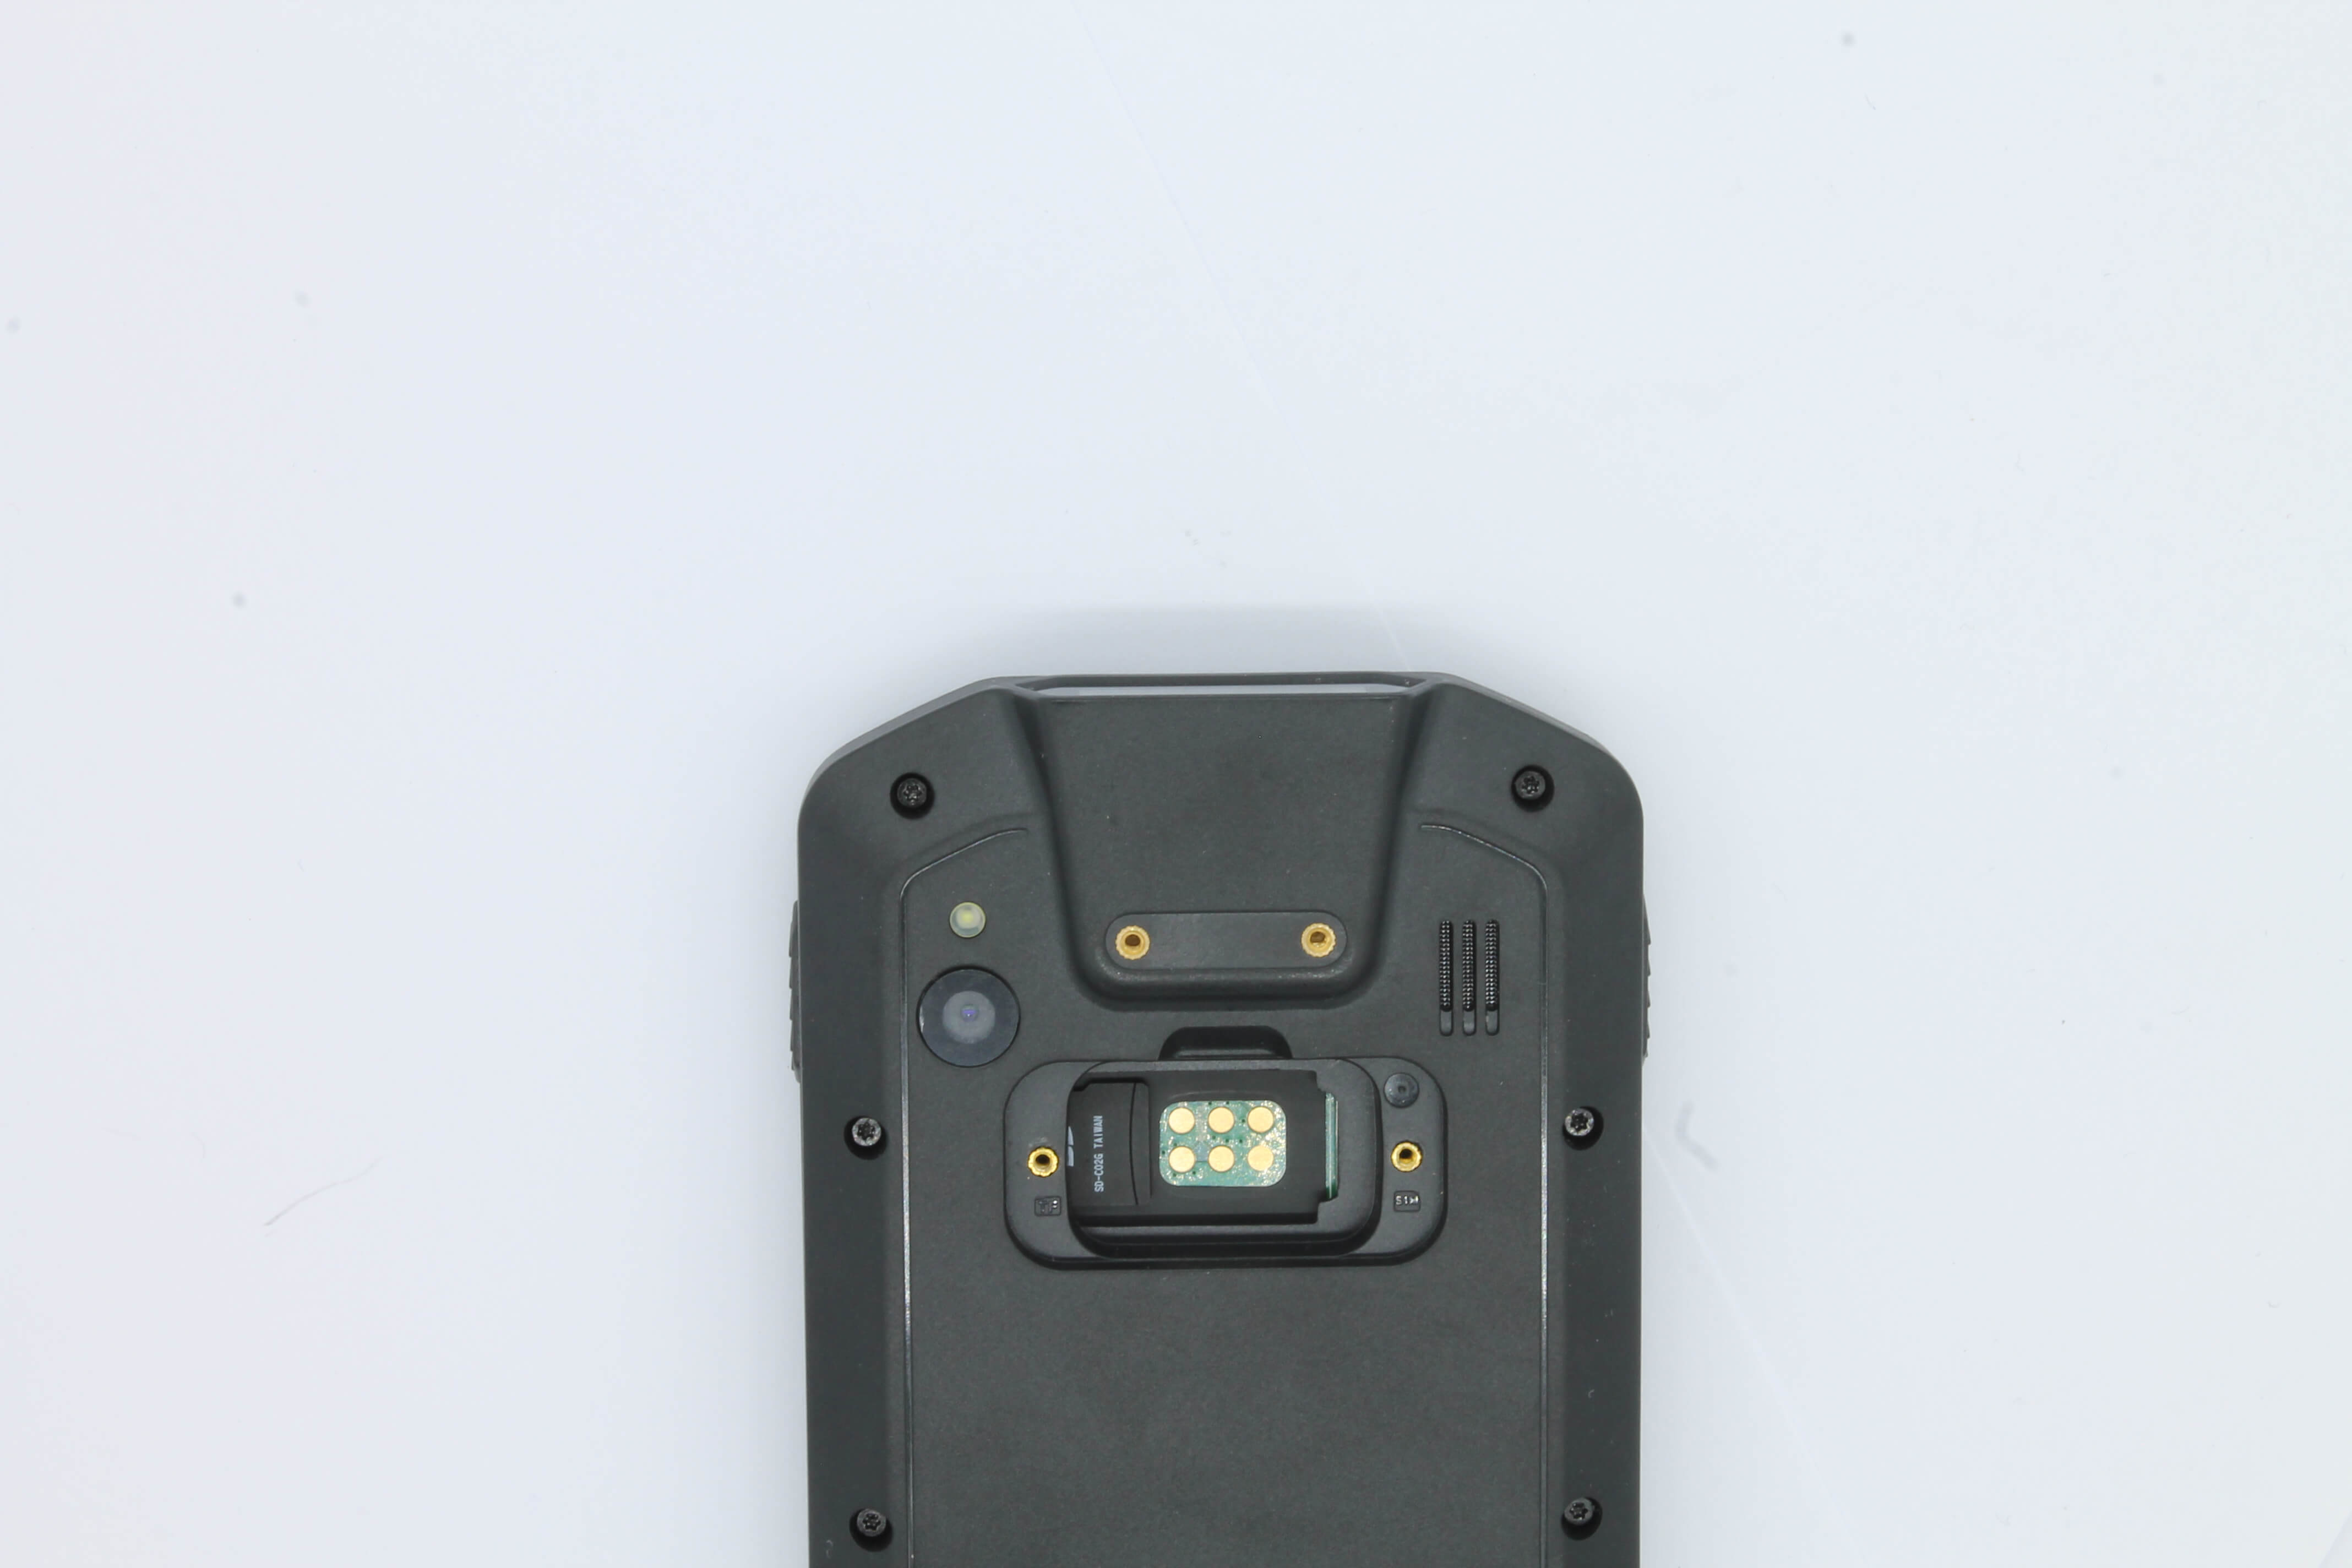
Below the "Pogo Pin" connector is the card slot for SIM card and Micro SD card.
- Loosen the two screws with a size 00 screwdriver and remove the lid.
- On the right side is the SIM card slot. You need a SIM card in "Nano" format. Carefully push the SIM card into the slot until it clicks into place. The contacts must point downwards.
- Push the side with the bent corner first into the device.

Install the memory card
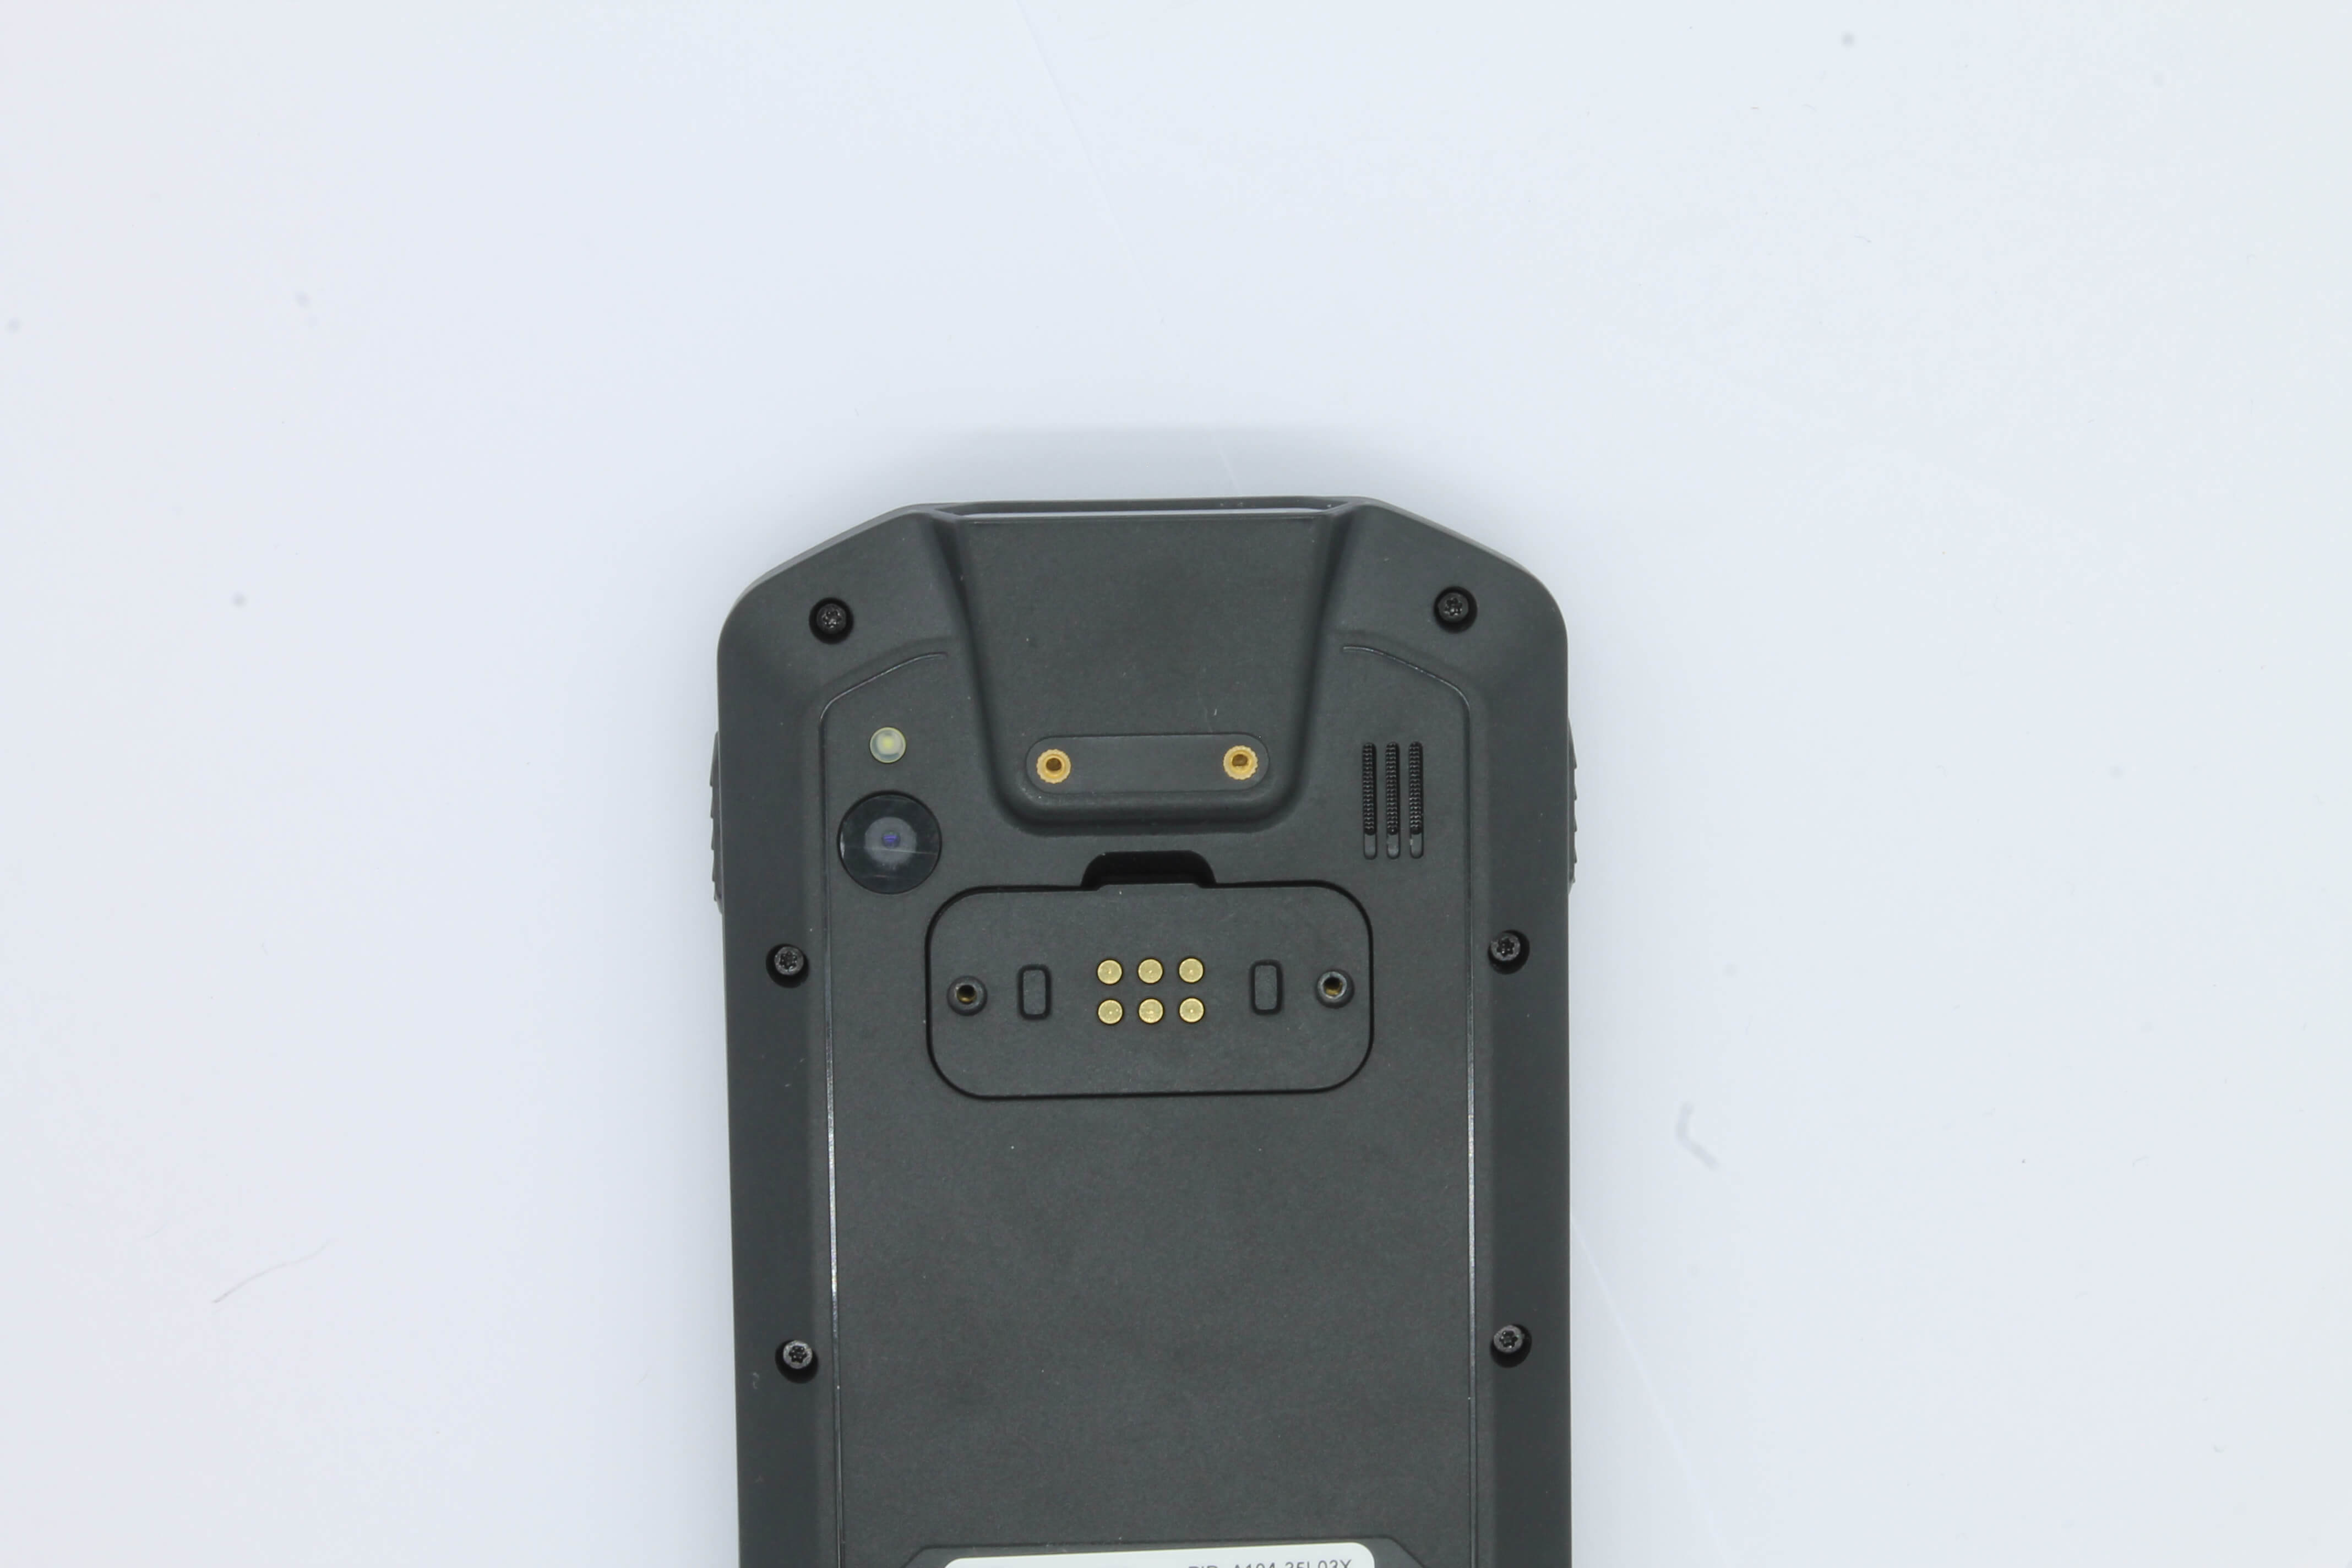
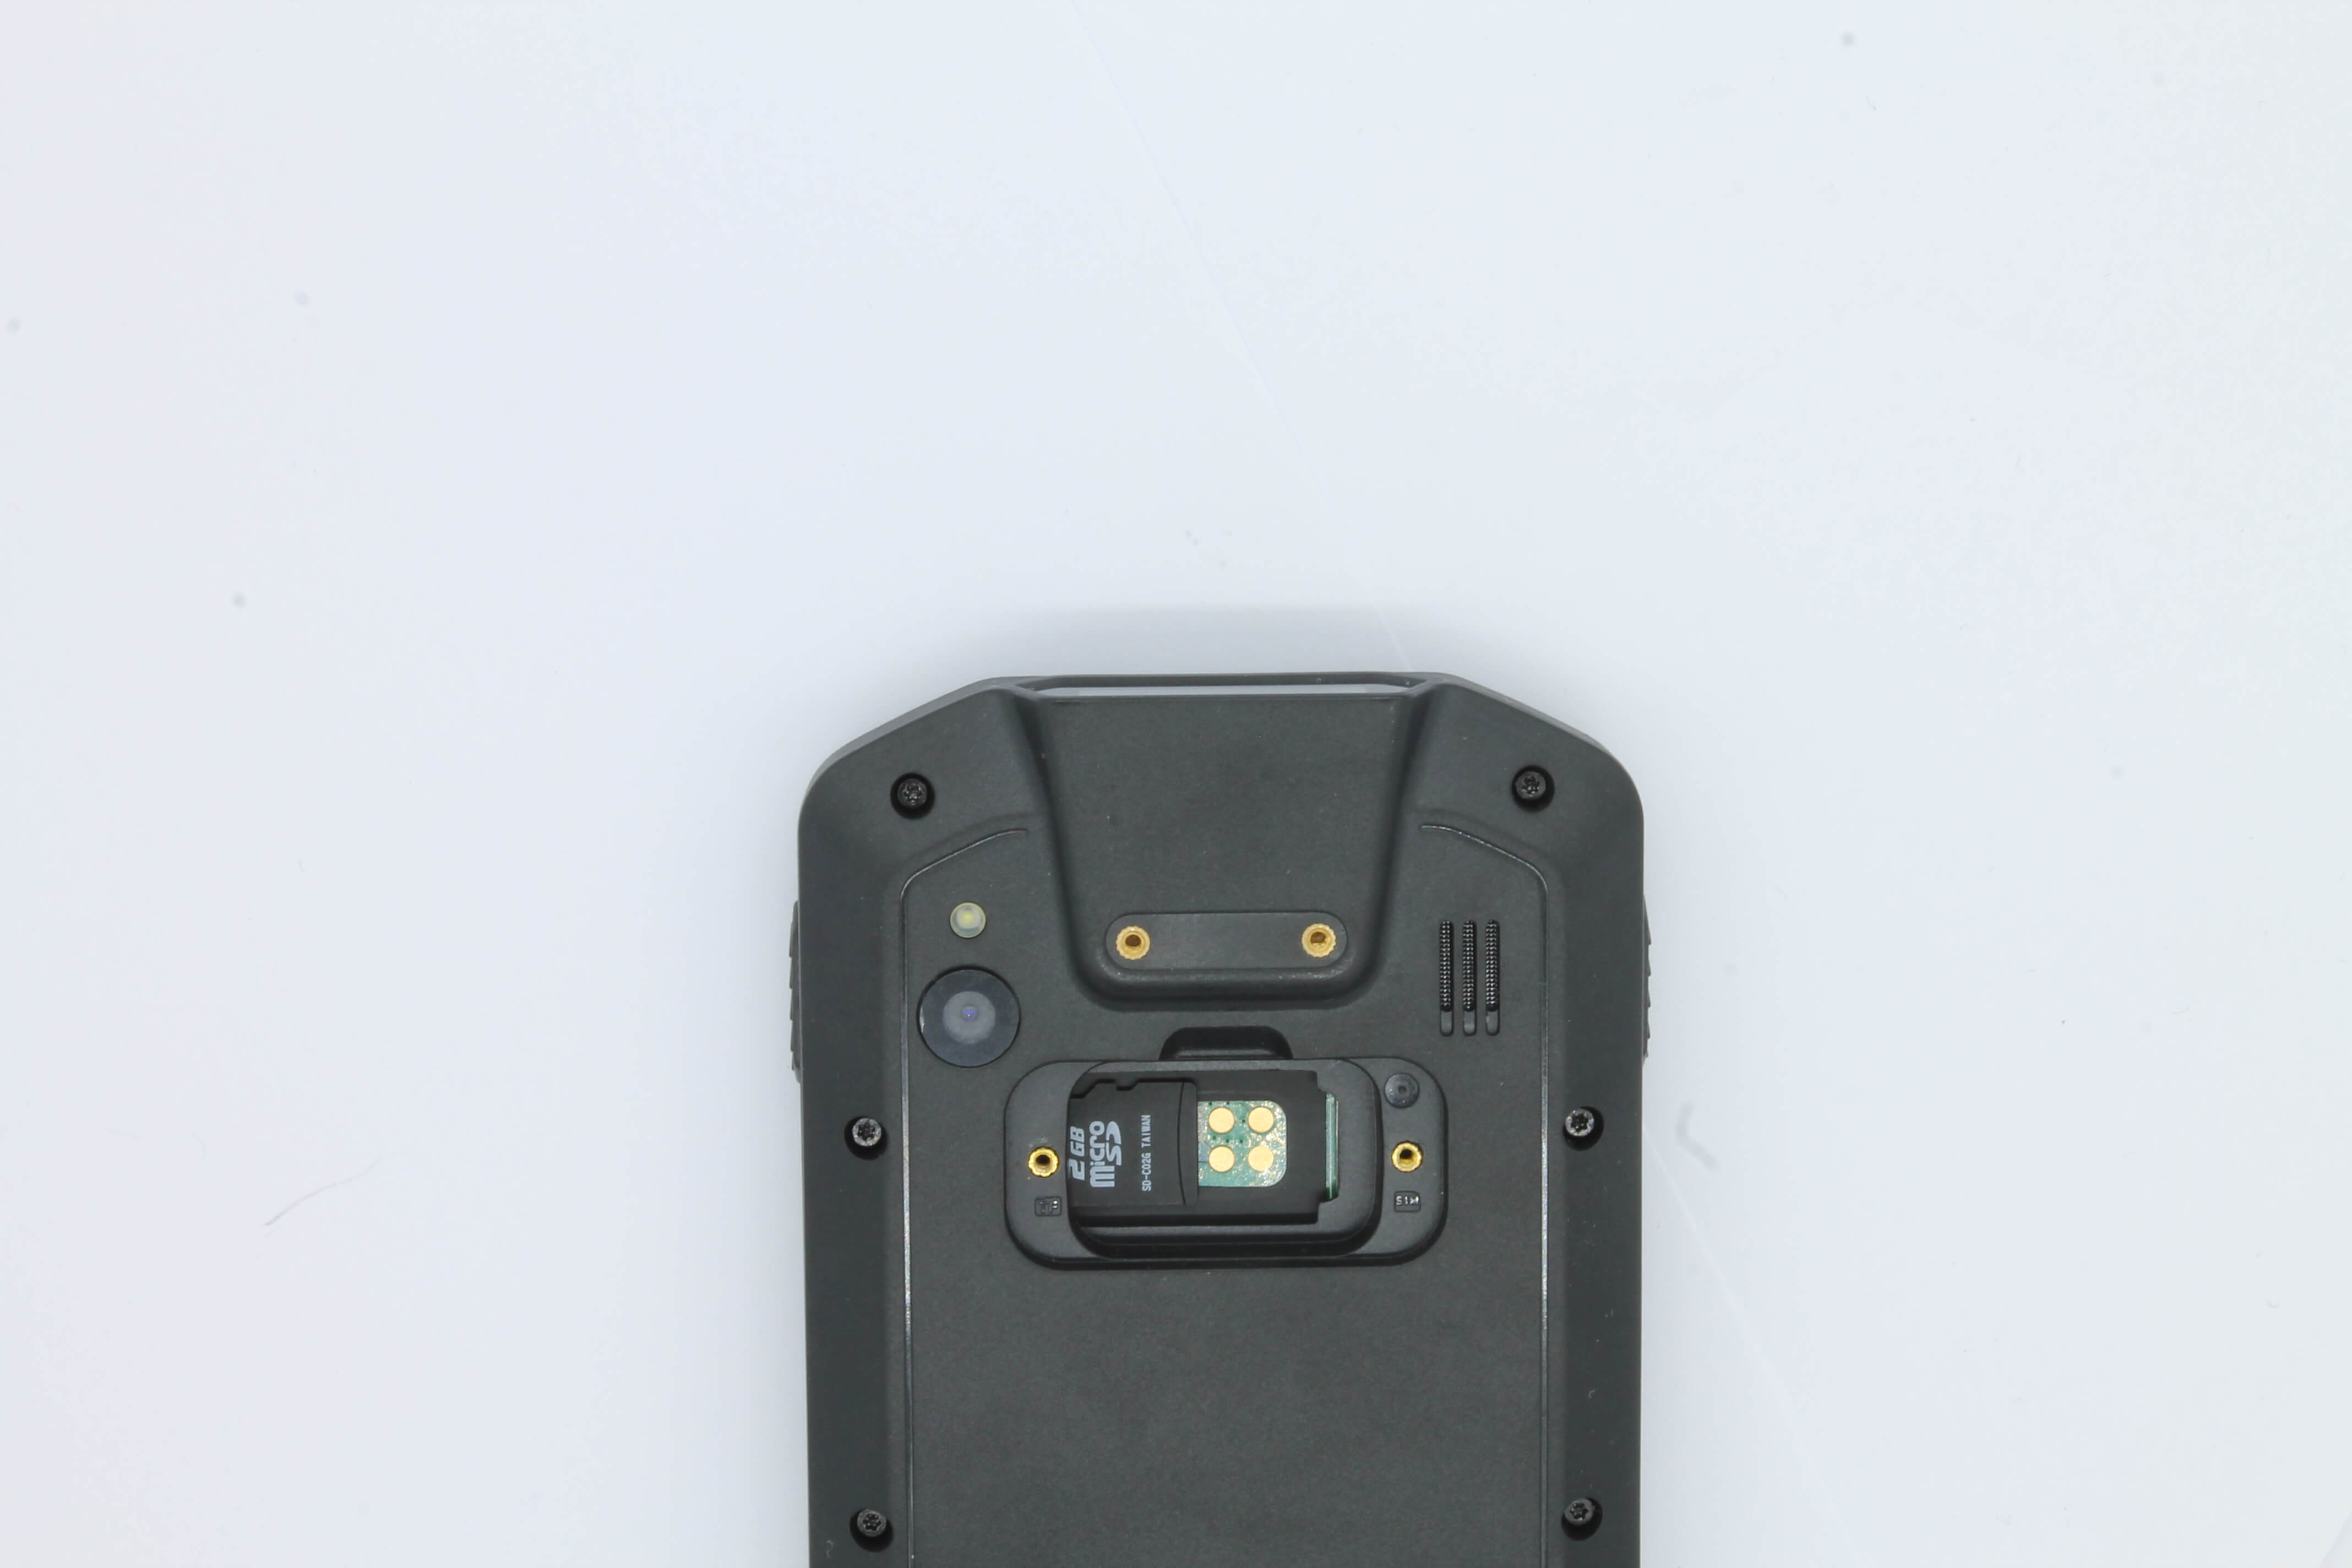
Below the "Pogo Pin" connector is the card slot for SIM card and Micro SD card.
- Loosen the two screws with a size 00 screwdriver and remove the lid.
- On the left side is the Micro SD card slot. Carefully slide the micro SD card into the slot. The contacts must point downwards.
- Slide the side with the contacts first into the device. Unlike the SIM card, the micro SD card is not fully recessed in the casing and does not have a snap-in mechanism. About half of the card sticks out of the slot.
- Finally, mount the cover again.
Charge the device
To charge the device, you need the "USB cable type A plug to type C plug" and the "power supply unit with USB socket".
- Plug the cable into the designated socket of the power supply unit and connect it to a power outlet. Make sure that it has the voltage specified in the technical data.
- Then connect the cable to the device.
- As soon as the device is supplied with power and the battery is charged, the LED above the display starts to light up red.
- When the battery is fully charged, the LED lights up green.
Start the device
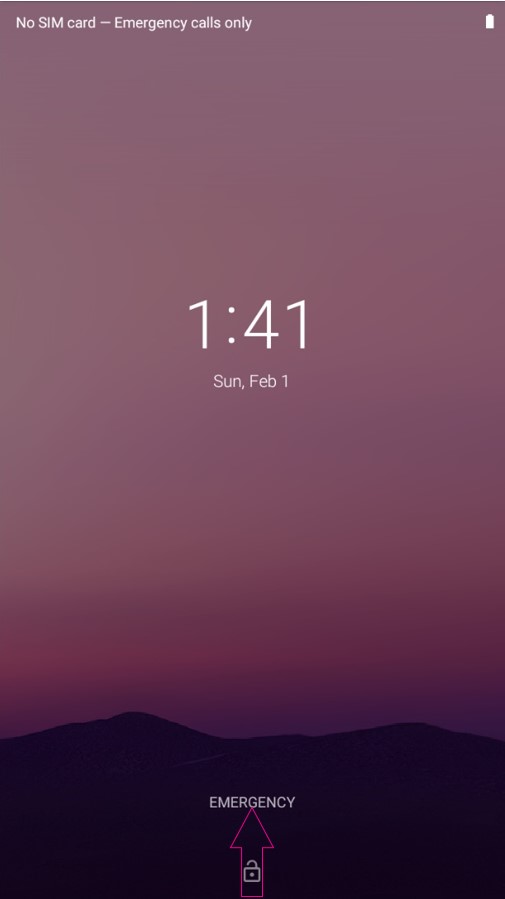
Press the "Power" button for a few seconds. During the startup process, you will see an Android logo. Once the device has started, you will see the lock screen. Swipe your finger from the bottom to the top of the screen to unlock the device.
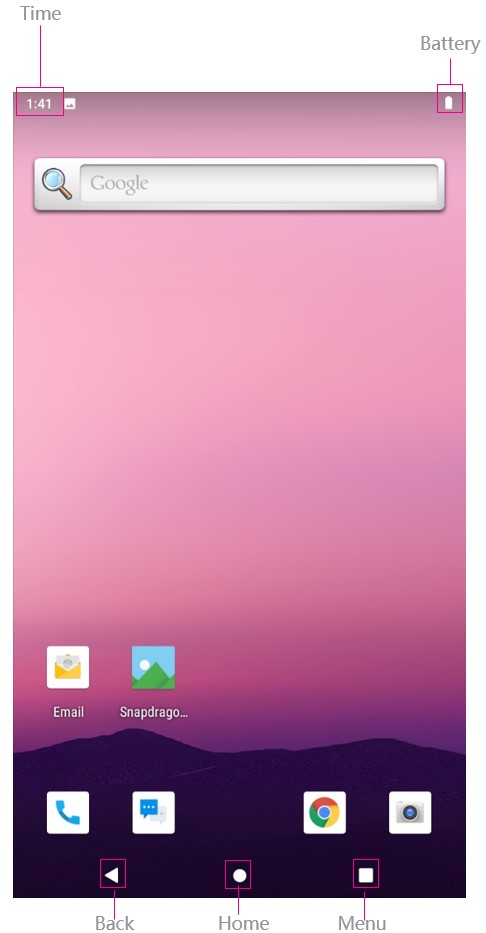
You will now see the interface of the device. From here you can launch all applications, search for things, etc. Users can add shortcuts to the desktop according to their own needs, as shown below.
From this interface you can launch all the important applications in a quick way and navigate to the menus. You can customize this interface according to your own needs. In the default view, you can see the current time in the top left corner and the current battery level in the top right corner in the form of a battery icon. The top bar also serves as an info bar for other applications. The bottom three elements help you navigate.
The left icon helps with navigation and takes you back one step from your application (e.g. to a previous menu or the last visited web page).
The middle icon minimizes all applications and returns you to the main interface.
The right icon opens the list of all applications installed on the device.
You can get more information on how to use Android 9 here: https://support.google.com/search?q=Android+9&from_promoted_search=true