Using the on-screen keyboard
Android
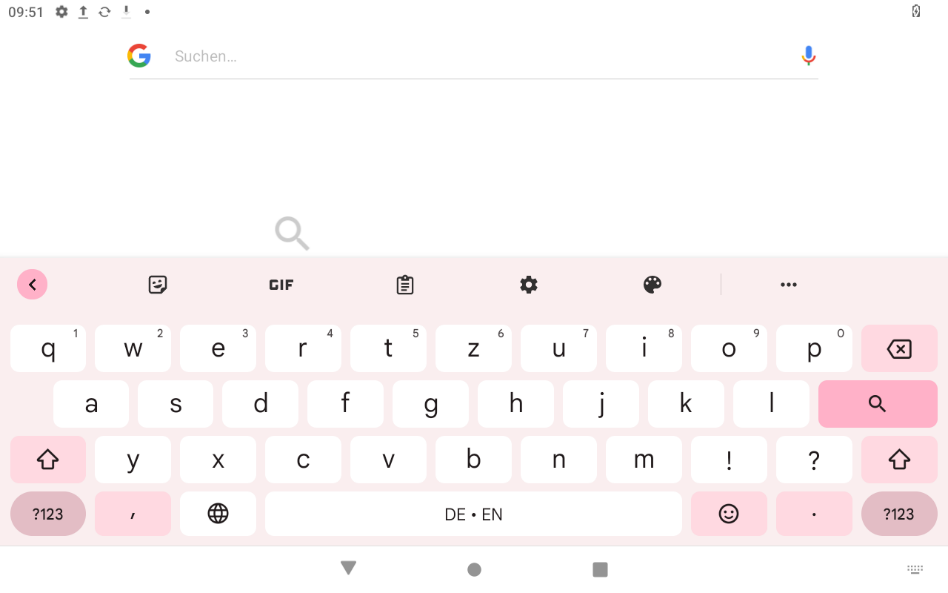
In general, the on-screen keyboard is already activated on Android devices by default. All you have to do is tap in an input field and the on-screen keyboard appears.
If the on-screen keyboard does not appear automatically, follow these steps to activate the on-screen keyboard on your Android device:
- Click in any input field. A keyboard icon will now appear in the bottom right-hand corner of your screen
- Now click on the icon

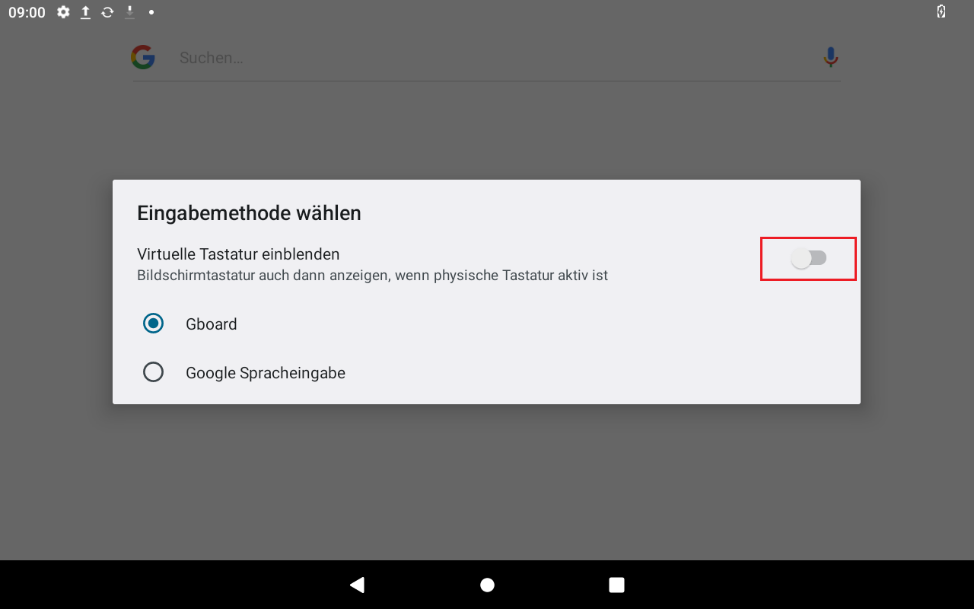
- A "Select input method" menu will now open
- Now also tap the slider next to "Show virtual keyboard"
If you cannot find a keyboard icon, proceed as follows:
- Open the settings in your main menu. To do this, click on the gear icon.

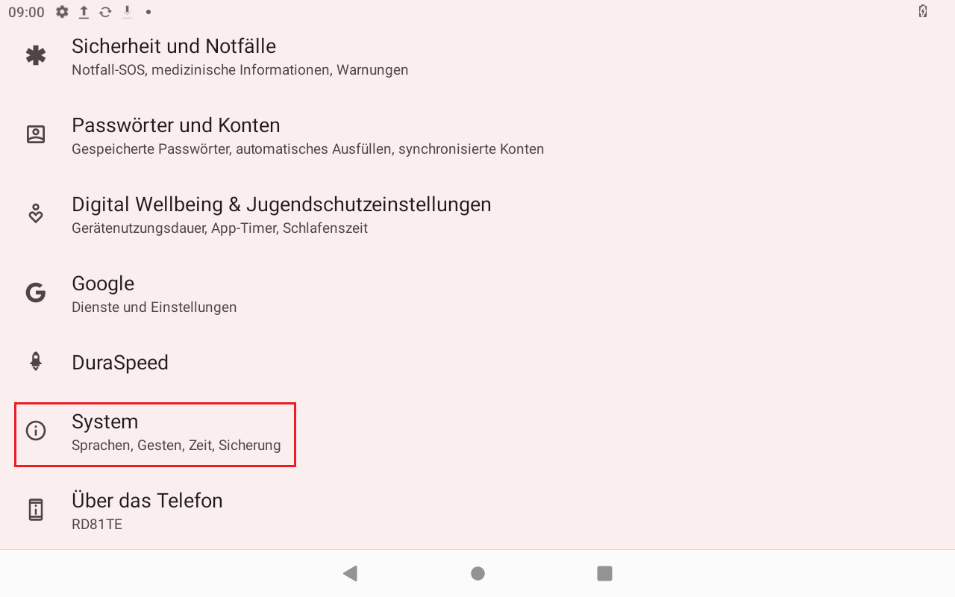
- Scroll down in the settings until you see the System item and tap on it to open the submenu
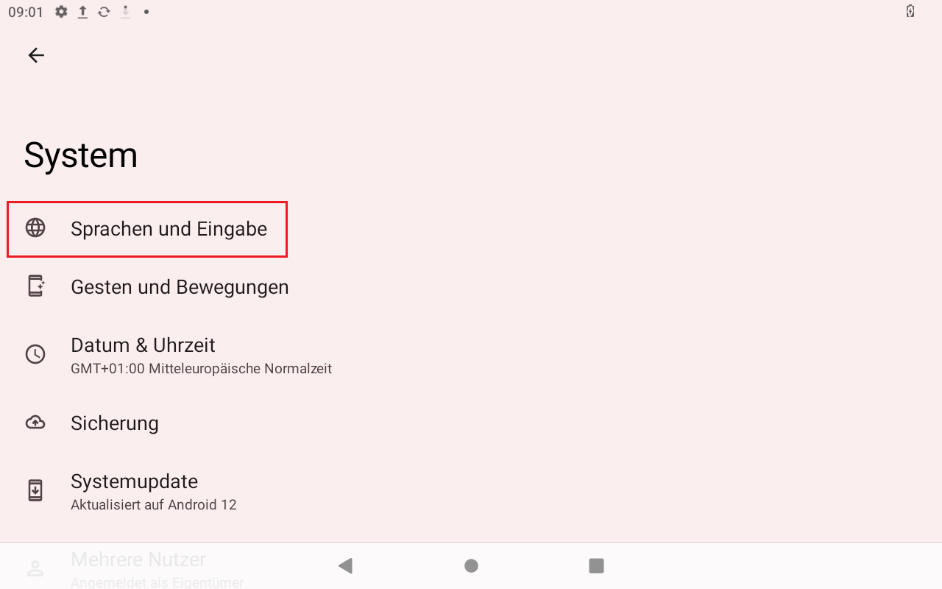
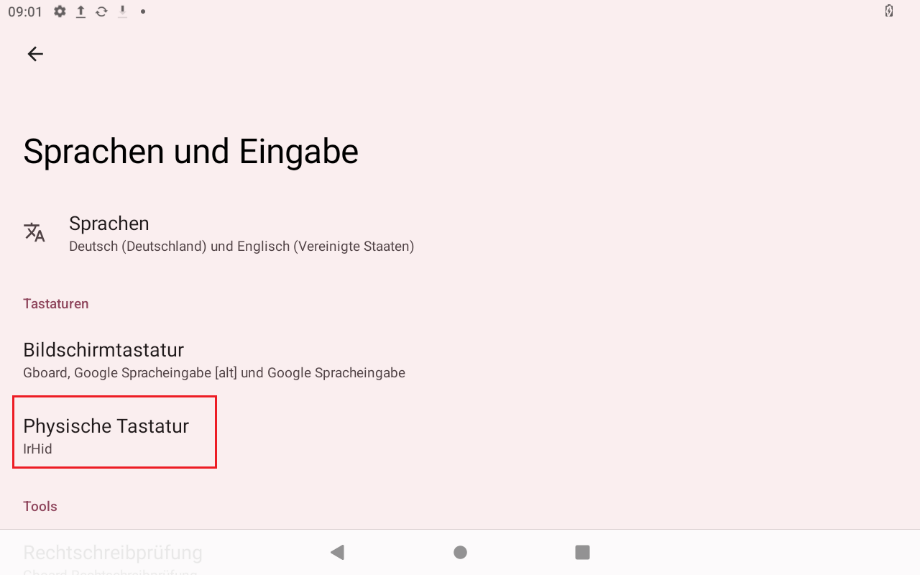
- Now tap on "Languages and input"
- Now tap on the sub-item "Physical keyboard"
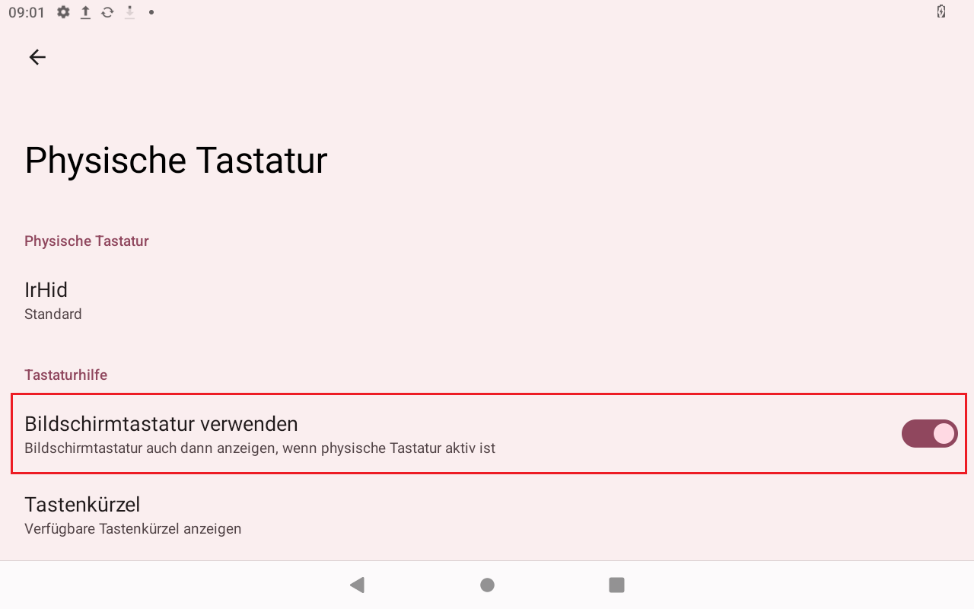
- Now also tap the slider next to "Use on-screen keyboard"
Windows
Unlike Windows 10, Windows 11 does not offer a tablet mode that can be controlled by the user. The operating system decides independently whether to operate in tablet mode or not by checking whether a physical keyboard is connected or not. Currently, this is not always 100% reliable.
In some scenarios, the on-screen keyboard may not open when you tap an input field. This can be remedied by setting up quick access in the taskbar.
To add quick access to the on-screen keyboard in your taskbar, follow the steps below:
- First, right-click in your taskbar. A context menu will then open. If you do not have a mouse connected, tap on the taskbar and hold it down until the context menu opens.
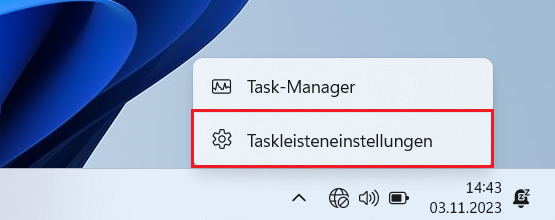
- Now tap or click on the "Taskbar settings" item
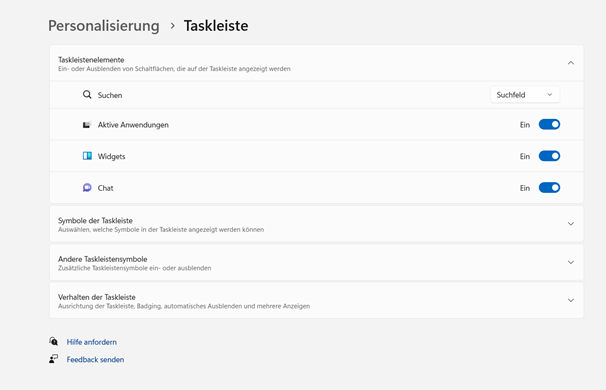
- You will then find the menu item Icons and taskbar. Expand this item by clicking on it.
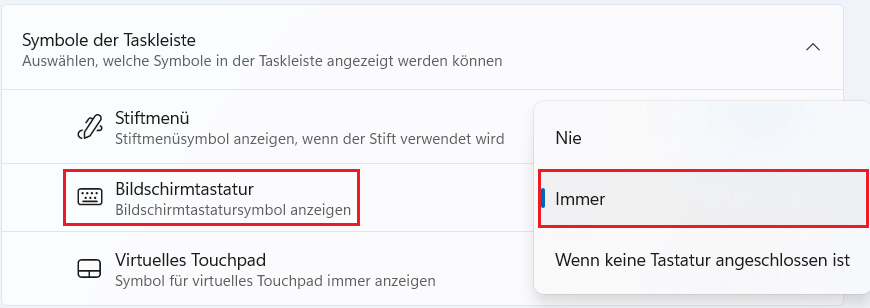
- If you select "Always", a keyboard icon is automatically added to your button. You can click on this at any time to open the virtual keyboard manually if it does not open automatically when you click in an input field.
