Rocktab U210
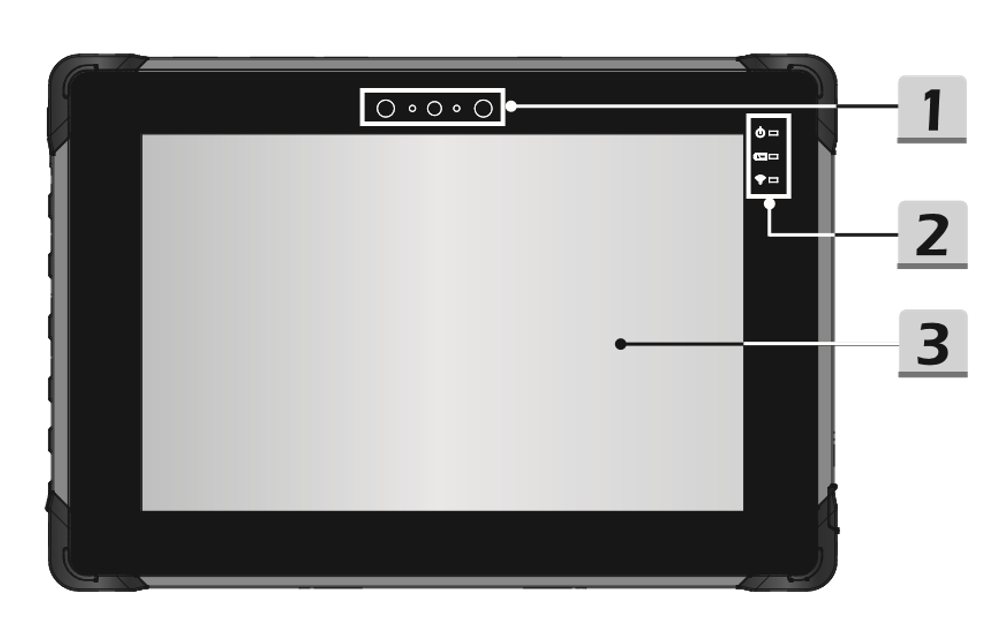
Front view
|
1 |
Front camera The integrated front camera can be used for photo shooting, video recording or conferencing, and other interactive applications. |
3 |
Touchscreen & Display |
|
2 |
Status LEDs LEDs for status indication of operating status, battery charge and radio connection (see "Explanation of the status LED display"). |
|
|
Explanation of the status LED display
|
LED |
Status |
Description |
|
|
LED lit |
The LED lights up when the tablet is turned on. |
|
LED flashes |
The LED flashes when the tablet goes into sleep mode. |
|
|
LED off |
The LED goes out when the tablet is turned off. |
|
|
|
LED lit |
The LED lights up when the battery is being charged. |
|
LED off |
The LED goes out when the battery is fully charged or when the AC/DC adapter is disconnected. |
|
|
LED flashes (slowly) |
LED flashes slowly when battery capacity is less than 7%. |
|
|
LED flashes (fast) |
LED flashes rapidly when there is a battery fault. |
|
|
|
LED lit |
LED lights up when the WLAN (WiFi) function is enabled. |
|
LED off |
The LED goes out when this function is deactivated. |


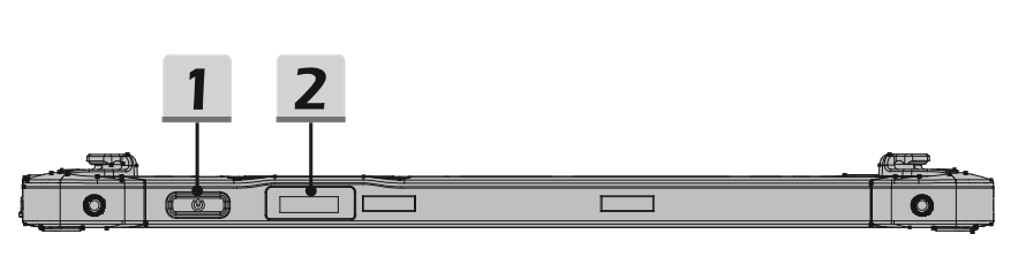
Top view
|
1 |
On-Off switch Before you turn on the Tablet PC for the first time, you must connect it to AC power. Press and hold the power button for 8 seconds to turn off the tablet. |
2 |
Barcode Scanner (optional) |
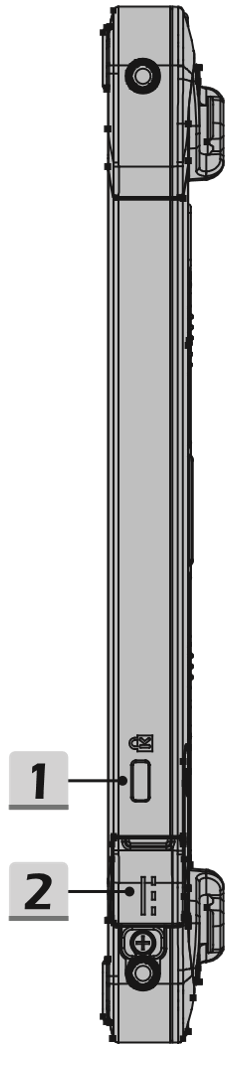
Right side
|
1 |
Kensington Lock This tablet has a Kensington lock that allows the user to secure the tablet in place. |
2 |
Power connection Connect the supplied power adapter to power the device and to charge the battery. |
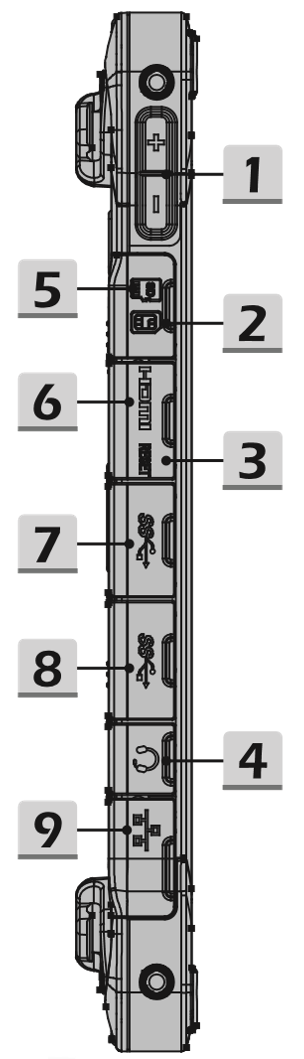
Left side
|
1 |
Volume up (+) & down (-) buttons Press the Volume up or Volume down button to adjust the volume. You can also use this buttons to access the boot menu (vol. down) and the BIOS (vol. up) when pressed during system startup. |
6 |
Micro-HDMI connector Used to connect an external display. Use a Micro HDMI to HDMI adapter cable to connect a display with a standard HDMI port. |
|
2 |
Micro SIM card reader Card slot for an optional 4G LTE module |
7 |
USB 3.1 Gen 1 port USB 3.1 Gen 1, the SuperSpeed USB, supports fast data transfer for connected devices, such as storage devices, hard drives or video cameras. |
|
3 |
Reset hole If the Tablet PC does not turn off normally or does not respond when you press the power button for 8 seconds, insert a bent paper clip into the hole. (NOTE: In this case, the Tablet PC must be plugged in before restarting). |
8 |
USB 3.1 Gen 1 Port (Type C) USB 3.1 Gen 1, the SuperSpeed USB, supports fast data transfer for connected devices such as storage devices, hard drives or video cameras. The sleek and stylish USB Type-C connector offers reversible plug orientation and supports 5V/1.5A charging power. |
|
4 |
Headphone jack Used to connect speakers or headphones. |
9 |
RJ-45 connector The Ethernet port with bandwidths of 10/100/1000 Mbit/s is used to connect a LAN cable for network connection. |
|
5 |
Micro SD card reader The built-in card reader supports Micro SD cards. |
|
|
|
|
|
|
|
|
DO NOT charge the device via the USB-C port! The USB-C port on this device is not intended to power or charge this device. Connecting an external power source to this port may damage or destroy the device and/or the power adapter.
|
|


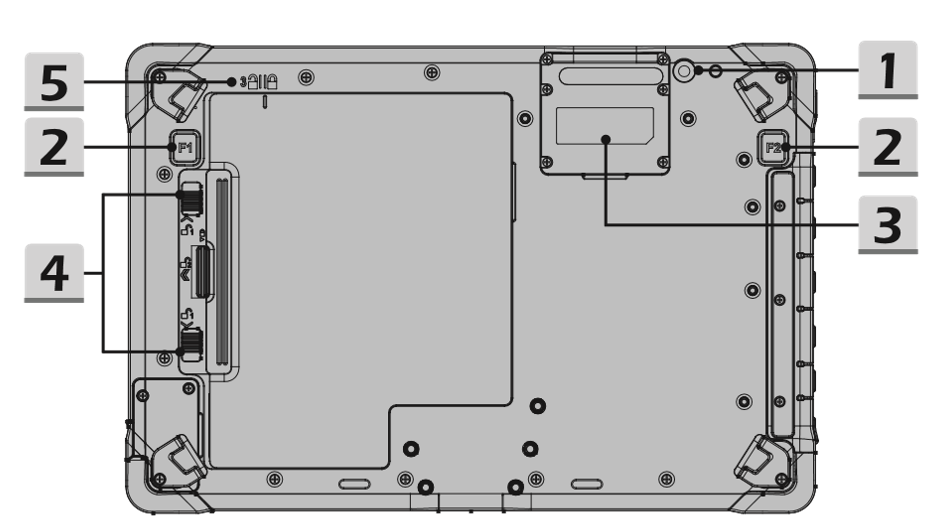
Back side
|
1 |
Rear camera The built-in rear camera can be used for taking photos, video recording or conferencing, and other interactive applications. |
4 |
Battery lock To lock/unlock the battery. |
|
2 |
Fn function Supports barcode scanner function by default. (optional) |
5 |
Lid indicator Indicates whether the battery lid is in the correct position for locking or unlocking. |
|
3 |
Expansion slot Space for optional extensions (e.g. barcode scanner) |
|
|
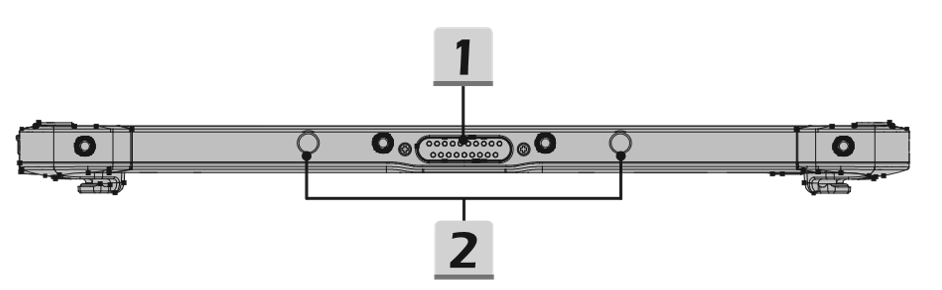
Bottom view
|
1 |
Docking connector Connects to an external docking station for additional connectivity features. |
2 |
Locking holes Serve for safe storage in a docking station |