Using the camera
Your device has a built-in camera. You can use the Windows Camera app to use the camera.
- Take photos.
- Record videos.
- Scan codes, including QR codes and barcodes.
- Scan documents.
- Scan whiteboards.
The following explains the features and operation of the camera app in more detail.
Opening the camera app
As with opening Windows programmes in general, there are several ways to open the camera app. Example method:
- Right-click on Start
 , and then select Search. If you have set your taskbar to display the search bar or search icon, you can also search directly there.
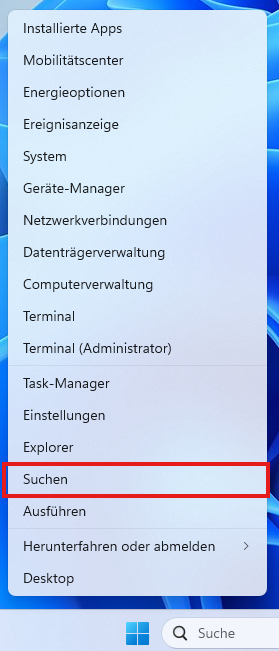
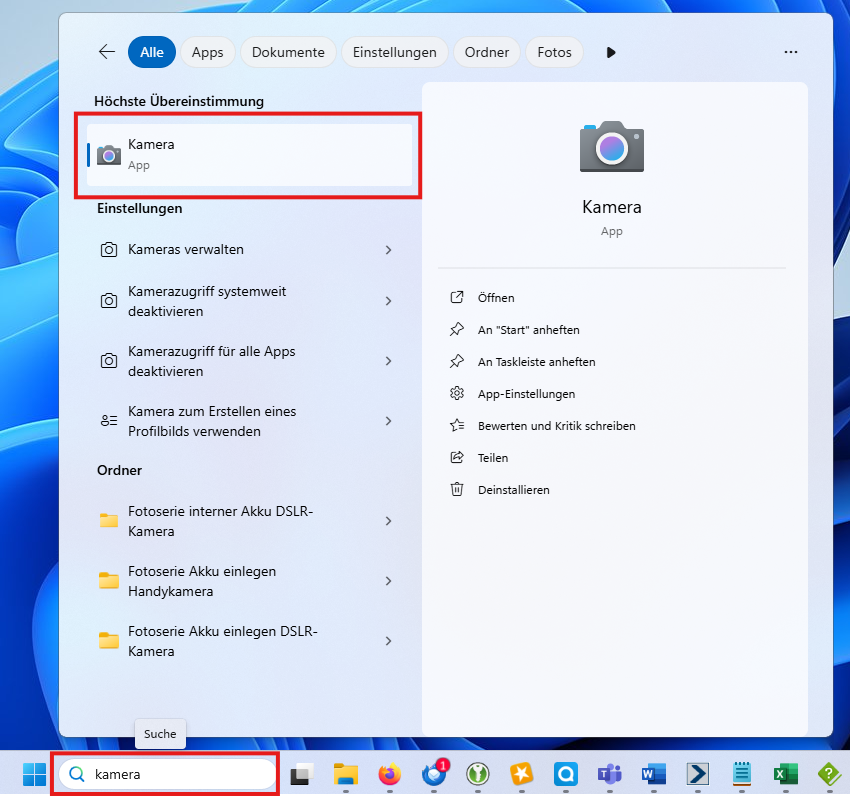
- Enter the following in the search field: Camera
- Under Best match, select the Camera app from the list of results.
Tip: If you use the camera frequently, save the program icon to the taskbar or desktop for quicker access.
Switch between front and rear cameras
Your device may have a front and rear camera. To switch between these cameras, follow these steps:
- Open the camera app.
- To switch between cameras, select the Switch camera icon in the top right corner of the camera app.
Take photos
- Open the camera app.
- Make sure the Photo button on the right side of the camera app is selected. The button will change to Take Photo.
- Select the Take Photo button a second time to take a photo.
- The photo appears in your camera roll as a thumbnail in the bottom right corner of the Camera app. Select the thumbnail to view a larger version of the photo.
- When viewing the photo:
- Select the icons at the top of the Camera app for editing options, including:
- Zoom: When selected, use the slider to zoom in and out of the photo.
- Rotate: The photo rotates 90° clockwise each time the Rotate icon is selected.
- Crop: Not available for photos.
- Delete: Deletes the photo.
- Filter: Switches between Photo, Document, and Whiteboard modes.
- Select the ellipsis in the upper right corner of the camera app to display more options:
- Copy: Copies the photo to the clipboard.
- Open folder: Opens the folder where the photo was saved.
- Export: Opens the Print dialogue box, where you can print the photo or save it as a PDF.
- To open the photo in the Photos app, select the Photos app icon in the upper left corner of the camera app.
Record videos
- Open the Camera app.
- Make sure the Video button on the right side of the Camera app is selected. The button changes to Record Video.
- Select the Record Video button a second time to start recording the video.
- The Video button changes to a red Stop button.
- Select the Stop Video Recording button to stop recording the video.
- The video will be displayed as a thumbnail in the lower right corner of the Camera app. To view the video, select the thumbnail.
- When viewing the video:
- To control video playback, use the playback controls at the bottom of the video.
- To delete the video, select the Delete icon at the top of the Camera app.
- To open the folder where the video was saved, select the ellipsis in the upper right corner of the Camera app, then select Open Folder.
- To open the video in the Photos app, select the Photos app icon in the top left corner of the Camera app.
Scan barcodes
The Windows Camera app can be used to scan codes such as QR codes or barcodes. To scan a code with the Windows Camera app:
- Open the Camera app.
- Make sure that the Barcode button on the right side of the Camera app is selected.
- The camera will activate. Place the code, such as the QR code or barcode, in front of the camera so that it is in focus. The Camera app will scan the code automatically.
- Depending on the type of code, different actions may occur. Example:
- For a QR code, the link to the website is displayed at the bottom of the camera app. Select the link to go to the website.
- For a barcode, the text of the barcode is displayed at the bottom of the camera app. Select the text to copy it to the clipboard.
Scan documents
The Windows Camera app can scan documents with supported cameras. To scan a document with the Windows Camera app:
- Open the Camera app.
- Make sure the Document button on the right side of the Camera app is selected. The button changes to Create document.
Important: If the Document button is not available, the camera does not support document scanning. - The camera will activate. Place the document in front of the camera so that it is in focus.
- A blue box will appear in the area where the camera app detects the document. Make sure the document is within the blue box.
- To scan the document, select the Create document button.
- The document is displayed in the camera roll as a thumbnail in the lower right corner of the camera app. Select the thumbnail to view a larger size of the document.
- When viewing the document:
- Select the icons at the top of the camera app for editing options, including:
- Zoom: When selected, use the slider to zoom in and out of the document.
- Rotate: The photo rotates 90° clockwise each time the Rotate icon is selected.
- Crop: Opens the crop window where you can crop the scanned document. Use the square to define the area to crop, then select Done on the right side of the camera app to save it.
To reset the crop square and start over, select Reset on the right side of the camera app. - Delete: Deletes the scanned document.
- Filter: Switches between Photo, Document and Whiteboard mode.
- Select the ellipsis in the upper right corner of the camera app to display more options:
- Copy: Copies the scanned document to the clipboard.
- Open folder: Opens the folder where the scanned document was saved.
- Export: Opens the Print dialogue box, where you can print the scanned document or save it as a PDF file.
- To open the scanned document in the Photos app, select the Photos app icon in the upper left corner of the Camera app.
Scan whiteboard
On supported cameras, the Windows Camera app can scan whiteboards. To scan a whiteboard with the Windows Camera app:
- Open the Camera app.
- Make sure the Whiteboard button on the right side of the Camera app is selected. The button changes to Use Whiteboard.
Important: If the Whiteboard button is not available, the camera does not support whiteboard scanning.
- The camera will activate. Place the whiteboard in front of the camera so that it is in focus.
- A blue box will appear in the area where the camera app detects the whiteboard. Make sure the whiteboard is within the blue box.
- To scan the whiteboard, select the Capture Whiteboard button.
- The whiteboard is displayed in the camera roll as a thumbnail in the lower right corner of the camera app. Select the thumbnail to display a larger version of the whiteboard.
- When viewing the whiteboard:
- Select the icons at the top of the camera app for editing options, including:
- Zoom: When this option is selected, use the slider to zoom in and out of the scanned whiteboard.
- Rotate: The photo is rotated 90° clockwise each time the Rotate icon is selected.
- Crop: Opens the crop window where you can crop the scanned whiteboard. Use the square to define the area to crop, then select Done on the right side of the camera app to save it.
To reset the cropping square and start over, select Reset on the right side of the camera app. - Delete: Deletes the scanned whiteboard.
- Filter: Switches between Photo, Document and Whiteboard mode.
- Select the ellipsis in the upper right corner of the camera app to display more options:
- Copy: Copies the scanned whiteboard to the clipboard.
- Open folder: Opens the folder where the scanned whiteboard was saved.
- Export: Opens the Print dialogue box, where you can print the scanned whiteboard or save it as a PDF.
- To open the scanned whiteboard in the Photos app, select the Photos app icon in the upper left corner of the Camera app.
Customise settings
You can change the options for the Camera app in Settings, including camera settings, photo settings, and video settings. To change the settings:
- Open the Camera app.
- Select the Settings icon in the upper left corner of the Camera app.
- In the Settings window, the settings are divided into four categories:
|
Category |
Available settings |
|
Camera settings |
|
|
Photo settings |
|
|
Video settings |
|
|
Related settings |
Links to the Settings app for the following topics:
|
- Select a settings category to expand it and view all settings for that category.
- Change the settings under the appropriate category as desired.
You can use the touchscreen to zoom in or out on the photo.
- Zoom in: Use two fingers to pinch together.
- Zoom out: Use two fingers to spread them apart.
If your Windows device supports it, the Camera app may include latitude and longitude information when a photo is taken.
To include location information when a photo is taken:
- Select Start, then Settings> Privacy & Security> Location.
- Go to Privacy & Security > Location.
- Make sure that location services are enabled.
Important: Administrator access is required to enable location services.
- Make sure that Apps can access your location is enabled.
- In the list of apps under Apps, make sure that the camera is enabled.