Barcode scanner
Scoria A10X devices have an integrated high-performance barcode scanner from Zebra. With this reader, you can electronically process 1D and 2D barcodes of all types. In this section you will learn how to activate, set up and use the barcode scanner.
Using the barcode scanner
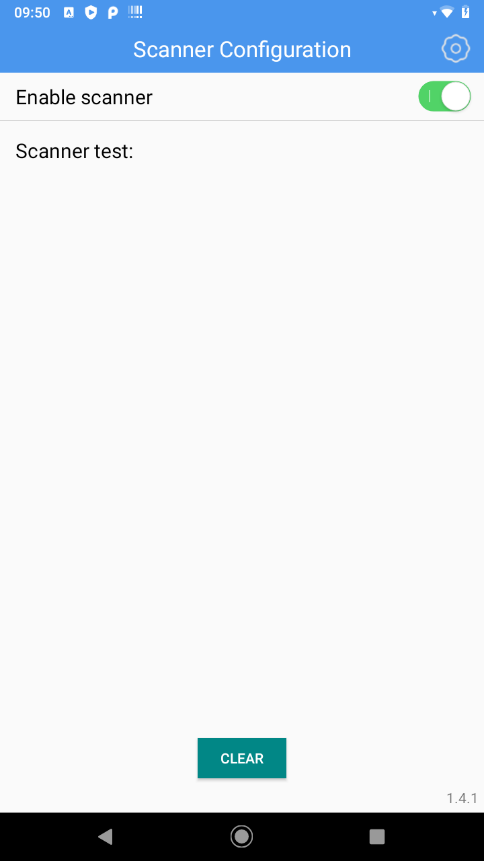
To activate the barcode scanner, start the "Scanner Configuration" application. It must run permanently in the background for the scan function to be active. Alternatively, a scan-enabled application is required. The device contains the SoftDecodeScan application, which allows the user to activate the imager, decode the barcode data and display the barcode content.The integrated barcode scanner in the Scoria A10X acts like a keyboard and can be triggered via the scan button. If the scan is successful, a beep sounds in the default configuration. However, the behavior can be configured in the settings.
- Make sure that an application is open on the device and a text field is in focus (text cursor in text field)
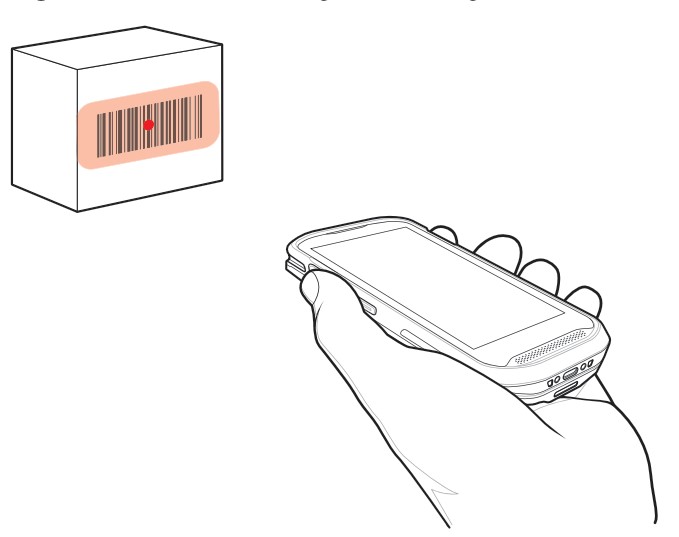
- Aim the output window on the top of the device at a barcode.
- Press and hold the scan button, the red LED aiming pattern will light up to help with aiming.
Automatic start of the barcode scanner at system startup
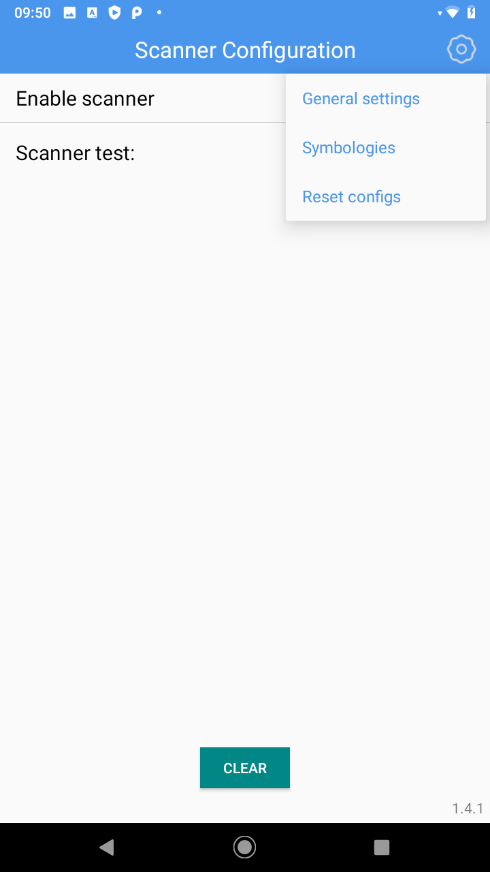
- In the Scanner Configuration app, tap the gear icon in the upper right corner.
- Then tap on "Setting
- Then tap on "Auto start Service" so that the toggle switch is highlighted in green.
The next time the device is started, the application will now start automatically.
This function was removed with the release of the Scanner Configuration App software version 1.2.9. The application now starts on the system side.
Make settings for prefix or suffix
- In the Scanner Configuration app, tap the gear icon in the upper right corner.
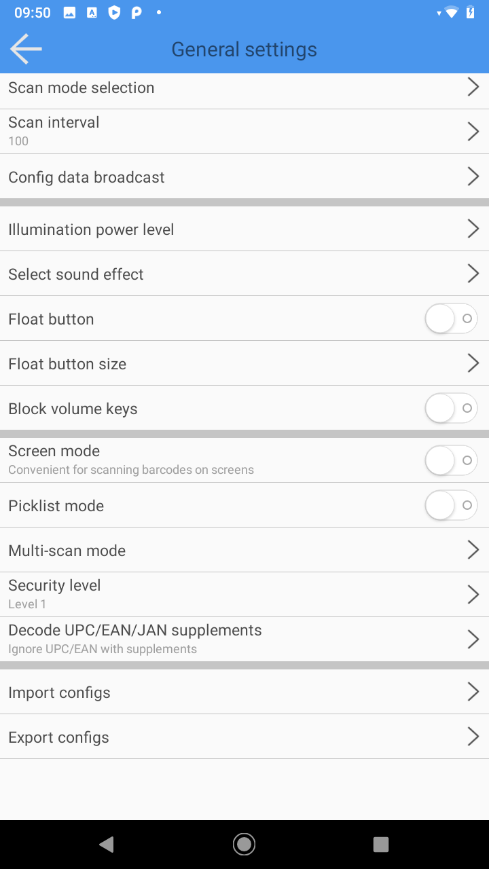
- Then tap on "General Settings
- Now tap on "Prefix Content" or "Suffix Content" and enter the corresponding values.
- Finally, confirm the entry by pressing "Sure".
Configure action after capturing the barcode
After a successful scan has been completed, a control signal can still be attached to the barcode. There are three ways to do this.
- Insert tabulator character before the barcode
- Insert tabulator character after the barcode
- Execute line break (Carriage Return / Enter) after the barcode
You can also combine tab and carriage return.
To make the settings, proceed as follows:
Insert tab character before or after the barcode.
- In the Scanner Configuration app, tap the gear icon in the upper right corner.
- Then tap on "General Settings
- Then tap on "Tab" and select the desired property:
- "Add in front" adds a tab control character in front of the barcode
- "Add behind" adds a tab control character after the barcode
- "Close" does not add a tab control character barcode
- Finally, confirm the input by pressing "Sure".
Execute line break (Carriage Return / Enter) after the barcode
- In the Scanner Configuration app, tap the gear icon in the upper right corner.
- Then tap on "General Settings
- Now tap on the toggle switch at "enter" so that it is highlighted in green.
Selection of the barcode types used
Disabling supported barcode types can be useful to increase the performance of the integrated scanner and reduce erroneous scans. To do this, proceed as follows:
- Open the "Scanner Configuration" app and tap on the gear icon in the upper right corner.
- Then tap on "Symbologies
- In the overview, select the barcode types you are using. The toggle on the right side is highlighted in green if the corresponding type is activated. Tap on the toggle switch to activate or deactivate the recognition.
The changes are applied immediately.
Confirmation of the successful reading process
To let you know when your barcode has been successfully captured, you can receive a confirmation from the Scoria A100. There is the option to receive a beep as well as a short vibration or both. To make these settings, proceed as follows:
- In the Scanner Configuration app, tap the gear icon in the upper right corner.
- Then tap on "General Settings
- To activate an acoustic notification Tap on the toggle switch at "sound" so that it is highlighted in green.
- To activate a haptic notification Tap on the toggle switch at "vibrate" so that it is marked green.
The changes are applied immediately.
Activate picklist mode
Picklist mode allows the digital scanner to decode only barcodes that are aligned under the exact LED aiming point. It allows the user to select and scan a single barcode from an array of barcodes.
- In the Scanner Configuration app, tap the gear icon in the upper right corner.
- Then tap on "General Settings"
- To enable Picklist Mode, tap the toggle switch at "Picklist Mode" so that
The changes are applied immediately.
Enable Multi Barcode Mode
The Multi Barcode Mode allows the digital scanner to capture multiple barcodes simultaneously. To make these settings, do the following:
- In the Scanner Configuration app, tap the gear icon in the upper right corner.
- Then tap on "General Settings
- Scroll down until you see the "Multi Decode Mode" line and tap on it. A new window will appear.
- To activate the Multi Barcode Mode tap on the toggle switch at "Multi Decode Mode" so that it is highlighted green.
- Tap on "Number of Multi Mode" to change the number of barcodes to be scanned simultaneously. The default value is 5.
- Tap on "SURE" to complete the process.
Configuration transfer to multiple devices
Setting up many devices at the same time can be annoying. There are two ways to transfer the configuration of the barcode scanner from one device to another:
- by means of a configuration file
- via a special configuration barcode
This function is only available as of version 1.4 of the Scanner Configuration App
Configuration transfer by means of a configuration file
To copy the configuration of one device to another device, proceed as follows:
- Open the Scanner Configuration App of the first device
- tap on the cogwheel symbol in the upper right corner
- tap on "General settings
- scroll down and select tap on the entry "Export configs" and tap on "OK"
- select a destination folder where you want to save the configuration by placing a checkmark to the right of the folder.
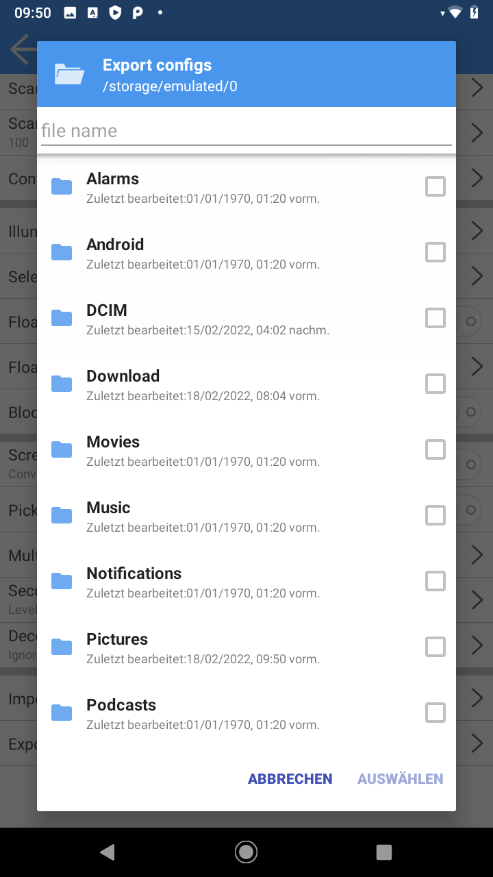
- Enter a file name in the upper part of the screen.
- Tap on Select at the bottom right to save the file. The saving is confirmed by the message "Export Completed".
- Now copy the file to the second device, e.g. via Bluetooth file transfer or using a USB stick.
- Open the Scanner Configuration App of the second device.
- Tap on the cogwheel symbol in the upper right corner.
- tap on "General settings"
- Scroll down and select tap on the "Import configs" entry
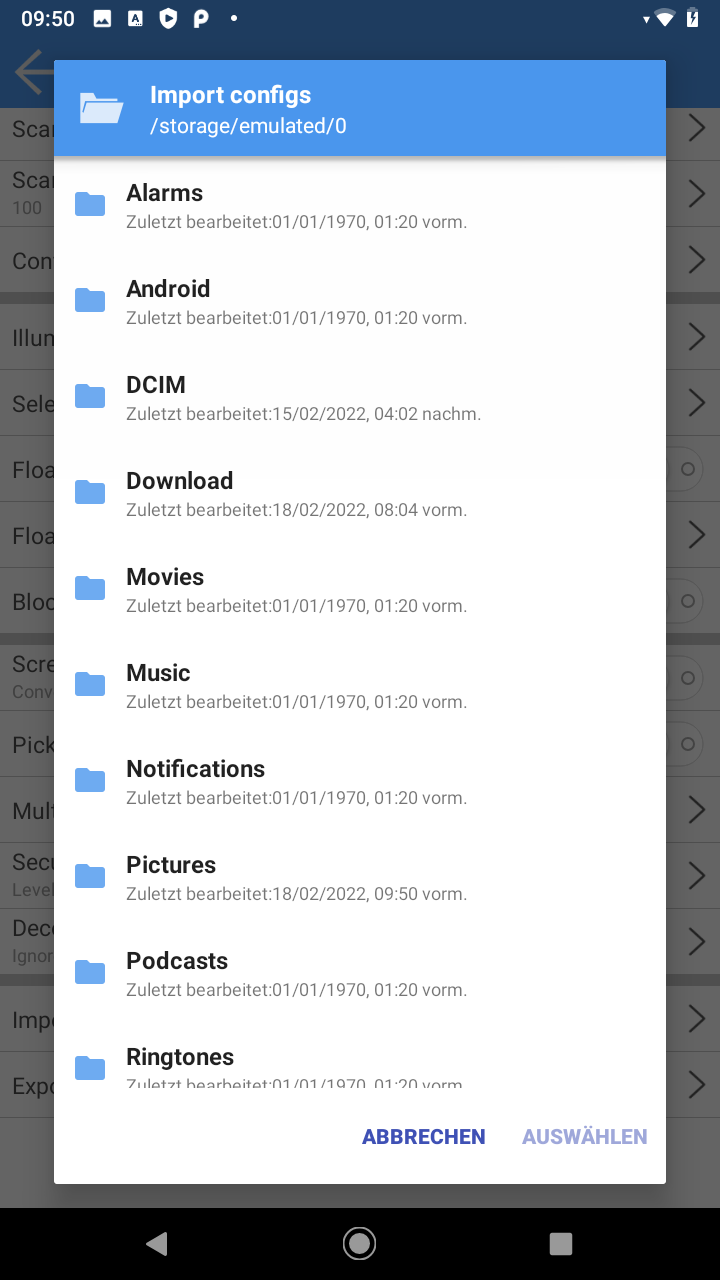
- then select the configuration file in the folder structure by placing a checkmark to the right of the file.
- Tap on Select at the bottom right to save the configuration. Saving is confirmed by the message "Import Completed".
Configuration transfer by means of a configuration barcode
To copy the configuration of one device to another device, follow these steps:
- open the Scanner Configuration App of the first device.

- tap on the cogwheel icon in the upper right corner
- tap on "General settings"

- scroll down and select tap on the entry "Export configs"
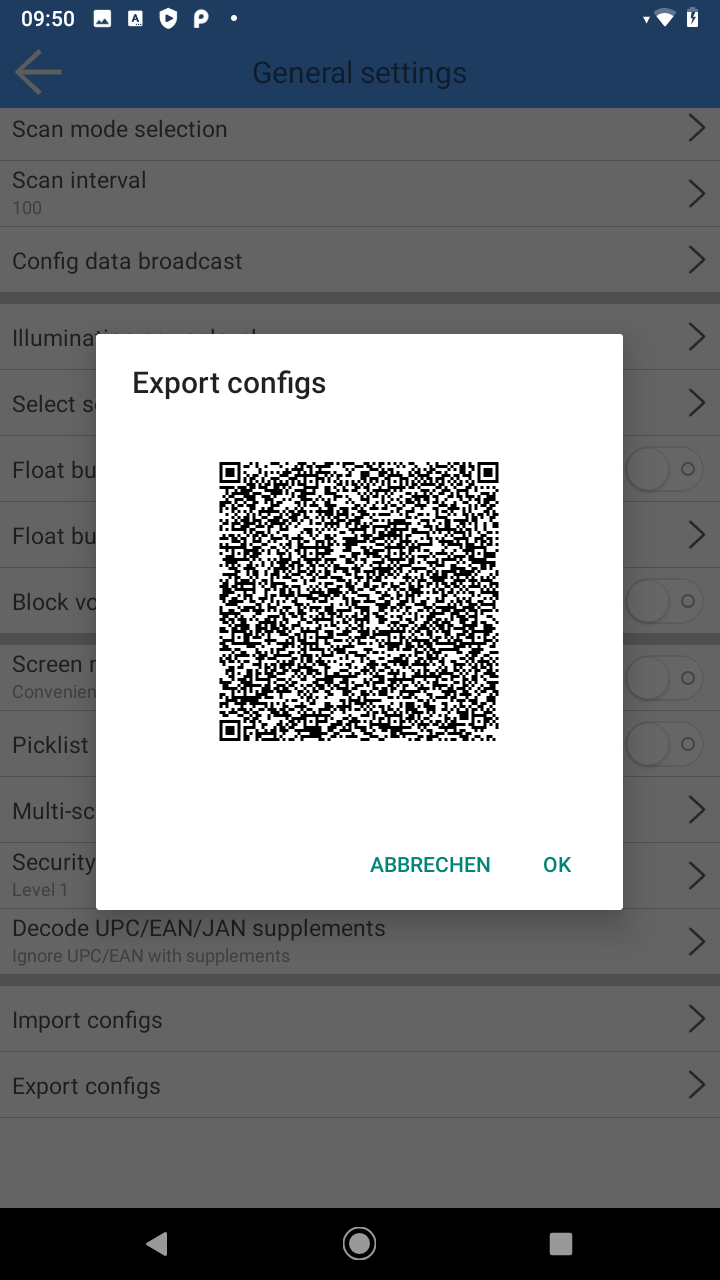
- now open the Scanner Configuration App on the second device and scan the displayed barcode.
Tip: Long press the on-off button until the menu appears and select "Screenshot" to create a screenshot for later use (e.g. for printing).