WLAN Configuration as client mode
Use the "WiFi Configuration Tool" to set up the product for use in an existing wireless network.
|
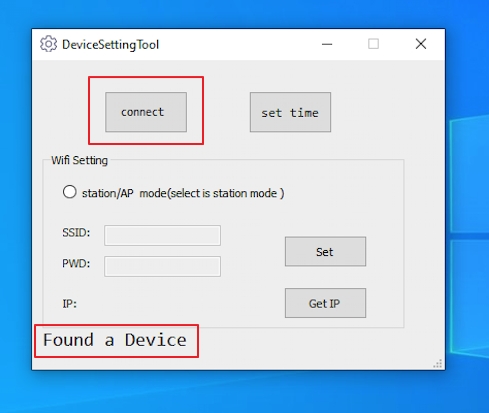
- Connect the product to the computer using a docking station or the USB port
- Start the "WiFi Configuration Tool" and click on Connect. If the connection is successful, the message "Found a device" appears in the lower area.
- Select "station/AP mode" to start the setup as WLAN client and fill in the
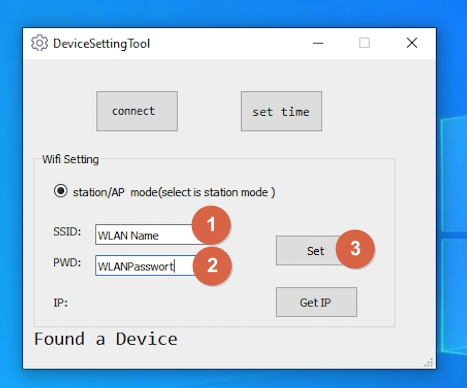
- SSID and the
- password in the fields an
- click on "Set" afterwards
-> The process may take a few seconds and is confirmed with an "OK" window: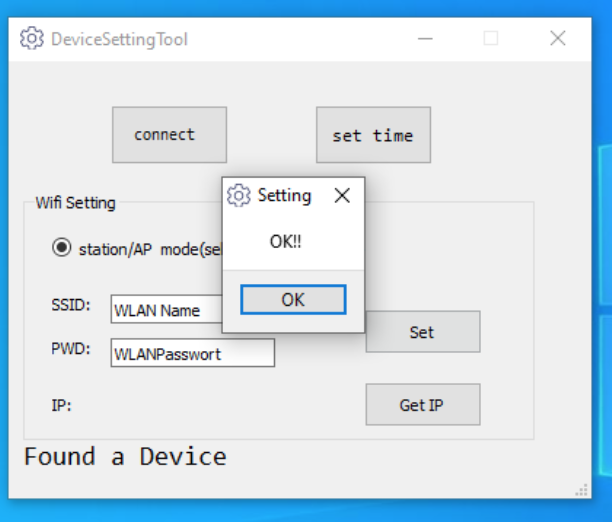
- Now take the product out of the charging station or remove the USB cable. The product will now switch off automatically.
- Now press the front key for a long time to switch on the device.
-> The green LED starts to light up. - Press and hold the photo button to activate the WLAN function.
-> The white LED starts to light up.
It can now take 10-20 seconds until the product has logged on to the router and an IP address has been assigned. - Re-connect the product to the computer using a docking station or the USB port.
- Start the "WiFi Configuration Tool" and click on Connect. If the connection is successful, the message "Found a device" appears in the lower area
- Click on "Get IP" to get the current IP address.
=> You can now access the camera's RTSP stream via the displayed IP address.