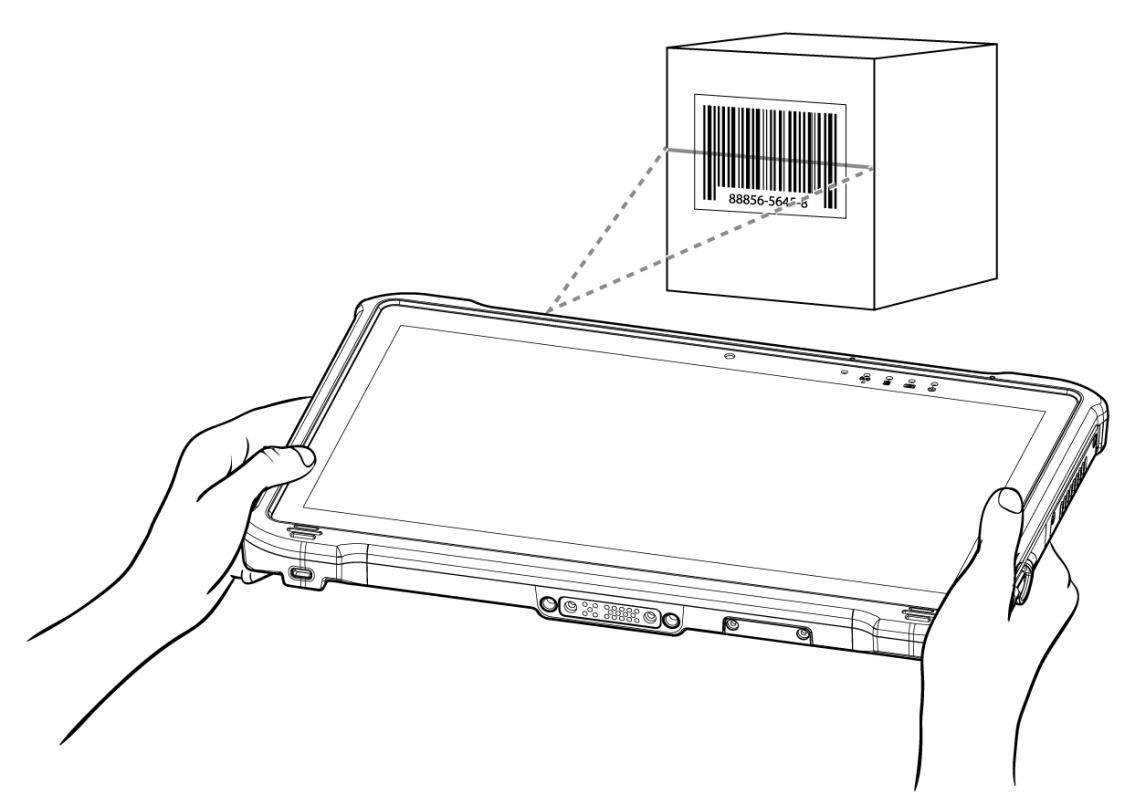
Using the barcode reader (Rocktab U212)
The 2D/1D barcode reader is optional and cannot be installed by the end user. To use this function, please ensure that the tablet PC has an integrated barcode reader before use.
To enable the barcode reader:
- Launch the HotTab utility
 .
. - Tap the Device ON/OFF button.
- Check the status color of the barcode icon
 :
:
Orange: Barcode reader is enabled. Reading must be triggered manually using the function key.
White: Barcode reader is disabled. - Open the application in which the barcode reader displays the scanned barcode.
- Trigger the barcode reader by pressing the F2 function key (function key is programmable and may vary depending on your settings).
Tap the Disconnect button to end the connection with the barcode reader. To reconnect, please tap the button again to reconnect to the barcode reader.
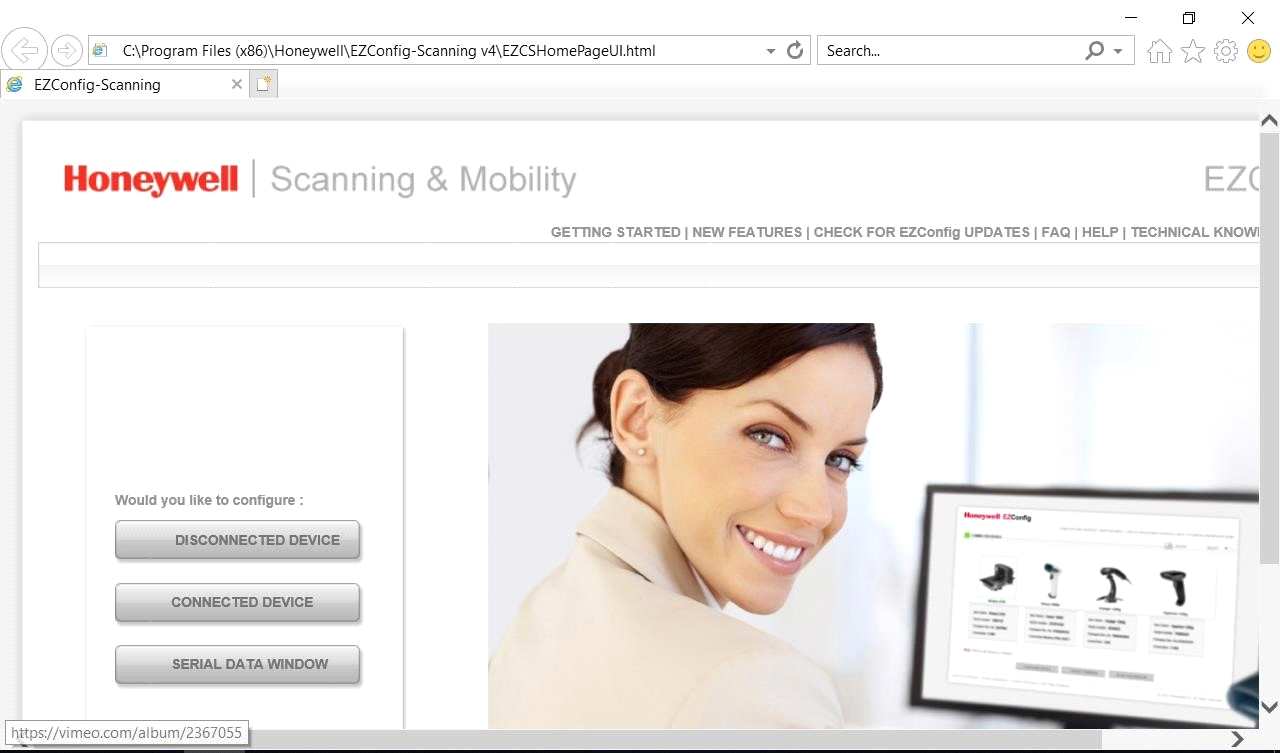
Device configuration and setting
- Click Windows
 and search for EZConfig scanning in the Start menu
 .
. - Click EZConfig-Scanning v4_IE and allow the blocked content if the browser blocks the content.
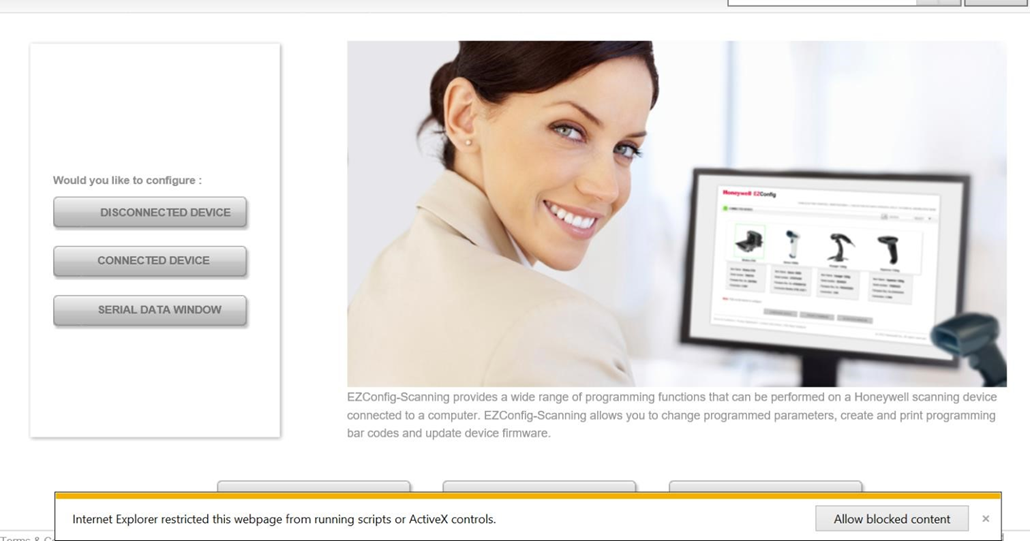
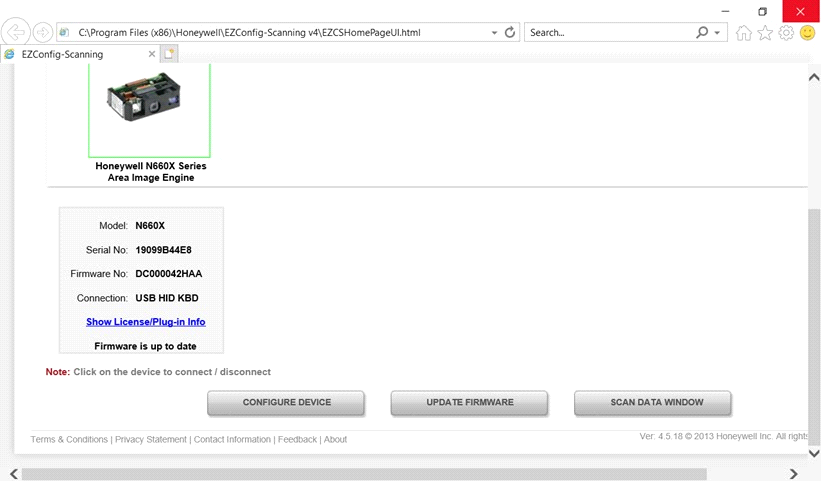
- Click the Connected Device icon and wait for the system to recognize the device (Honeywell N660X).
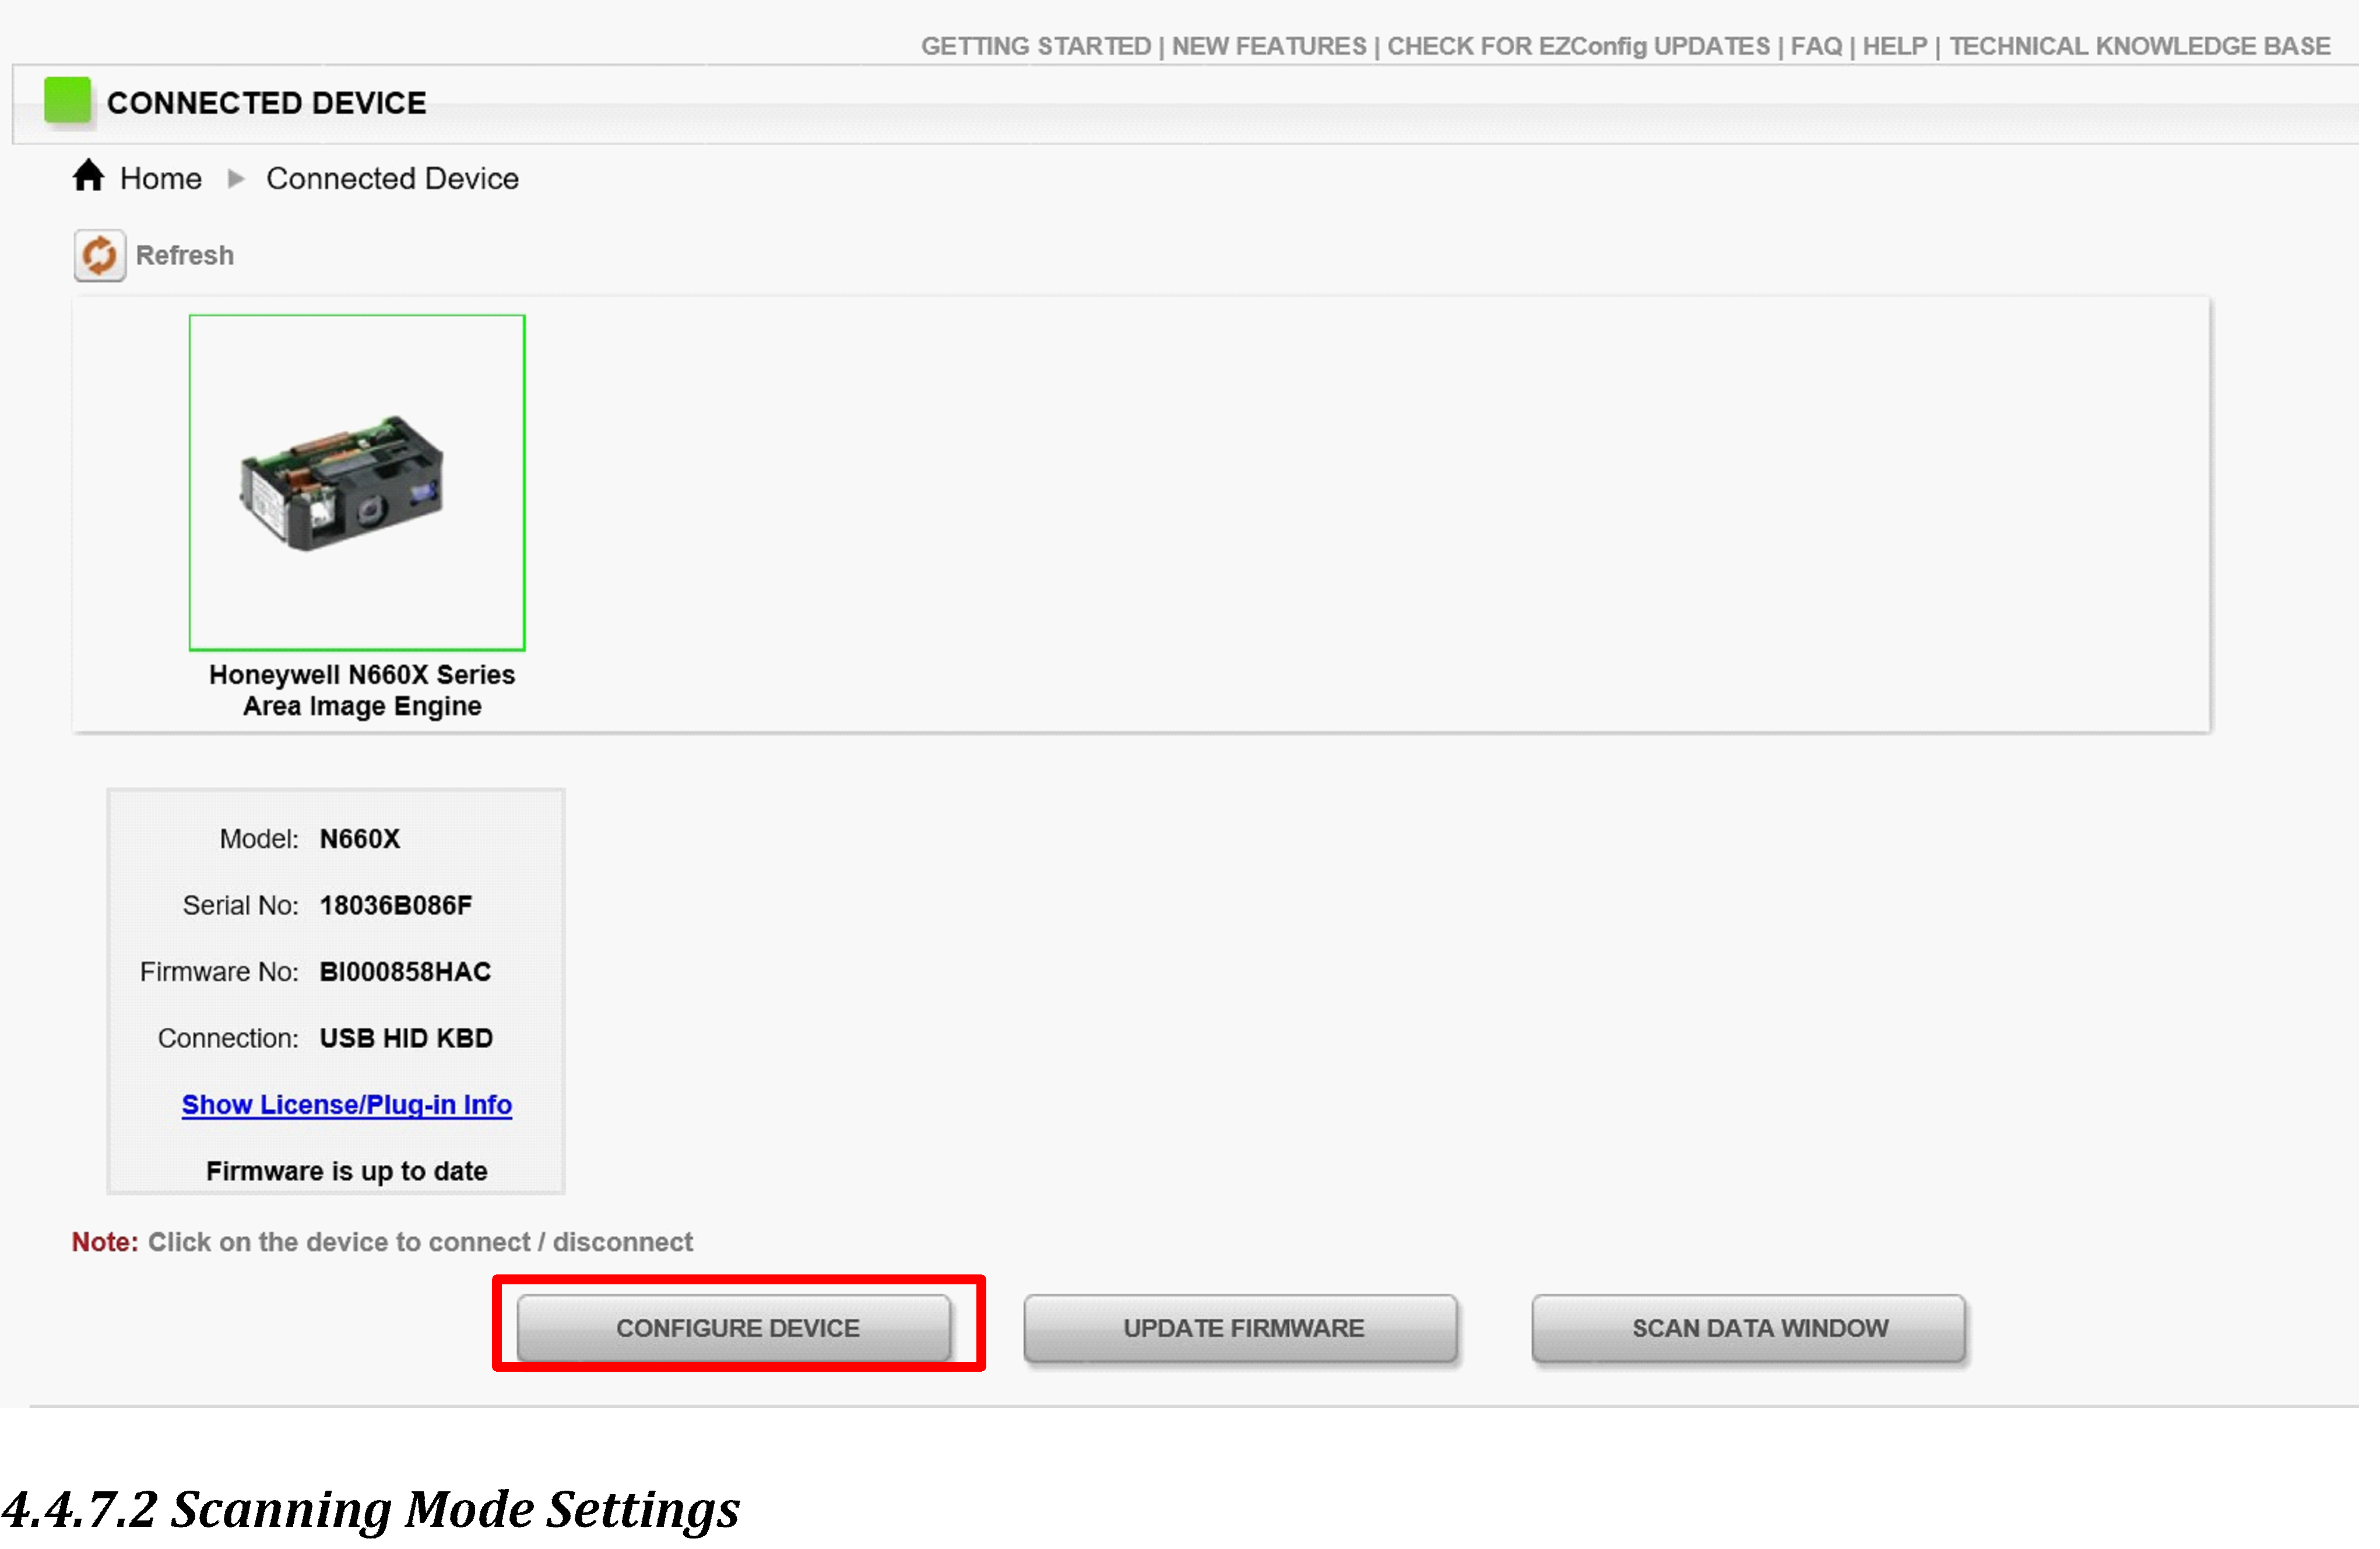
- Once Honeywell N660X is detected, click on the "Configure Device" button as shown.
Scan Mode Settings
- In the Input/Output Settings section, click Device Settings.
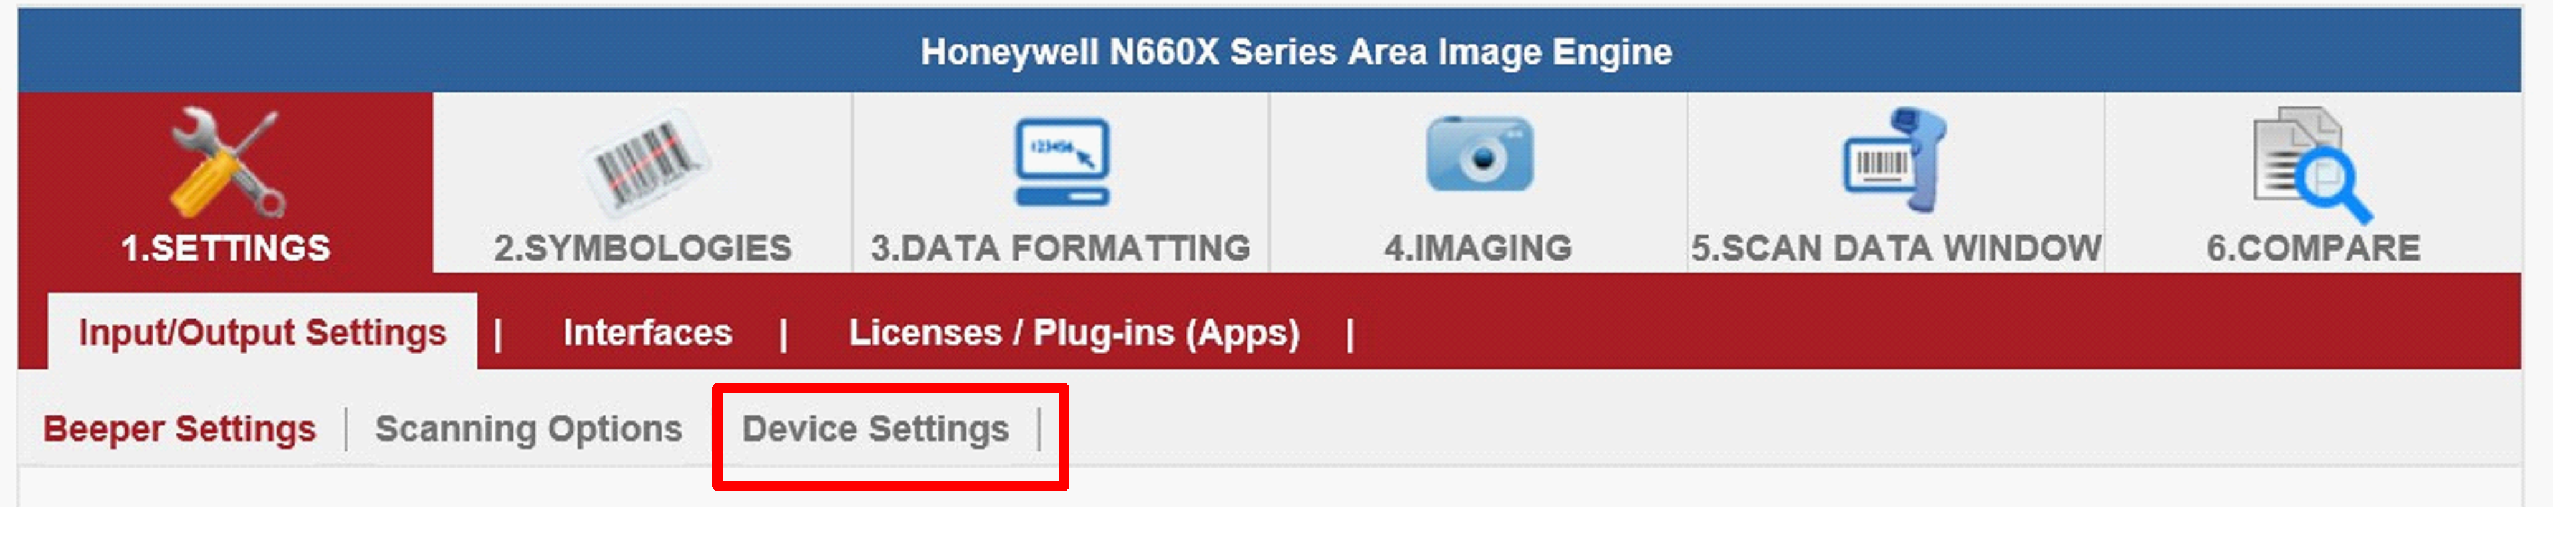
- Select the desired scan mode from the drop-down menu as shown below.

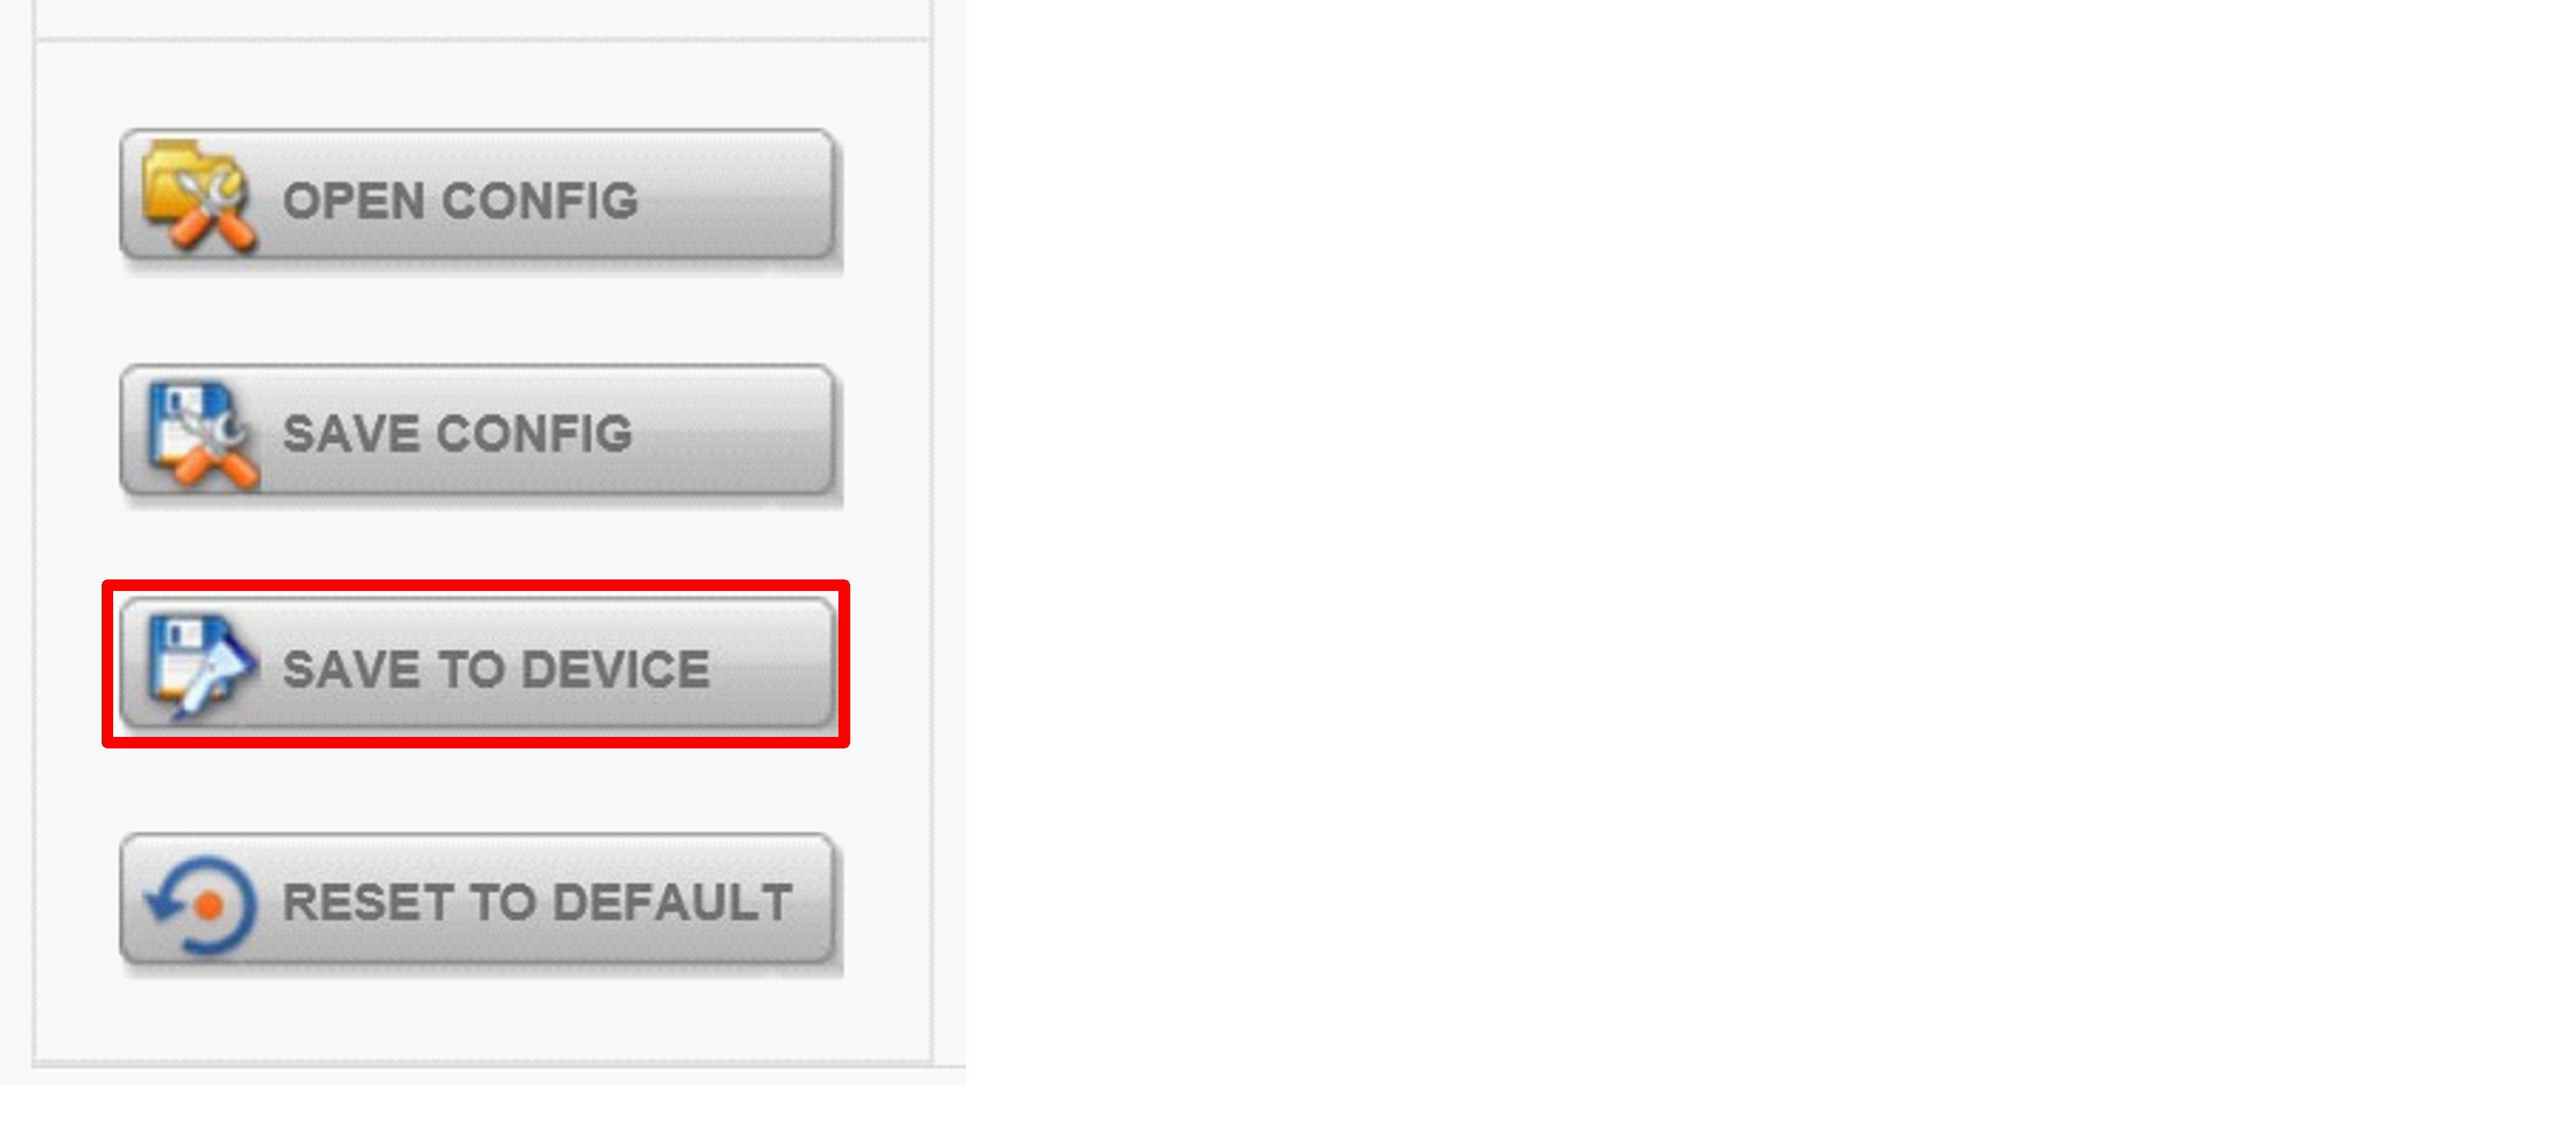
- After selecting a desired scan mode, click "Save to Device" in the sidebar.
|
Scan mode |
Description |
|
Manual Trigger |
In manual trigger mode, the scanner scans until a bar code is read or until the trigger is released. Two modes are available, Normal and Advanced. Normal mode provides good scanning speed and the longest working ranges (depth of field). Advanced mode gives you the highest possible scanning speed, but slightly less range than Normal mode. Advanced mode is best used when you need very high speed and do not need a large working area. Standard = Manual Trigger Normal. |
|
Presentation Mode |
Presentation mode uses ambient light and scan engine illumination to detect bar codes. In Presentation Mode, the LEDs remain dimmed until a bar code is presented to the scan engine, at which time the target device turns on and the LEDs illuminate to read the code. If the light level in the room is not high enough, presentation mode may not work properly. |
|
Streaming presentation mode |
In streaming presentation mode, the scan engine's aimer goes off after a short time, but the scan light stays on all the time to continuously search for bar codes. Two modes are available, Normal and Advanced. The Normal mode offers a good scanning speed and the longest working ranges (depth of the field). Advanced mode gives you the highest possible scanning speed, but slightly less range than Normal mode. Advanced mode is best used when you need a very high scanning speed and do not need a large working area. |
|
Host Notification Mode |
Host notification mode bypasses the decoder and notifies the host that there has been a hardware trigger pull. been a hardware trigger pull. In host notification mode, it is up to the host to initiate an image snap and/or an image ship command. It is also up to the Host to change to a different trigger mode. |
|
Snap and Ship mode |
Snap and Ship mode, allows you to bypass the decoder and send an image directly to the host. In this mode, one image at a time is captured and sent with each trigger pull instead of being sent to the decoder. Snap and Ship is useful if you are using your own decoder. |
Setting the 1D/2D Barcode Scanner Symbologies
The barcode scanner is shipped with the default settings shown below. If the default setting matches the usage, setting symbologies is not required.
Default settings for symbologies:
|
|
Symbology |
Standard Setting |
|
Linear |
UPC-A |
Activated |
|
UPC-E |
Activated |
|
|
EAN/JAN-8 |
Activated |
|
|
EAN/JAN-13 |
Activated |
|
|
UPC-E1 |
Not Active |
|
|
UPC-A/EAN-13 Extended Coupon Code |
Not Active |
|
|
GS1 DataBar Omni-Directinal |
Activated |
|
|
GS1 DataBar Limited |
Activated |
|
|
GS1 DataBar Expanded |
Activated |
|
|
Code 39 |
Activated |
|
|
Code 128 |
Activated |
|
|
ISBT 128 |
Not Active |
|
|
GS1-128 |
Activated |
|
|
Interleaved 2 of 5 |
Activated |
|
|
Matrix 2 of 5 |
Not Active |
|
|
NEC 2/5 |
Activated |
|
|
IATA 2/5 |
Not Active |
|
|
Code 2/5 |
Not Active |
|
|
Codabar |
Activated |
|
|
Code 93 |
Activated |
|
|
Code 11 |
Not Active |
|
|
MSI |
Not Active |
|
|
Telepen |
Not Active |
|
|
Trioptic Code |
Not Active |
|
|
Postal Code |
Not Active |
|
|
Planet Code |
Not Active |
|
|
Korea Post |
Not Active |
|
|
China Post |
Not Active |
|
|
Australian Post |
Not Active |
|
|
2D |
Data Matrix |
Activated |
|
PDF 417 |
Activated |
|
|
Micro PDF 417 |
Activated |
|
|
Codablock A |
Not Active |
|
|
Codablock F |
Not Active |
|
|
Maxicode |
Not Active |
|
|
QR Code |
Activated |
|
|
Aztec |
Activated |
|
|
Composite Code |
Not Active |
|
|
Han Xin |
Not Active |
Changing the default setting of symbologies or the advanced setting.
There are two methods to change the default setting of symbologies  or other advanced settings:
Method (1). Click Symbologies at the top, then you can reset the Symbology back to default setting or make advanced setting by category. After setting, click the "Save to Device" on the sidebar.
Method (2). Click the reset to default button on the sidebar as shown in the figure:
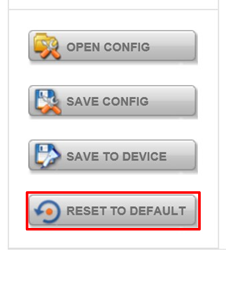
Important: The "Reset to default" button, resets all settings to default.
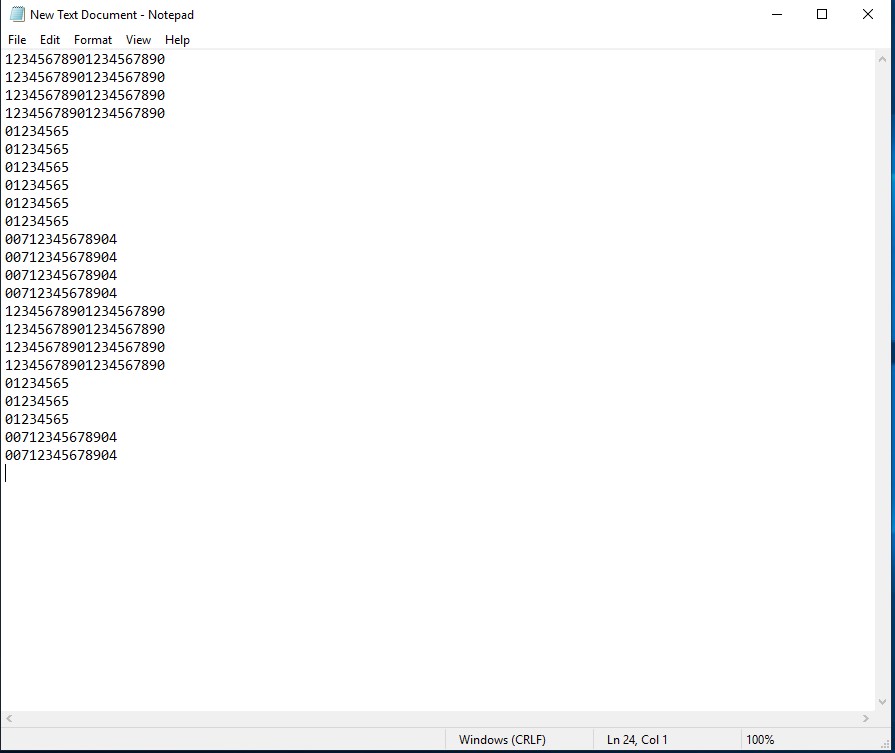
If the N660X bar code scanner loses connection to the system, scan the bar codes below using the following steps.
- Scan the USB HID barcode:

- Then scan the USB keyboard barcode:
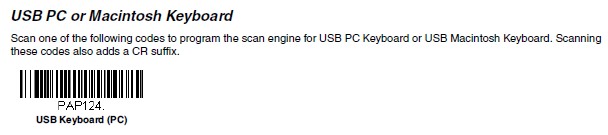
- Run EZConfig scanning again by following Device Configuration and Setup.
Adding a prefix or suffix.
- To add a prefix or suffix, please click on "Data Formatting".
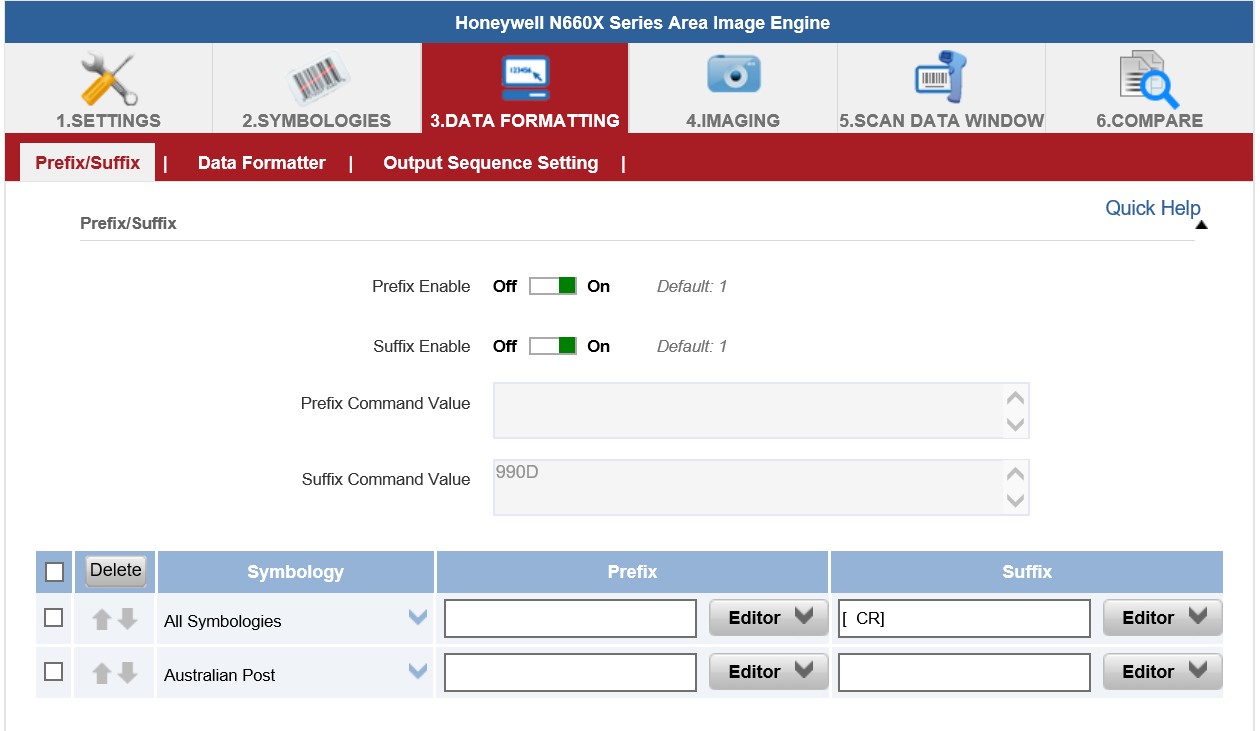
- Click the Editor button under the Prefix or Suffix section and create a prefix/suffix value by typing in the block or selecting desired characters in the Control Characters, Printable Characters, and Extended ASCII File. As shown below:
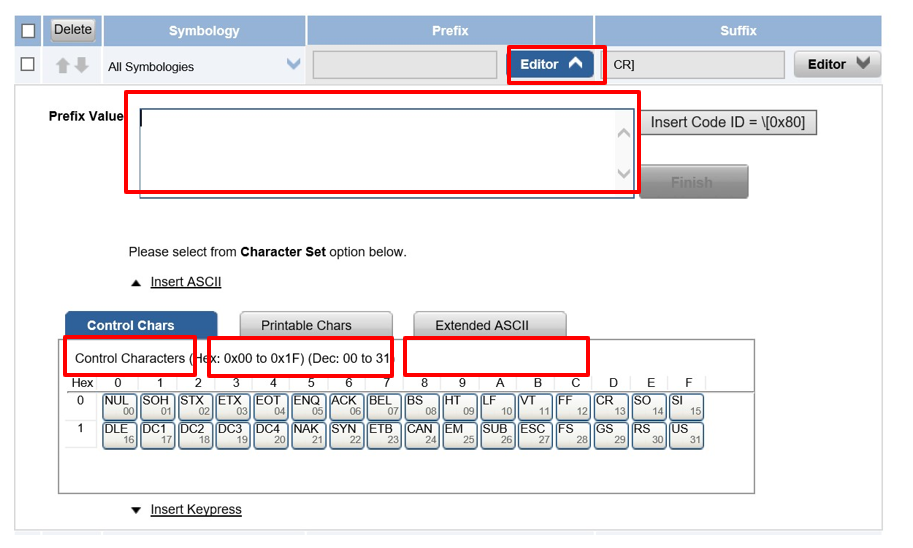
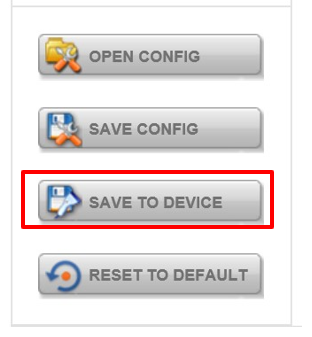
- When you are done creating prefix/suffix, please click Save to Device on the sidebar.
- To check the functionality of Prefix/Suffix, please click the "Scan Data Window" icon at the top. Then scan a barcode to check if the prefix/suffix is displayed correctly.

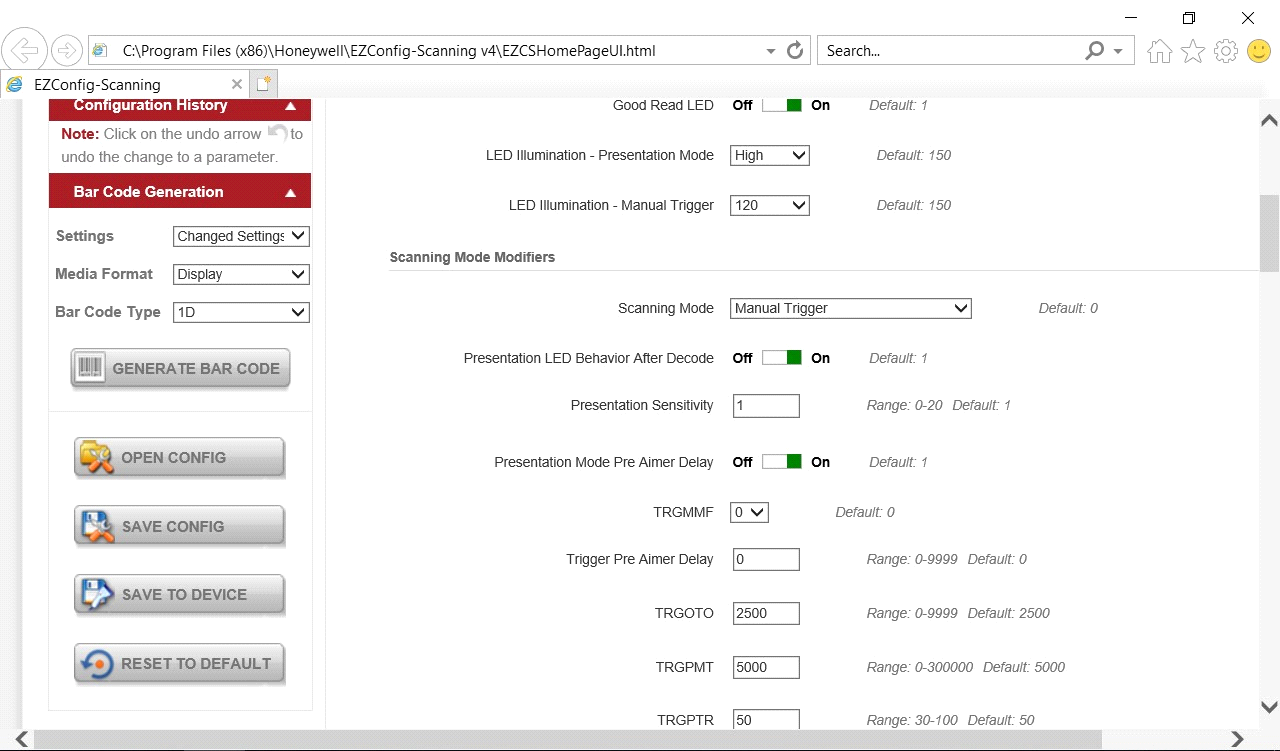
Setting the LED brightness
- Open EZConfig-Scanning V4_IE
- Click on Connected Device
- Then click on Configure Device
- Click Settings 🡪 Device Settings 🡪 at LED illumination - Manuel Trigger change the value to 120
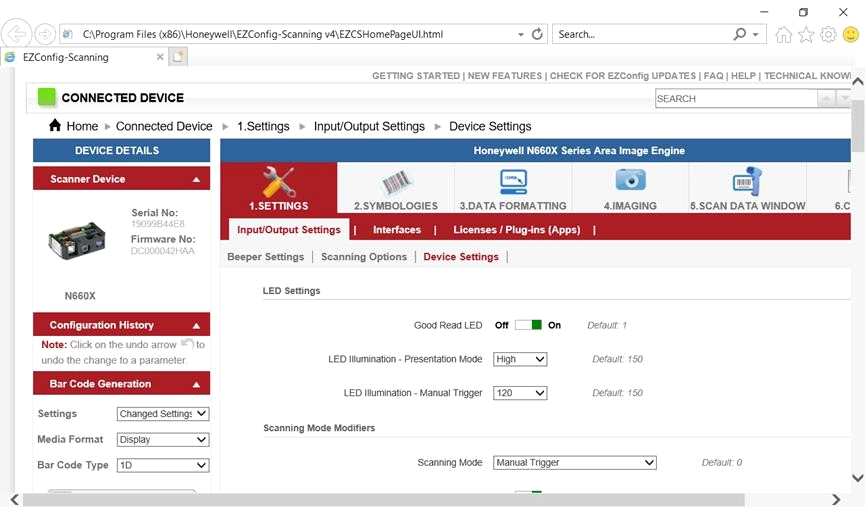
- Click on "Save to device" to save the settings
- Click on Device Control and click Barcode Scanner Wedge on "OFF" to switch off the Barcode Scanner Wedge.
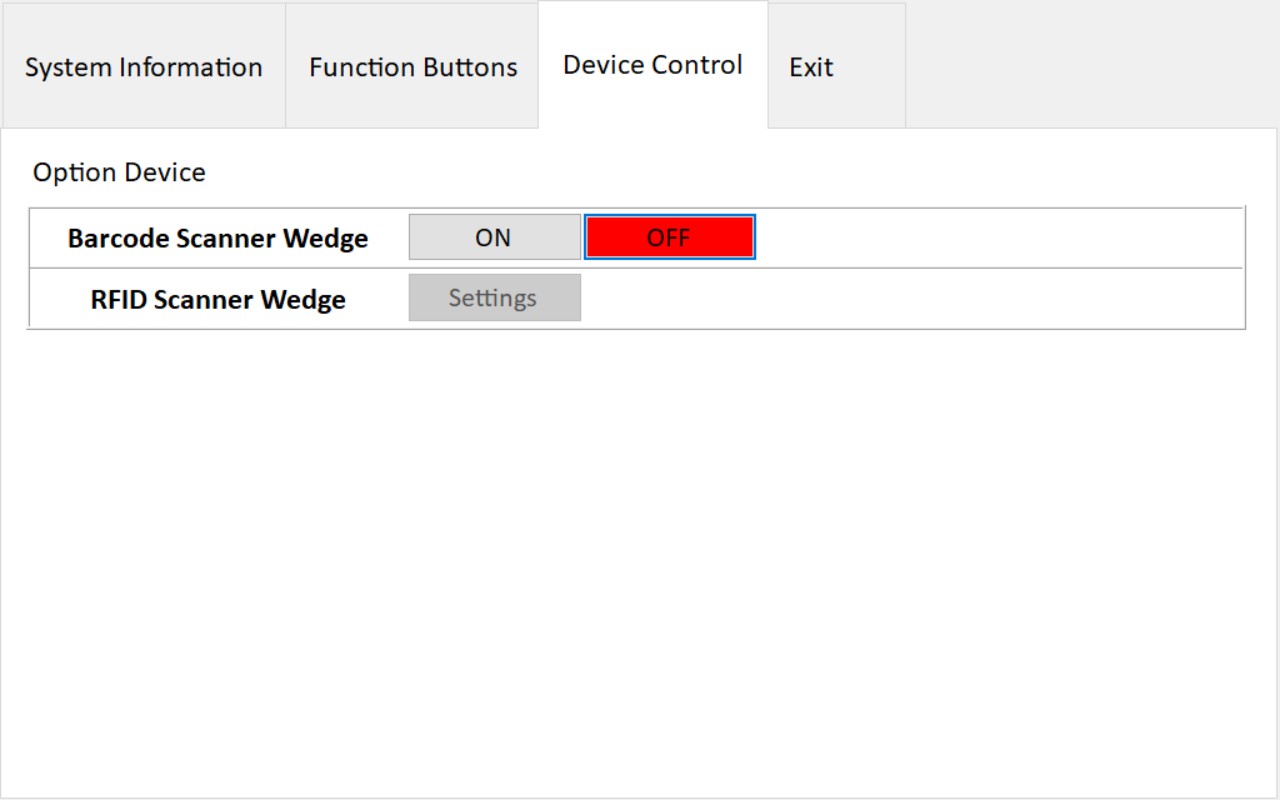
- Click "On" to turn on the barcode scanner wedge again
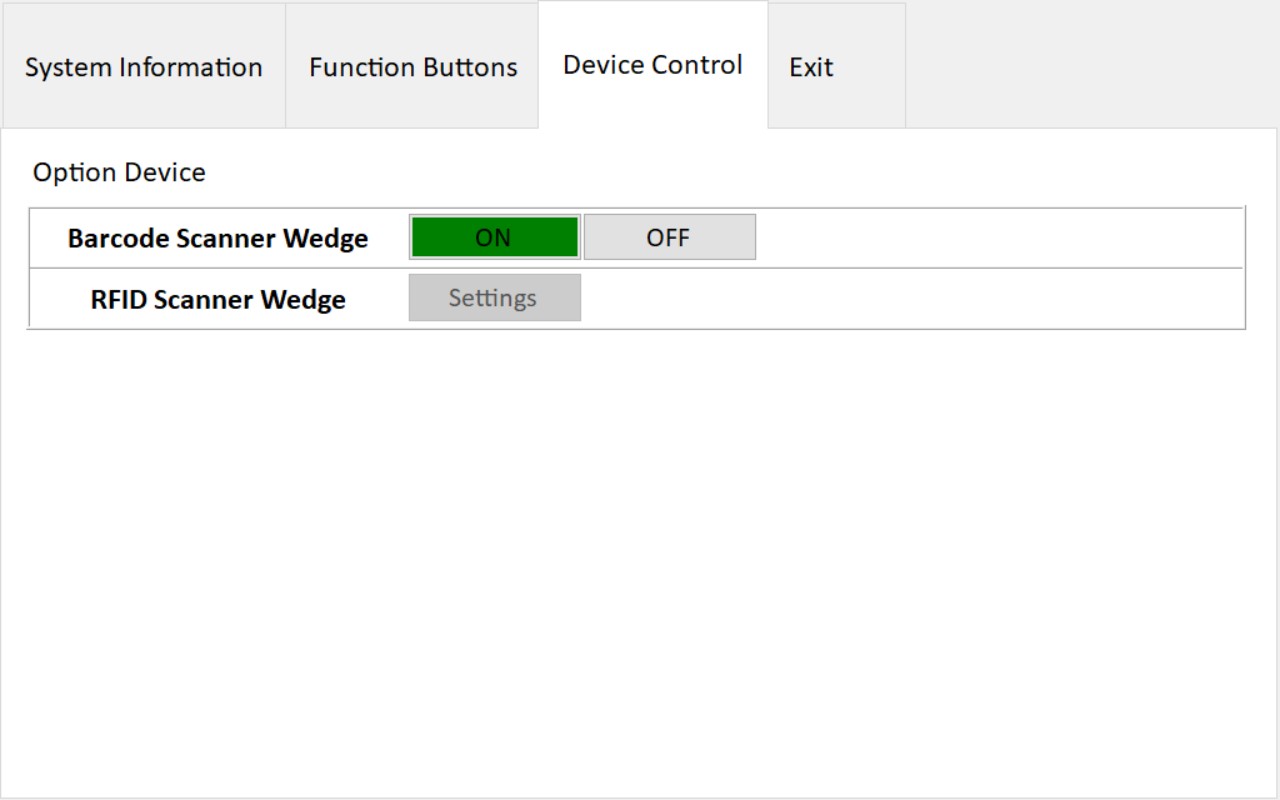
- Open a text editor and scan some barcodes to test it