First start U210
Before using the product for the first time and before using it in everyday life, read the following instructions. This chapter provides information on the correct installation, connection and use of the product.
|
Hint: Items not included in the delivery are sold separately. |
|
HINT |
|
|
|
Damage of the display Do not place heavy objects on the computer, this could damage the display. |

|
Hint: Before connecting the product to a power outlet, make sure that the power cord is not pinched or damaged. Also make sure that the power output is within the voltage range of the product. |
First start
To put the Rocktab U210 into operation, proceed as follows:
- Install the SIM card.
- Install the memory card.
- Install the battery.
- Charge your tablet.
- Start up the tablet.
|
|
|
|
|
Disconnect all cables from the tablet computer before installing or removing the battery. |


Installing the SIM card
Please note that the 4G LTE function is optional and may not be supported by your device. Check your order specifications for more details. A SIM card in NanoSIM format is required. Other SIM formats are not compatible with the tablet computer.
How to install the SIM card:
- Open the protective cover (number 5 in the diagram)
- To open the SIM card compartment, insert a paper clip or a SIM tool into the hole next to the SIM card tray. Carefully press the paper clip into the Rocktab U210, to be able to remove the SIM card tray.
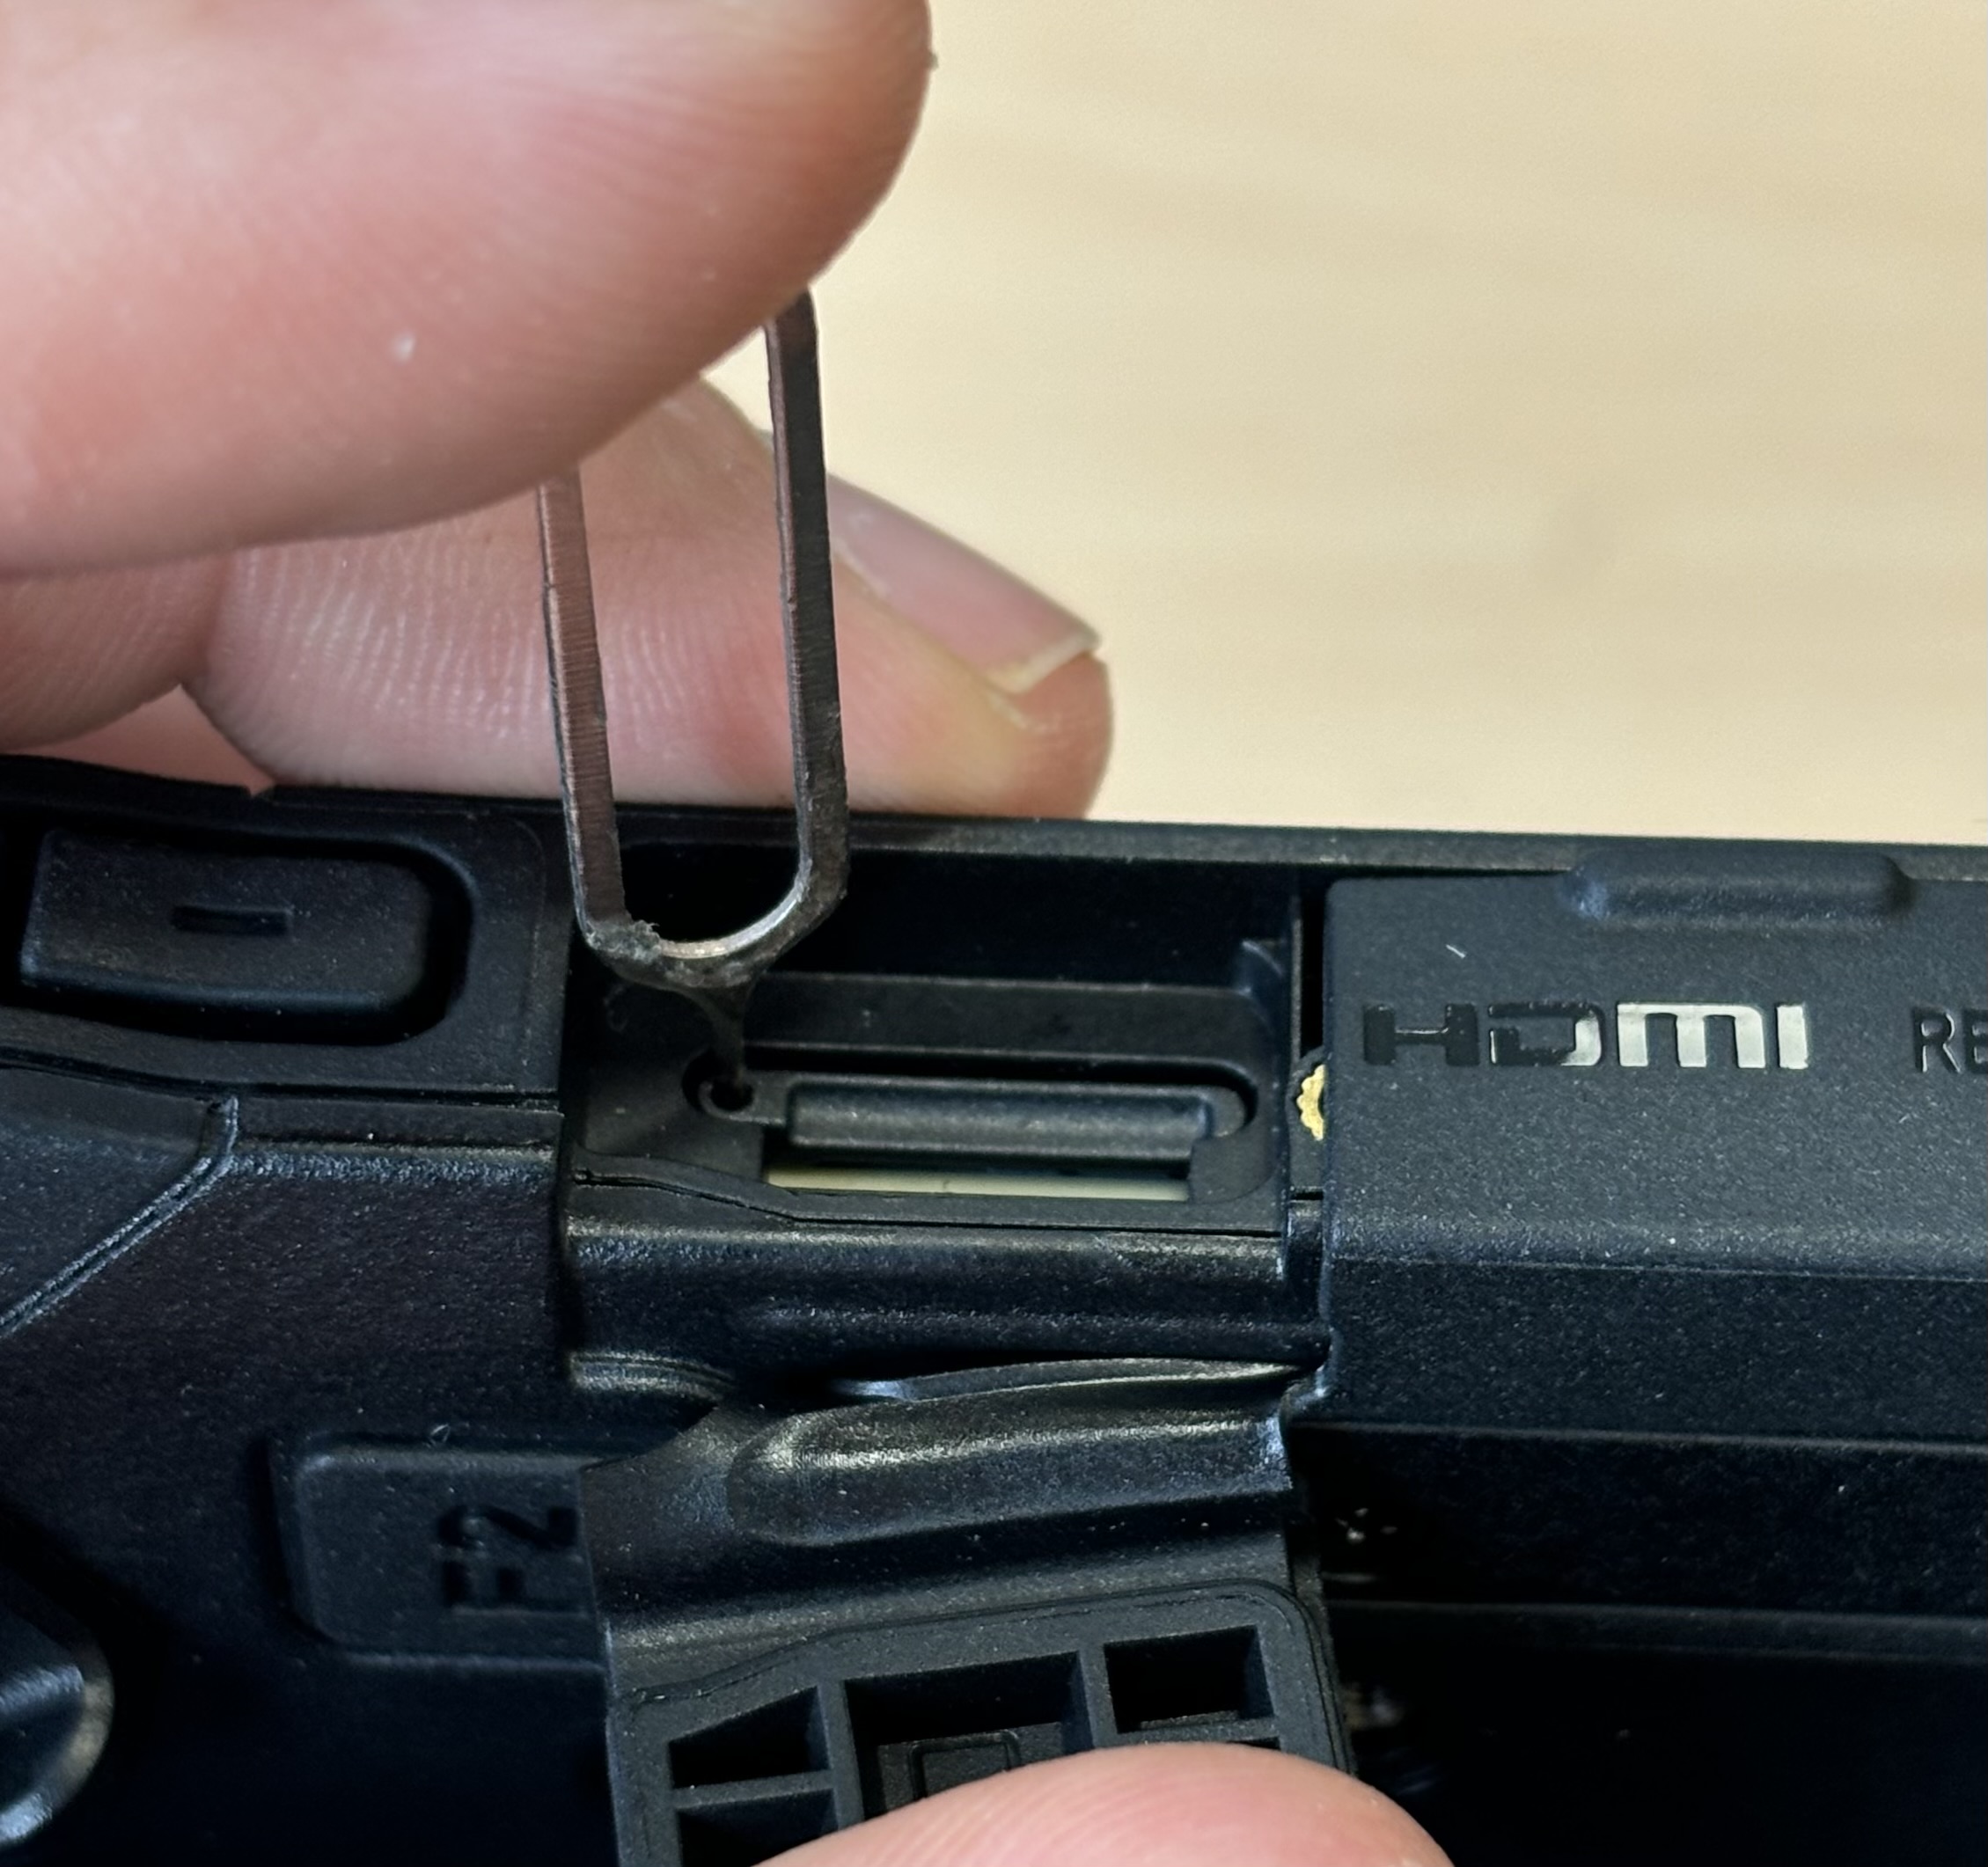
- Insert the SIM card into the SIM card tray with the contacts facing the display.
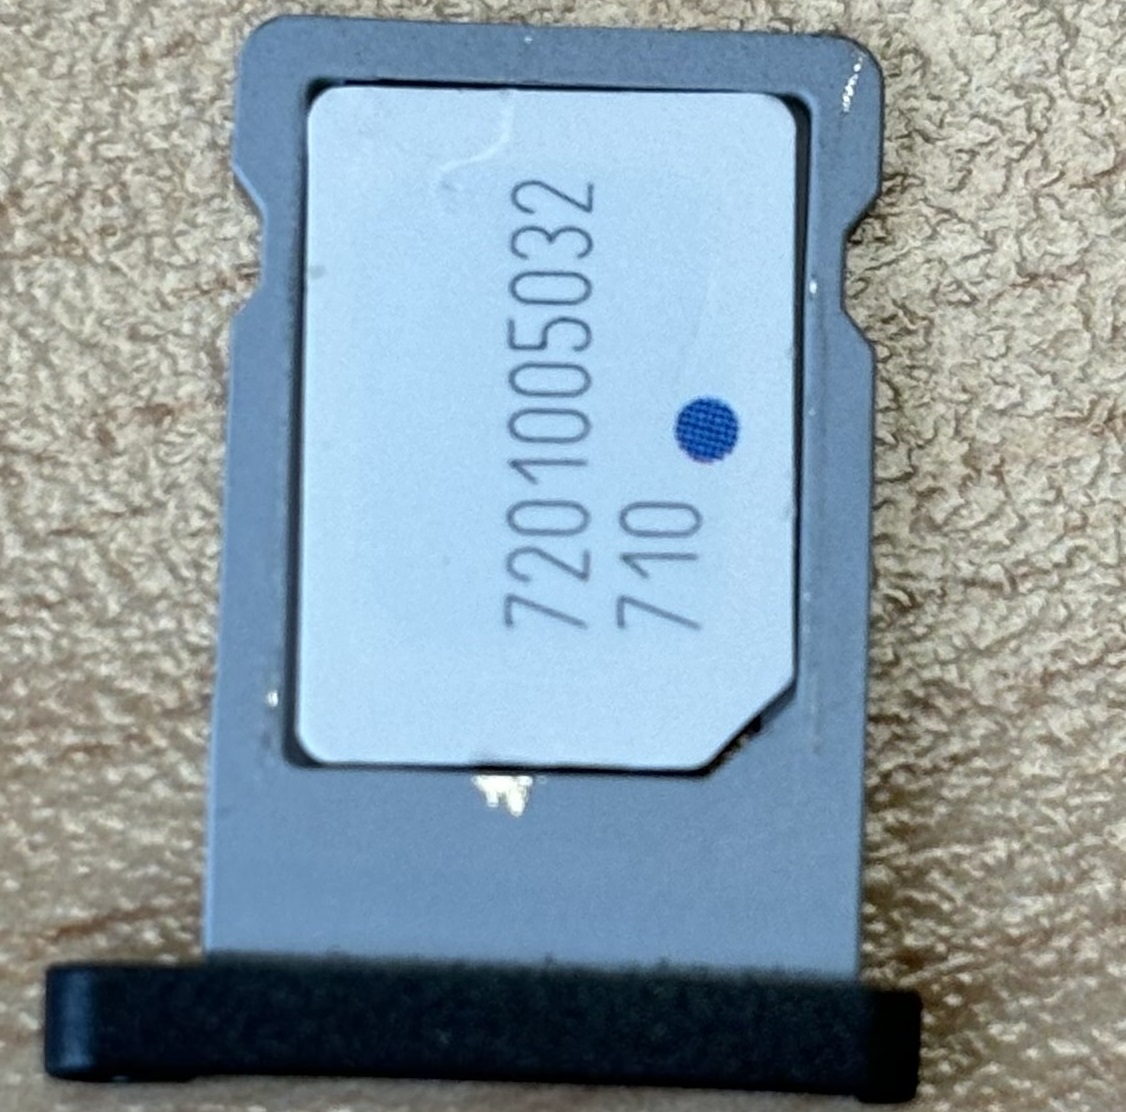
- Push the SIM card tray with the SIM card back into the slot until you feel the SIM card tray click into place.
- Close the protective cover.
How to remove the SIM card:
- Open the protective cover (number 5 in the diagram)
- To open the SIM card compartment, insert a paper clip or a SIM tool into the hole next to the SIM card tray. Carefully press the paper clip into the Rocktab U210, to be able to remove the SIM card tray.
- Remove the SIM card from the SIM card tray.
- Push the SIM card holder back into the slot until you feel it click into place.
- Close the protective cover.
Installation of the memory card
Your tablet supports additional memory with an optional MicroSDXC card.
How to install the MicroSDXC card:
- Open the protective cover (number 5 in the diagram) to expose the SD card slot (see picture for the exact position).
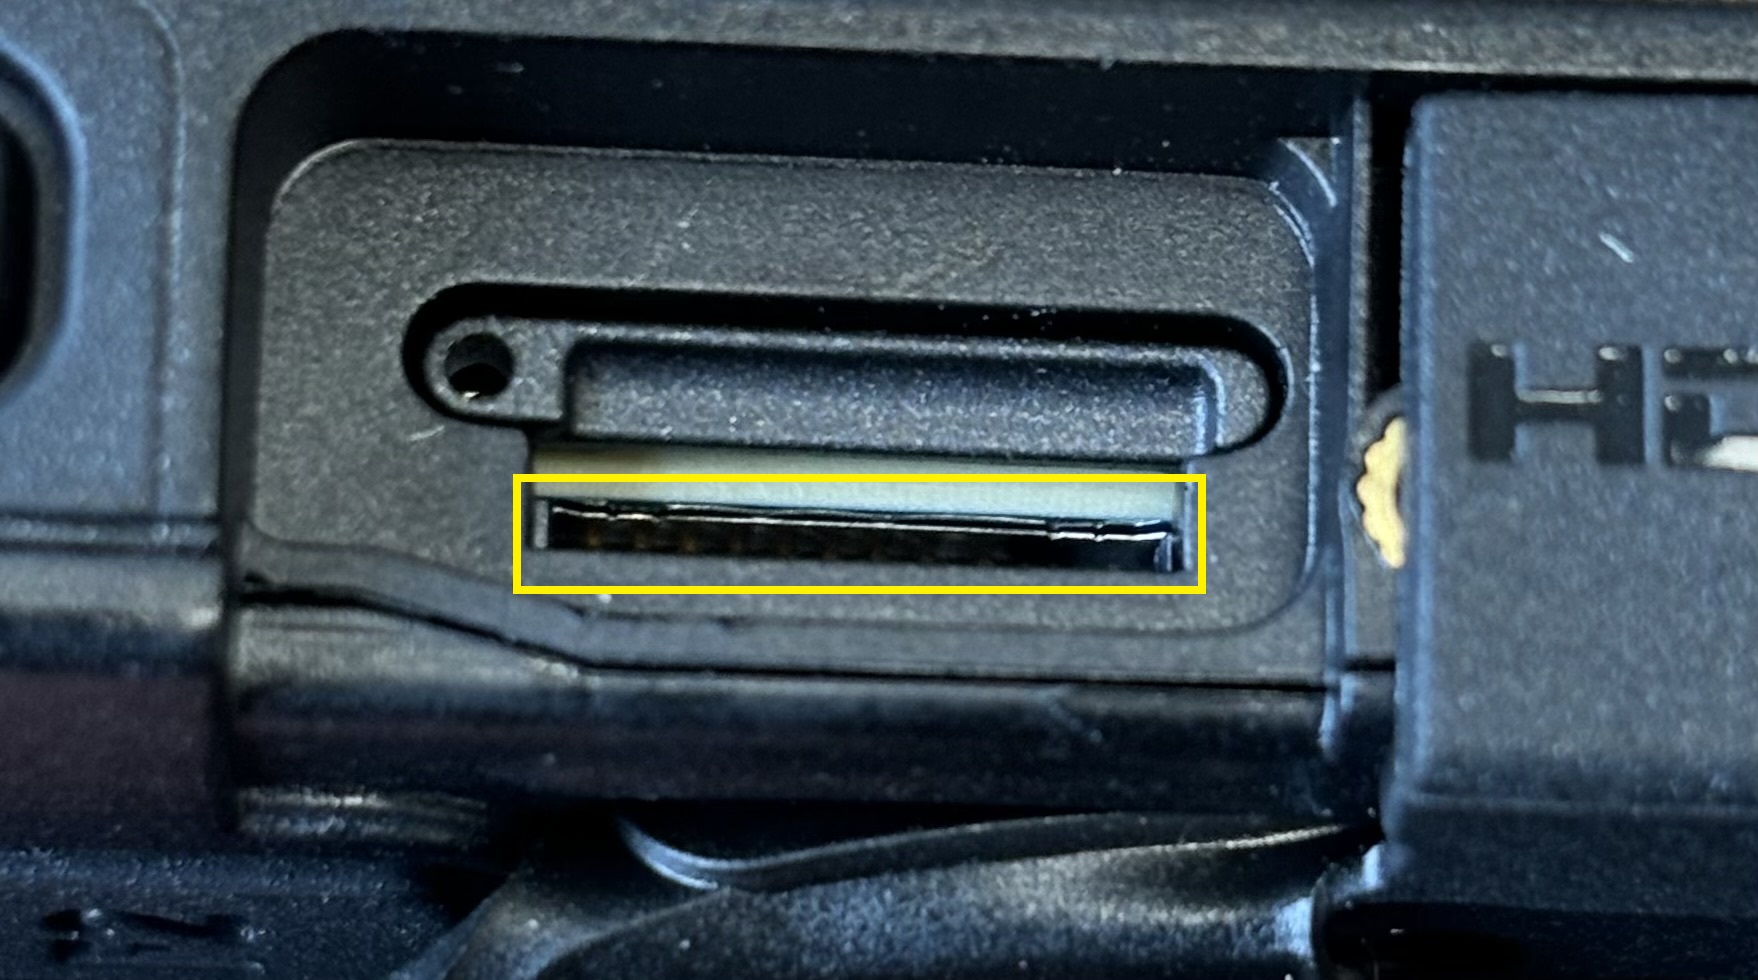
- Insert the micro SDXC card into the slot with the contacts facing the back (see image).
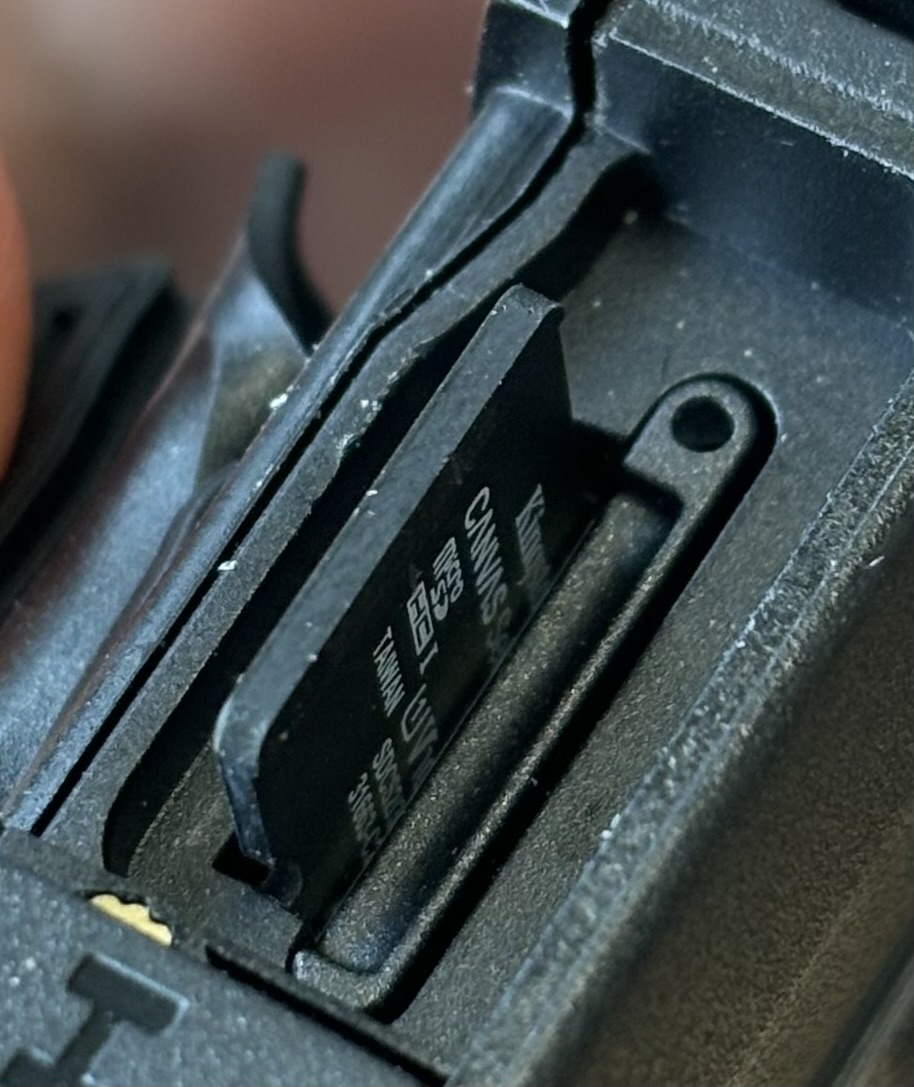
- Push the SD card into the tablet until you feel it click into place.
- Close the protective cover.
How to remove the MicroSD card:
- Open the protective cover (number 5 in the diagram)
- Briefly press on the micro SD card to unlock it
- Pull out the micro SD card.
Installing the battery
To install the battery, proceed as follows:
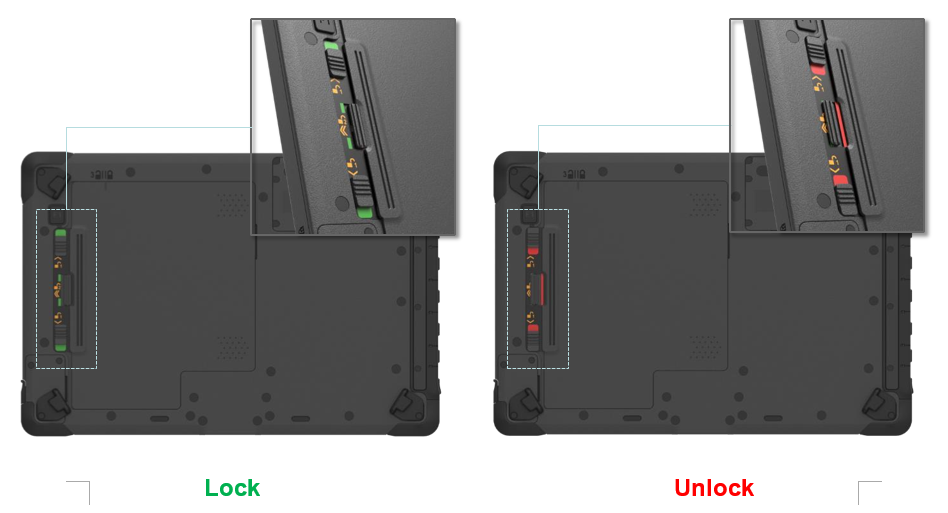
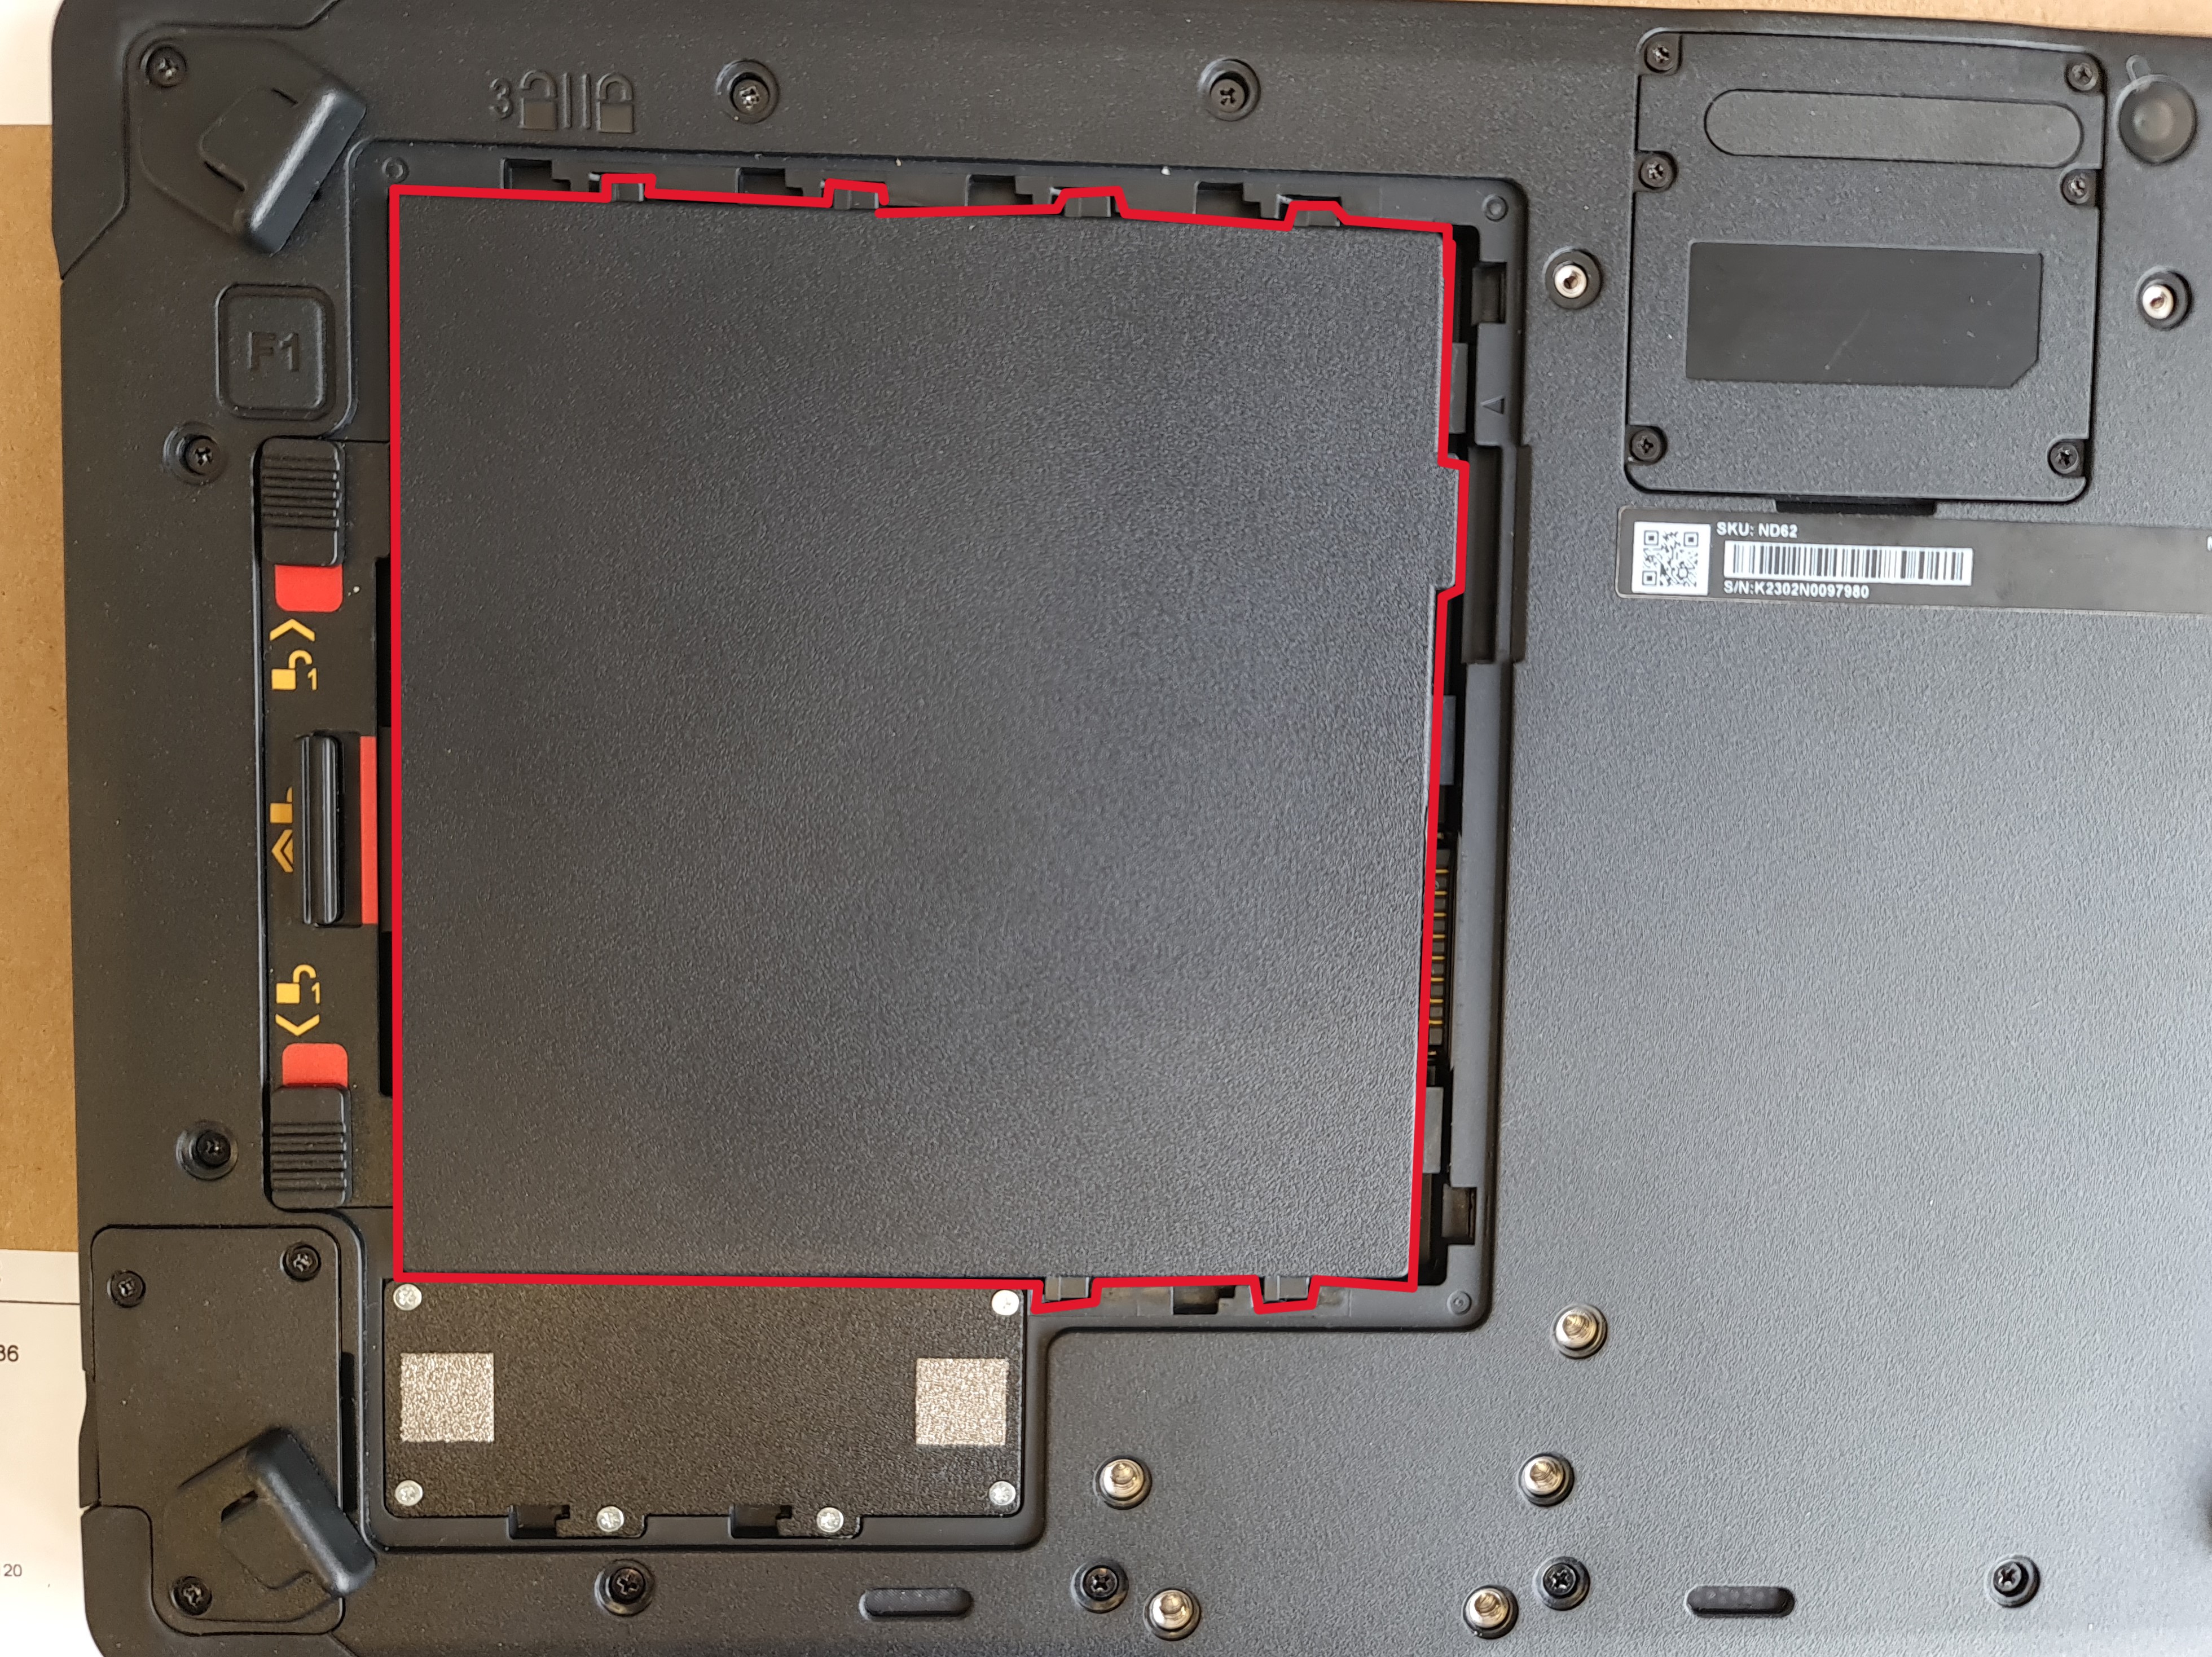
- Unlock the two battery locking tabs (number 4 in the operating and display elements diagram) marked 1. When these are unlocked, you will see a red mark.
- Unlock the battery cover tab marked 2. When these are unlocked, you will see a red mark.
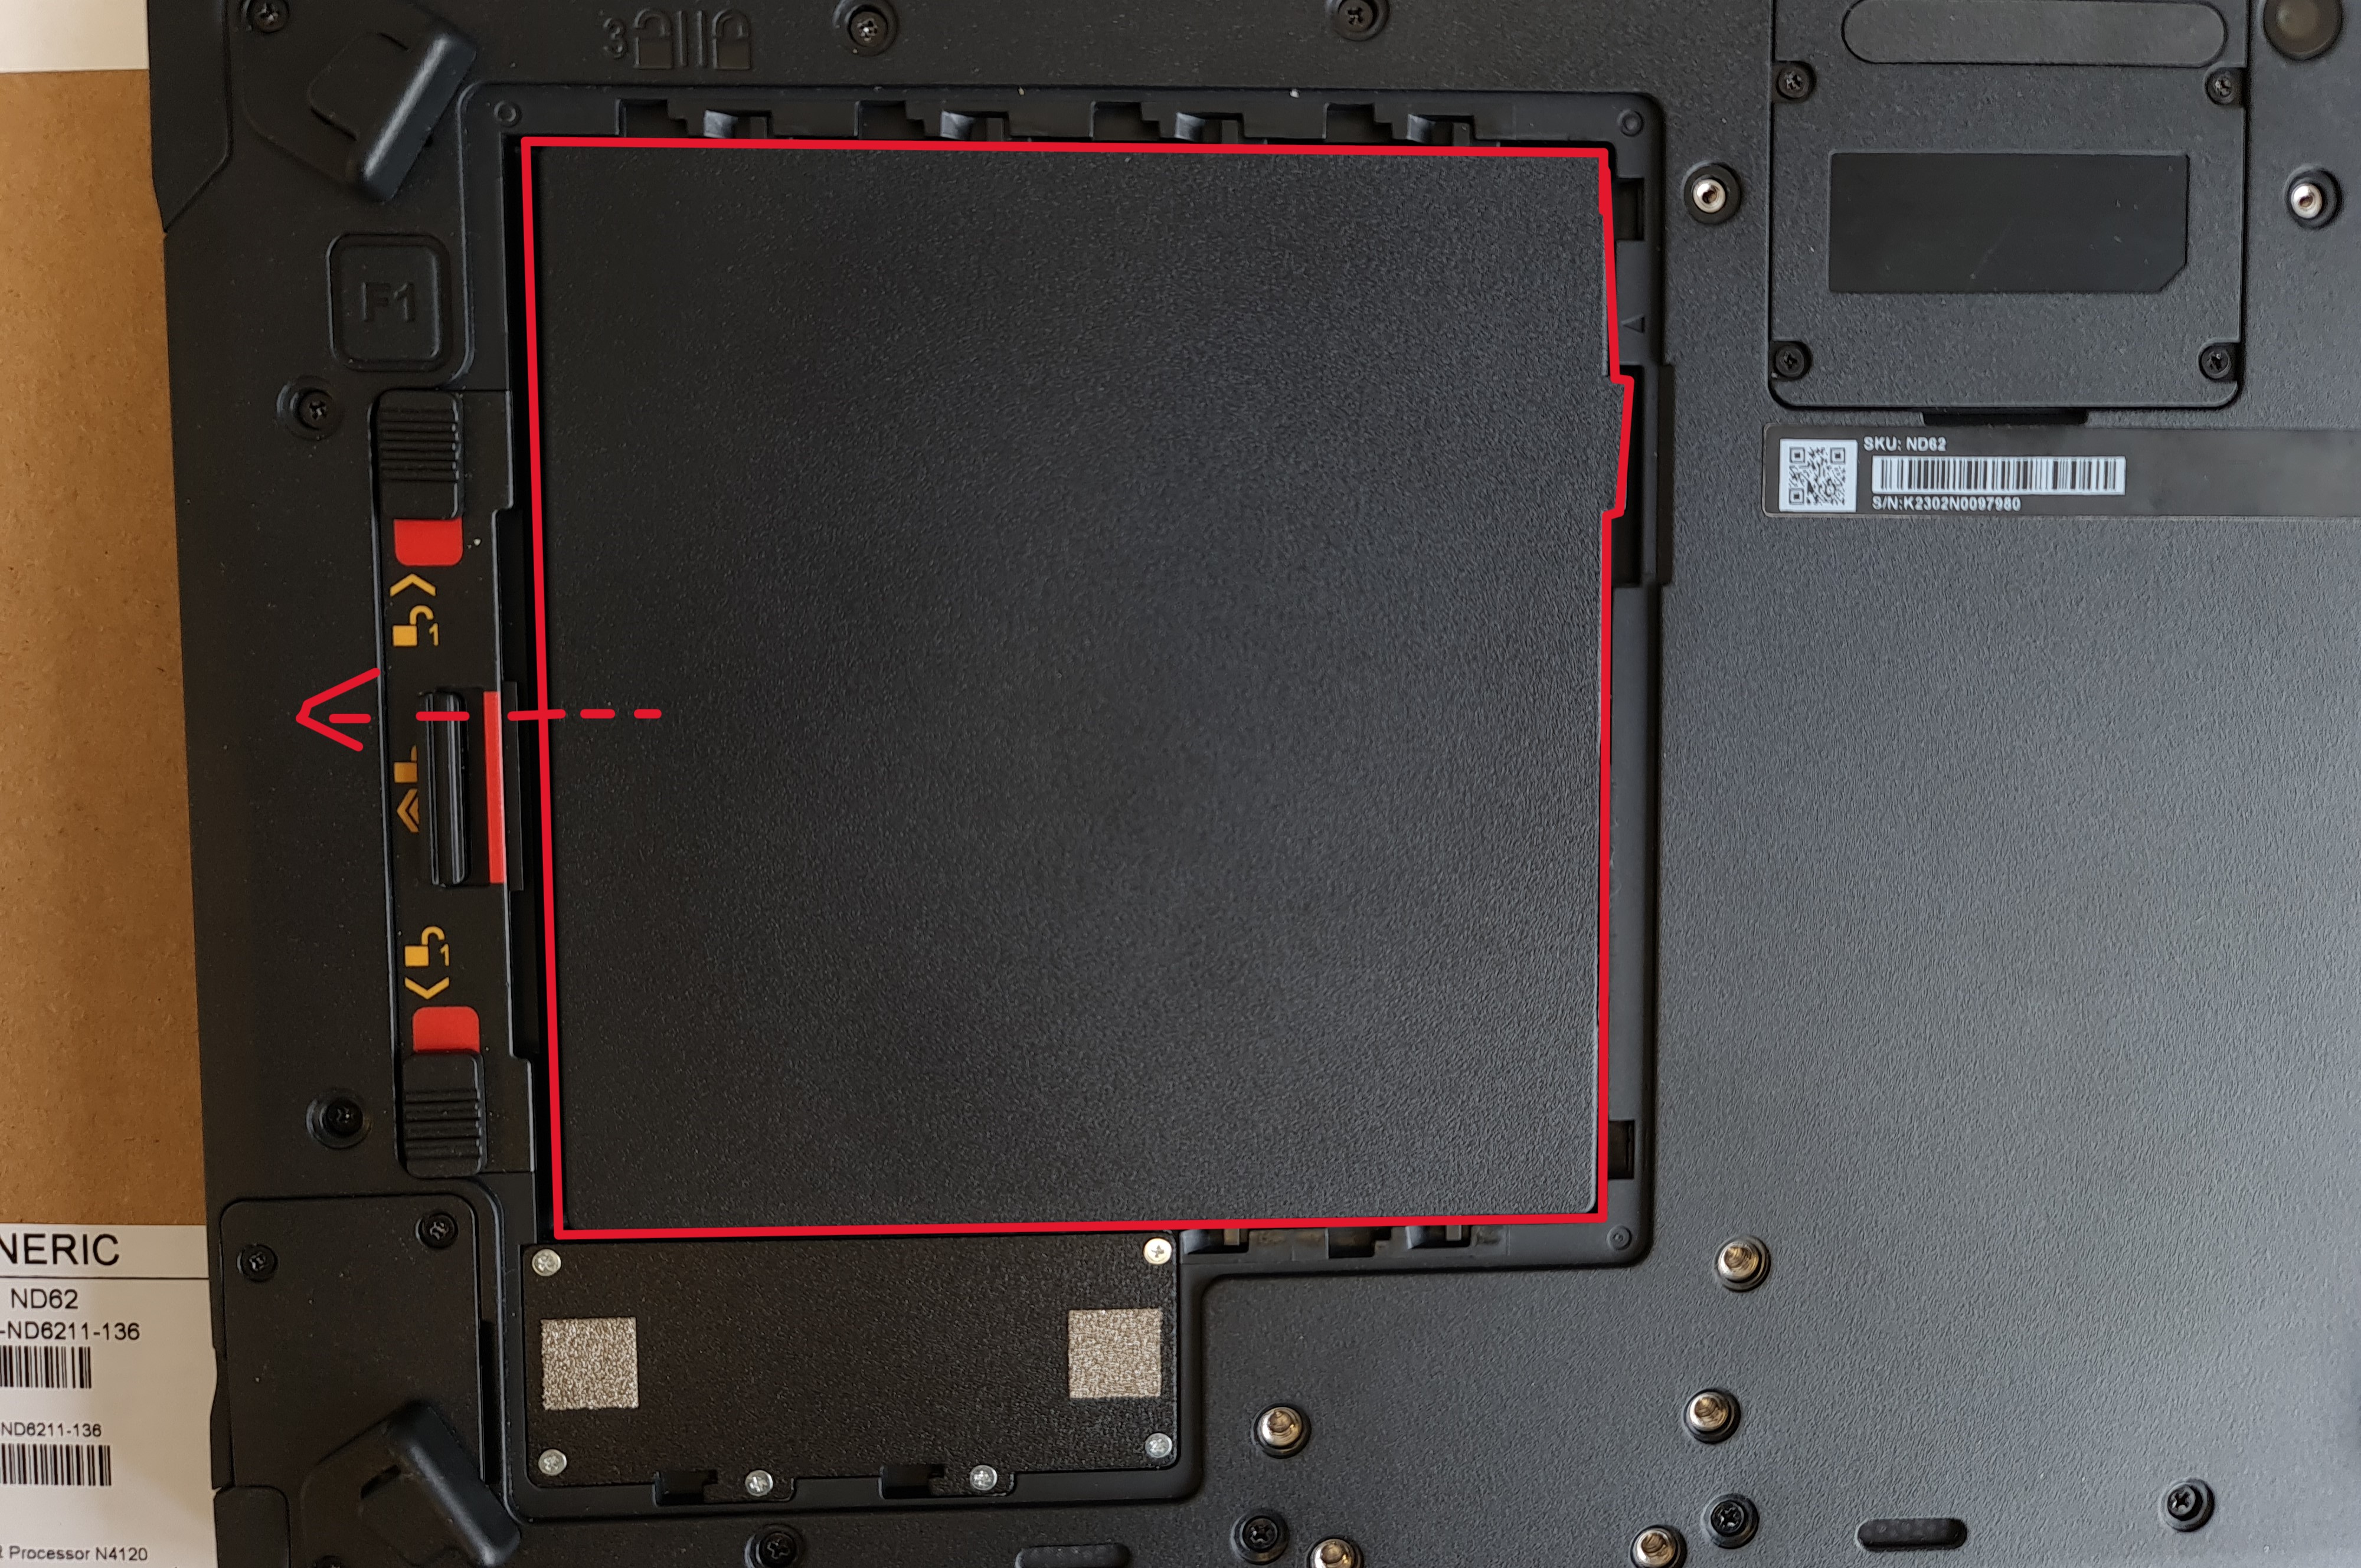
- Now slide the battery cover in the direction of the battery locking tabs. Above the cover (number 5 in the operating and display elements diagram) you will find an indicator showing the position of the cover.
- You can now remove the cover.
- Insert the battery and slide it to the right.
- Place the battery cover back on the device so that the indicator above the cover points to the open lock.
- Press on the two arrows on the battery cover and slide the cover to the right.
- Lock the battery cover tab marked 2. When these are locked, you will see a green mark.
- Lock the two battery lock tabs (number 4 in the operating and display elements diagram) marked 1. When these are locked, you will see a green mark.
To remove the battery, proceed as follows:
- Unlock the two battery locking tabs (number 4 in the operating and display elements diagram) marked with 1. When these are unlocked, you will see a red mark.
- Unlock the battery cover tab marked 2. When these are unlocked, you will see a red mark.
- Now slide the battery cover in the direction of the battery locking tabs. Above the cover (number 5 in the operating and display elements diagram) you will find an indicator showing the position of the cover.
- You can now remove the cover.
- Slide the battery in the direction of the battery locking tabs.
- Pull out the battery using the tab attached to the battery.
- Place the battery cover back on the device so that the indicator above the cover points to the open lock.
- Press on the two arrows on the battery cover and slide the cover to the right.
- Lock the battery cover tab marked 2. When these are locked, you will see a green mark.
- Lock the two battery lock tabs (number 4 in the operating and display elements diagram) marked 1. When these are locked, you will see a green mark.
Charging the tablet
The tablet computers are operated either with the external power supply unit or with the internal battery. It is recommended that you use the mains adapter when you start the tablet computer for the first time.
|
|
|
|
|
Only use the power adapter supplied with your tablet computer. Using other power adapters can damage the tablet computer and the battery. |


Proceed as follows to connect the tablet computer to the power supply:
- Open the protective cover (number 2 in the diagram on the right-hand side)
- Plug the DC cable of the mains adapter into the mains socket of the tablet computer
- Plug the mains cable into the mains adapter
- Finally, plug the power cable into the power socket.
When the mains adapter is connected, the battery starts to charge. The battery LED display on the tablet computer shows various statuses. Please refer to the description of the LED display.
First Start
How to switch on the tablet computer:
Press and hold the power button for approx. 3-4 seconds until the LED power indicator lights up. The tablet computer then boots up automatically.
How to switch off the tablet computer:
1. Make sure you have closed all programs open on the desktop. Start screen apps do not need to be closed.
2. Tap on the Windows logo
3. Tap on the on/off logo
4. Tap Shut down.
5. Tait until the tablet computer switches off.
Alternative method:
1. Press and hold the power button for approx. 3-4 seconds until a Windows shutdown banner appears.
2. Pull down this banner.
3. The tablet computer will shut down.
Forced shutdown:
If the tablet computer freezes, i.e. no longer responds to any input, you can force it to switch off. The tablet computer is forcibly switched off when the power button is pressed and held for 8 seconds or longer.
|
NOTE |
||
|
|
Forced shutdown Please note that using this function can lead to data loss and, in the worst case, even damage the operating system. Therefore, avoid the usage of the forced shutdown if possible. |
|